It’s the perfect time of year to make this easy DIY Fall Burlap Wreath!
I love Fall. It’s my favorite time of year. That’s probably because I grew up on a farm and when a farmer brings in the harvest… well, it’s always such a great feeling. In addition, I love all of the colors of the season, the cooler weather, and all of the delicious aromas marinating in the air.
To help support our blogging activities, our site contains affiliate links. If you make a purchase from a link on our site, we may receive a small percentage of that sale, at no extra cost to you. Blessed Beyond Crazy is a participant in the Amazon Services LLC Associates Program. This affiliate advertising program is designed to provide a means for sites to earn advertising fees by advertising and linking to amazon.com
Recently, I moved into a condo. Therefore this is my first fall season in my new home. Because of this move, I am gradually adding a few new pieces to our decor. Since I enjoyed making a DIY Patriotic Burlap Wreath earlier in the year, I decided I would make one for fall. I always love getting a great bargain. As a result, I try to get my supplies when they are on sale. This fall burlap wreath project is no different.
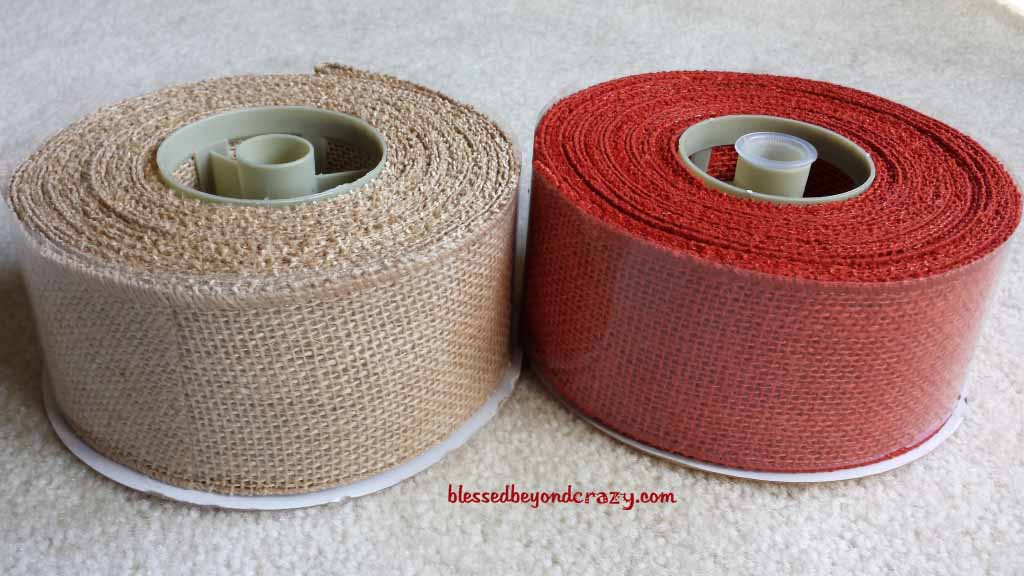
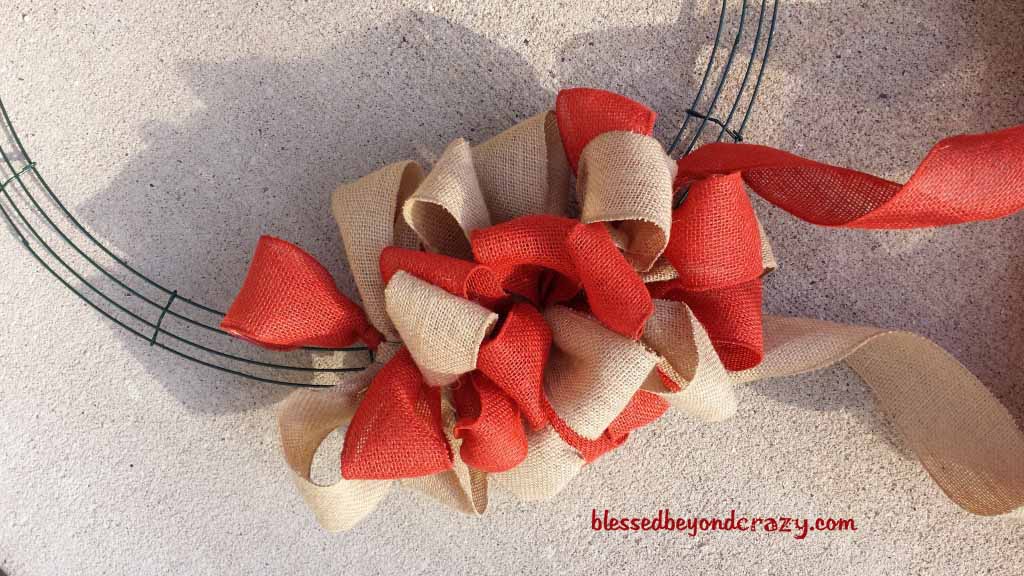
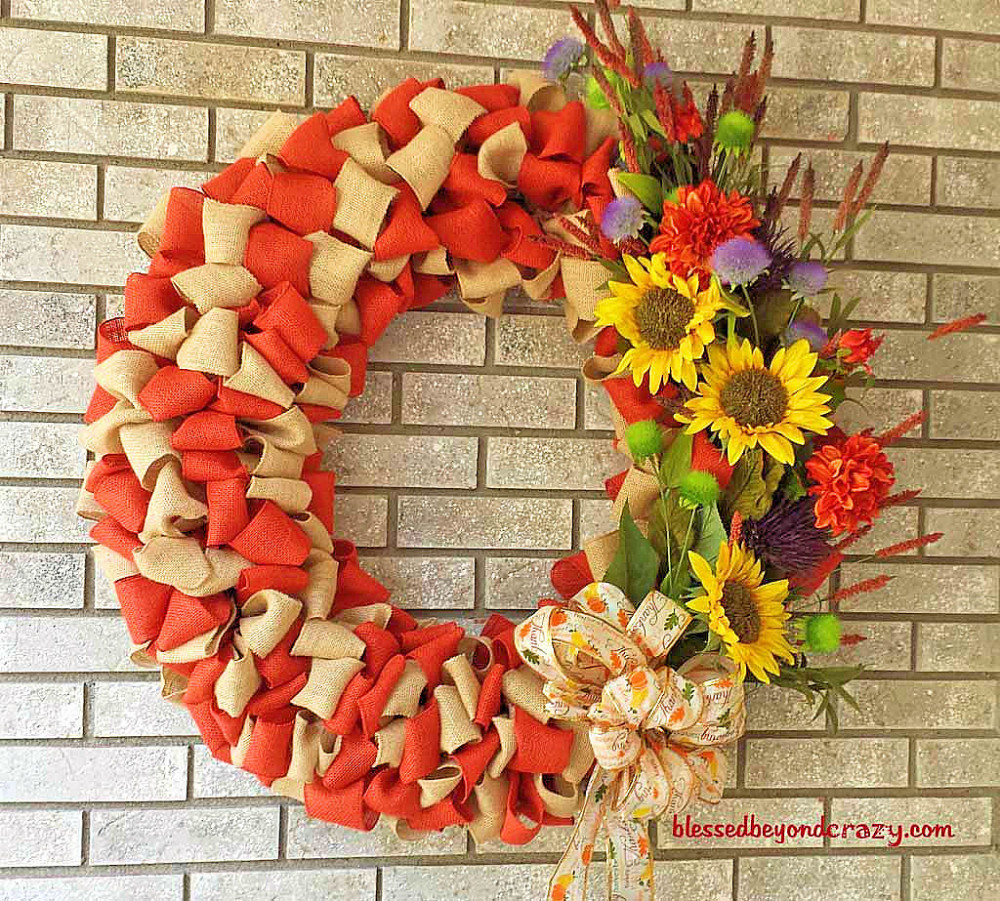
I found spools of burlap ribbon on sale for half price. Awww… great find! This ribbon is great because it has little tiny wires on the sides so it is easy to shape. For this particular wreath, I used three spools of each.
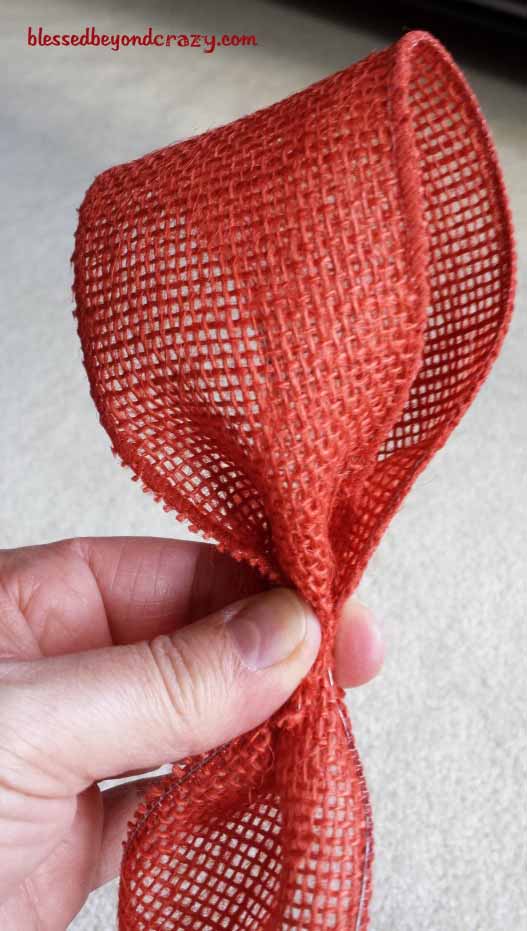
If you can make a loop and twist a little wire, then you can definitely make a wreath like this. Simply start by making a loop with the end of the burlap ribbon. Notice the tiny little wires on each side of the edges.
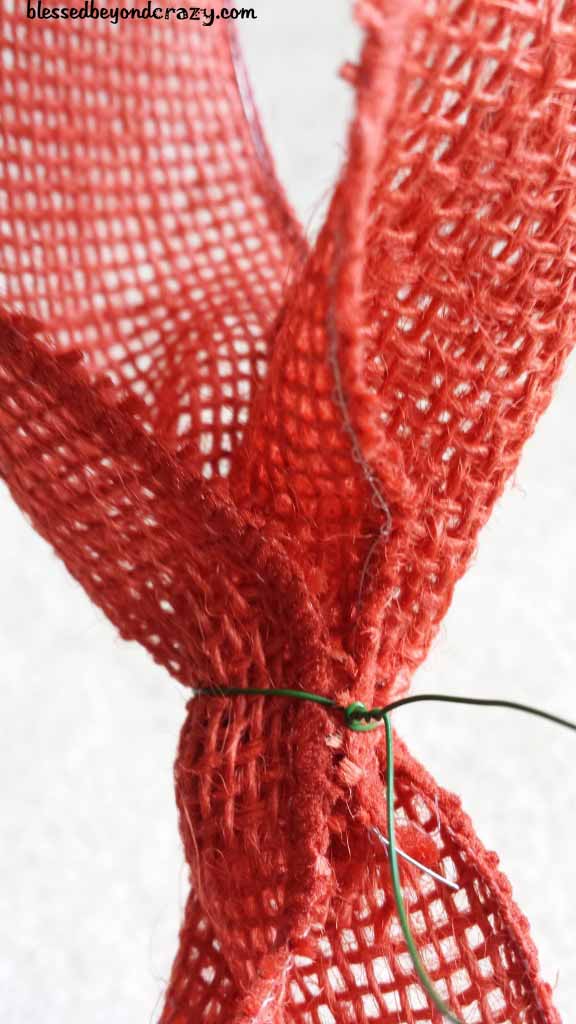
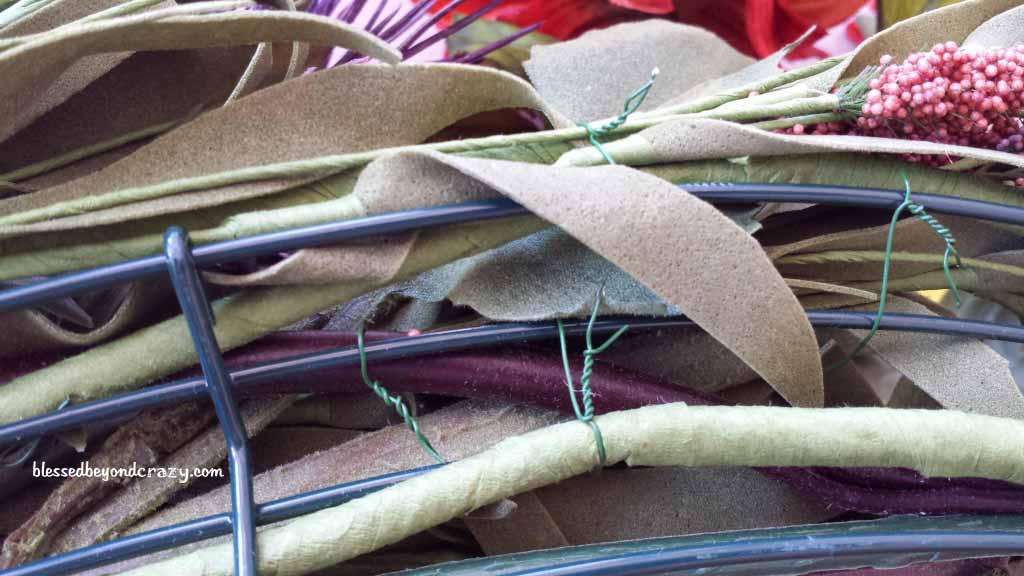
Pinch the burlap together at the base and carefully twist a 3 – 4-inch piece of craft wire around it.
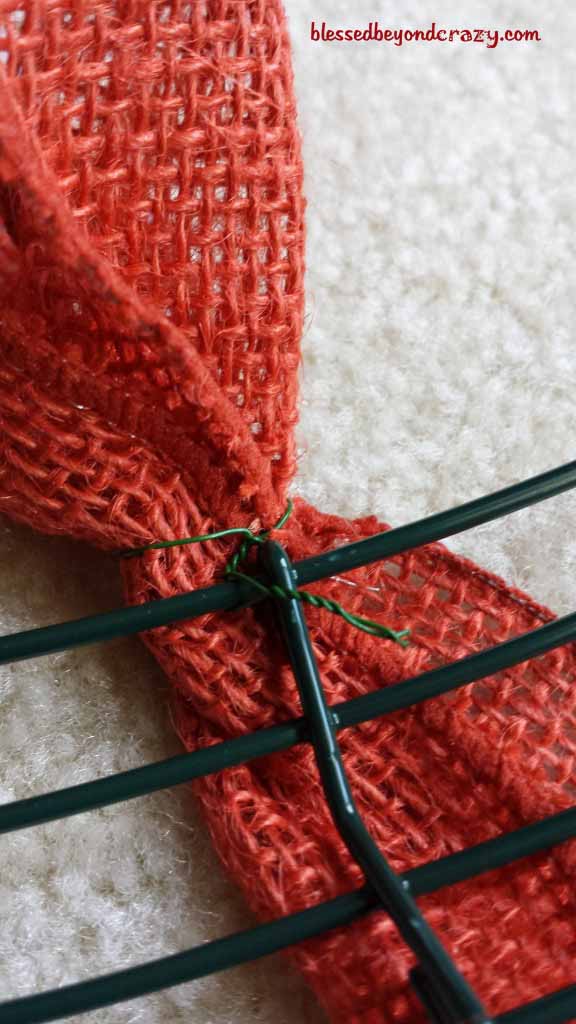
Wrap the wire around the wire wreath frame and twist both ends together to secure the bow onto the frame. Cut the excess wire with wire cutters, or tuck them into the wreath as you go. If you make your wreath full enough no one will ever see the wires in the back.
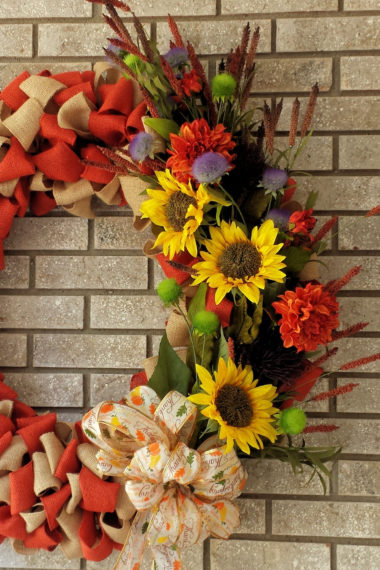
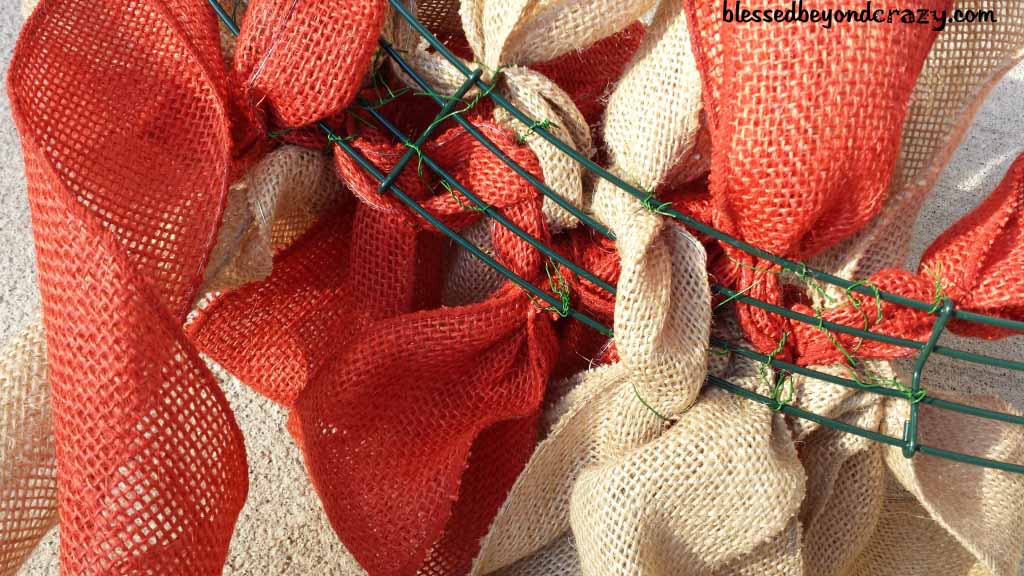
Since I had two different colors of burlap I crisscrossed them onto the frame. This helped to blend the colors together.
I secured each loop of burlap onto the frame. I did not cut the burlap ribbon but would weave it back and forth across the wireframe. This made the wreath more uniform and my burlap ribbon didn’t fray.
Notice how the colors blend well?
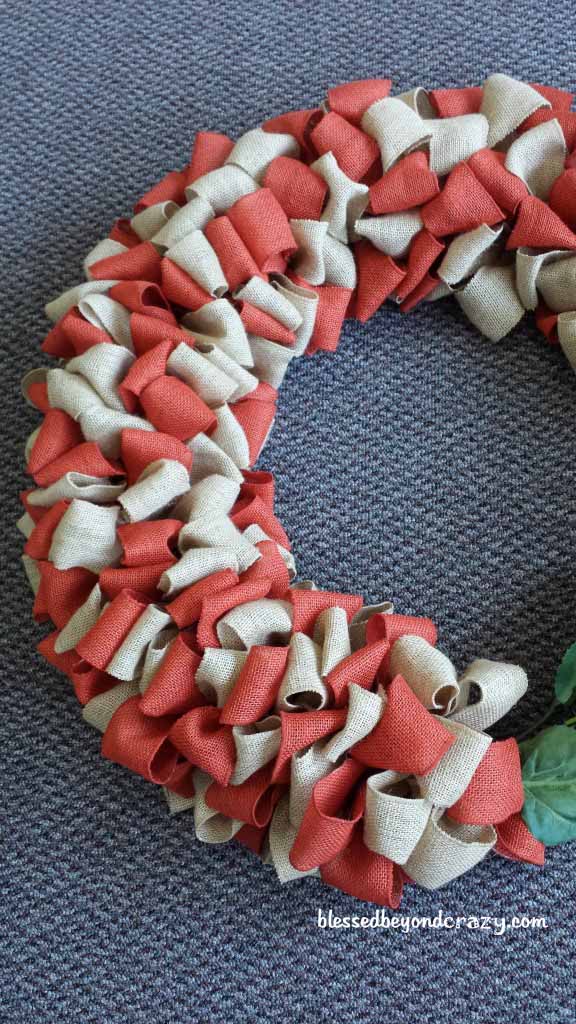
Repeatedly looping, twisting and blending the burlap ribbon until it covered the majority of the wireframe. Now I wanted to add some other colors with the addition of colorful flowers.
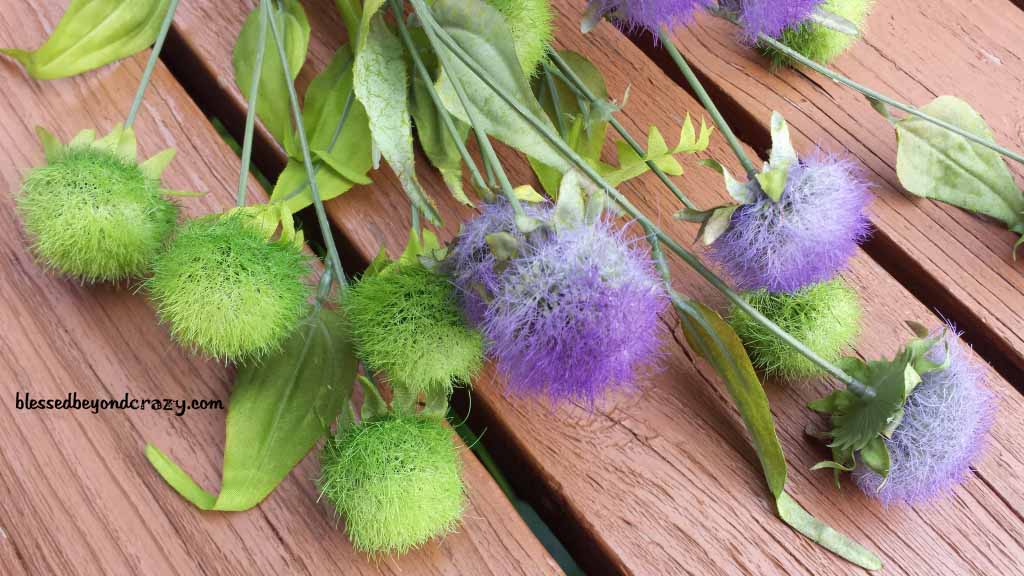
More artificial wildflowers.
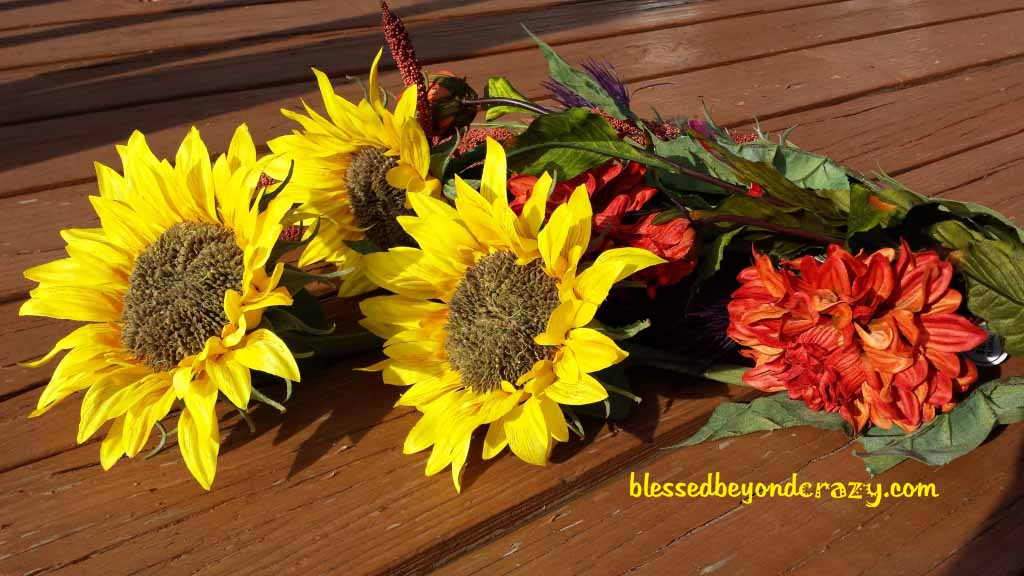
Next, I wired each flower/greenery onto the wireframe. (Just like I did the burlap). Because I wanted the sunflowers to be the most noticeable I layered the flowers so that the sunflowers were on top.
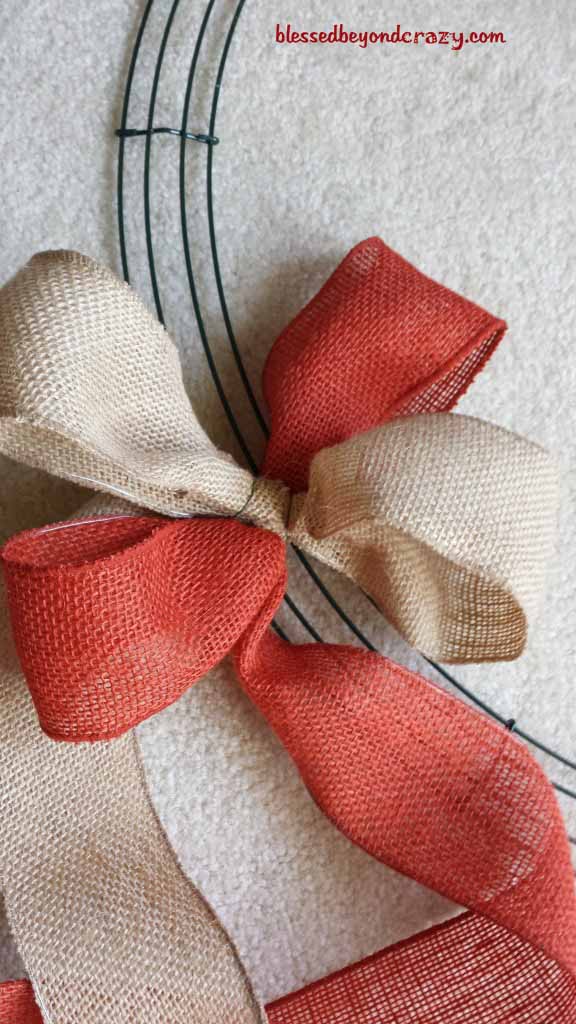
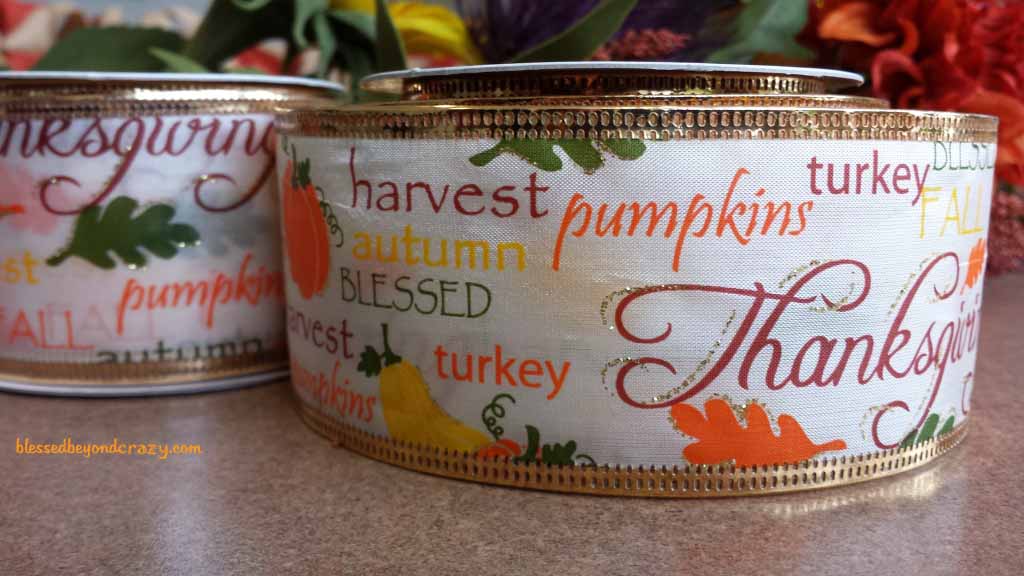
For the final touch, I added a big ribbon. Again, I purchased some inexpensive ribbons at a dollar store.
I started to make the bow by making two loops with the ribbon and securing them with another strand of craft wire.

I kept looping the ribbon on each side while pinching in the center and securing it with several twisted wires to keep everything in place.
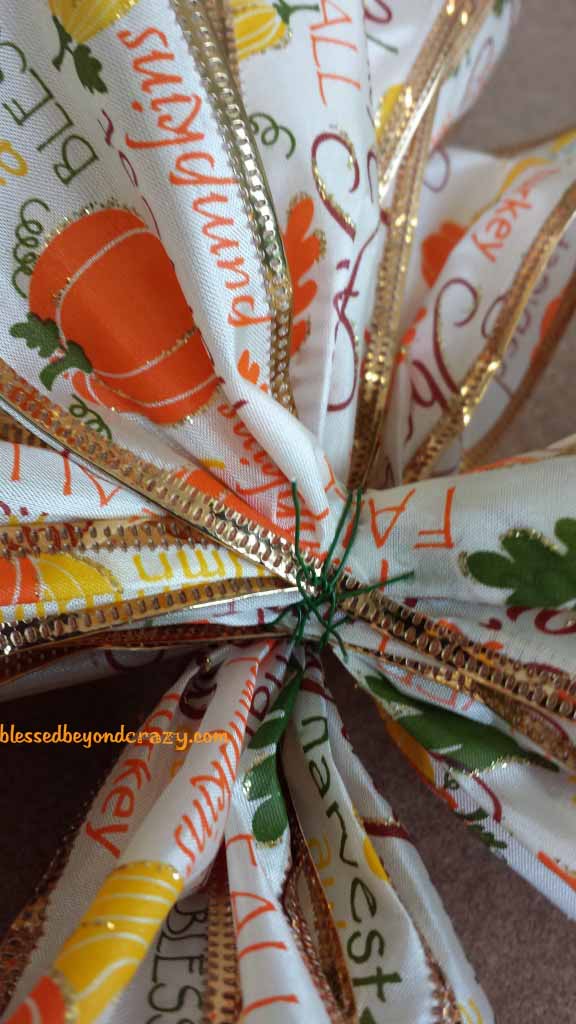
To finish the bow, I took one end of the ribbon and folded it over the center to cover the wires. I then brought the end of the ribbon through the newly formed loop in the center, (like tying), and left the remaining ribbon to hang at the bottom of the bow.

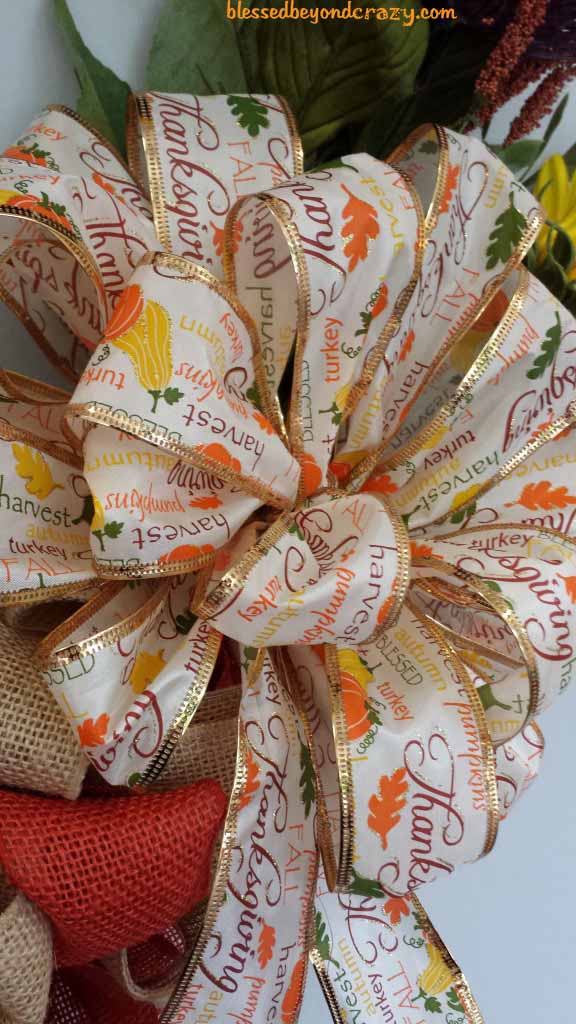
Once the bow was finished I attached it to the wreath and secured it with a longer piece of wire. I ‘fluffed’ the ribbon to make it fuller. This ribbon also had tiny wire on the edges so it made it easy to form and maneuver into place.

Since this wreath is rather large I worked on it over the course of three days. It would be easy to make it smaller simply by using a smaller wire wreath frame. I used an 18″ round green wire wreath frame.
At a local, well-known, nationwide craft store, I notice that a fall burlap wreath this size had a price tag ranging from $160 to over $200. I made mine for under $50.
Hope you have fun making your very own fall burlap wreath that will last for years.
Linda
More great ideas:


Nico says
Hi Linda,
Have you made another wreath since making this one? Did you record it? I have been trying to make this wreath for months with your directions and pictures, but I am still having some trouble. Any suggestion you may have would be helpful. Thank you 🙂
Blessed Beyond Crazy says
Hi Nico,
No, I’m sorry but I haven’t made another burlap wreath similar to this one. What issues are you running into? I’ll be happy to help you in any way that I can. Thanks! Linda
Amie says
Hi! The wire wreath frame you used has four rings. Did you tie a bow twice going across? In the pic it looks like one bow of natural then one bow of orange however the finished product appears to have 2 bows across? Not sure this makes since!
Blessed Beyond Crazy says
Hi Amie,
Yes, you are correct, the wire frame I used does have four rings. What I did was to alternate placing loops of burlap on the different four rings as I worked my way around the wire frame. I made a couple of orange loops and placed each on a different wire ring, then came back and filled in the bare spots with natural burlap loops. I covered the frame well with both colors of burlap. There really isn’t an official pattern to wiring the loops onto the frame. The main thing you want to do is fill in any and all blank spots. Please let me know if this answers your question and thank you for stopping by Blessed Beyond Crazy! Have a great day! Linda
geometry dash says
Amazing article thanks for sharing.
Joyce says
Just love your wreath! The 2tone burlap is gorgeous & adding the beautiful flowers just makes it pop! Tx so much for sharing!
Blessed Beyond Crazy says
Hi Joyce,
Awwww, thank you! I appreciate your kind words. It certainly was a fun diy craft project.
Thanks again for stopping by and leaving us a nice message.
Linda
Lacretia Guest says
Love this : I’m going to make one today
Anna Martin says
We would love to see a picture! You can email us one or share it on social media with us, use #blessedbeyondcrazy
Chris says
Wish you had a video I don’t get how you did it!
Blessed Beyond Crazy says
Hi Chris,
I know, right? I made this wreath several years ago before I started making videos. Basically, in a nutshell, I attached the burlap, foliage, and bow by using small segments of wire that I twisted around the wreath framework. It isn’t hard to do, but it does require time. If you have specific questions about the process I would be more than happy to help walk you through it. Just let me know. Maybe sometime I can make another similar burlap wreath and video the process.
Have a great day and please let me know if I can help you figure this diy project out.
Linda
Monica says
Hi, do you have a Christmas one with this same system? This one is beautiful but I already have a fall one. I’d love a Christmas one. Thanks!
Blessed Beyond Crazy says
Hi Monica,
I’m sorry, but no, I haven’t made a burlap wreath for Christmas. You could try making the same type of wreath using Christmas flowers and ornaments instead of fall flowers/foliage and plain burlap instead of the orange burlap.
Have fun!
Linda
Alice says
Hello, I am currently trying to make a wreath like this because yours is absolutely beautiful! But I’ve only done two loops so far lol one of each color. Do you attach each loop with the wire?
Blessed Beyond Crazy says
Hi Alice,
Yes, I attached each loop with wire to make it nice and secure. Have fun!
Linda
Lorrie says
Hi..this looks great. I’ve read comments and replies. You said that you rotated in between the segment wires. Did you use two at a time or one wire out of things meaning 4?
Blessed Beyond Crazy says
Hi Lorrie,
If I understand your question correctly, I used all four of the wire segments and kept wiring the burlap loops back and forth across the entire width of the frame until it was covered, although I did leave an open area where I attached the flowers. Does this answer your question? If not, please send me another message and I’ll do my best to explain.
Thanks!
Linda
Amy says
How many yards of burlap were on your spools?
Amy says
And did you use the full three spools?
Blessed Beyond Crazy says
Hi Amy,
I’m so sorry that I didn’t put the exact amount of burlap that I used in this post. Honestly, since this post was written several years ago, I’ve kinda forgotten. I do remember that I purchased the rolls of burlap (on sale) at WalMart. Since I had such a big wire frame to cover, I’m pretty sure that I used 3 rolls of both the natural colored burlap and orange burlap, but I do not remember how many yards were on each roll. I believe that WalMart and Hobby Lobby carry the rolls of burlap. The amount of burlap you purchase will also depend on how tight you make the loops. If you make them really close together, then you’ll obviously need more burlap. Also, adding flowers and greenery will also take up room on the frame as well so the more you add, the less burlap you’ll need. Hope this helps you out.
Thanks for stopping by and please let me know if you have any other questions.
Thanks,
Linda
Anne says
I’m curious did you make 2 loops to make each color or just 1?
Blessed Beyond Crazy says
Hi, Anne!
Yes, I made two loops per color then alternated attaching them to the wire frame.
Thanks for stopping by and I hope you enjoy making your own DIY Fall Burlap Wreath! 🙂
Linda
Helen says
I Hope I can learn to Make a bow like your
Helen says
I Hope I can learn to do this
Sheree says
Do you have a video of how you did this?
Blessed Beyond Crazy says
Hi Sheree,
No, I’m sorry but I don’t. I made this wreath way before I knew how to make a video. Thanks for asking, though.
Linda
Cheryl M says
I’ve seen wreaths that have the burlap/ribbon woven on the frames and the burlap/ribbon attached to the frames with zip ties. This is SOOO much simpler!! Why didn’t I think of it?! Thanks for sharing!
Blessed Beyond Crazy says
Hi Cheryl,
Yay! I’m so glad you like this DIY idea! Out of all of the wreaths I’ve made, this particular one is my favorite. It’s hanging on my kitchen wall right now.
Thanks for stopping by and for leaving us a message. If you do decide to make a DIY Fall Burlap Wreath I hope you have fun and enjoy your creation!
Have a great day!
Linda
Libby Esparza says
What size of burlap was use. Thx
Blessed Beyond Crazy says
Hi Libby,
I used burlap that measured 2 1/2-inches wide.
Have a great day!
Linda
Julie Stowe says
Did you alternate ribbon on different metal circles of frame or use to same circle of wire frame
Blessed Beyond Crazy says
Hi Julie,
I alternated the ribbon using different segments of the wire frame. In other words, I didn’t wire the two different colors of burlap to the exact same wire at the same time. I wired the natural colored burlap to one segment of wire and the orange burlap to the wire segment next to it, working my way back and forth across the four different wire segments of the frame. Does that make sense?
Thanks for stopping by. Please let me know if you have any other questions.
Have a great day!
Linda
Véronique Cartier says
Thanks for sharing Linda, it looks awesome! I can’t believe you did it yourself!

Blessed Beyond Crazy says
Hi Véronique,
Thank you! It’s one of my favorite wreaths and I have it hanging on my kitchen wall right now.
Take care and thanks for stopping by!
Linda