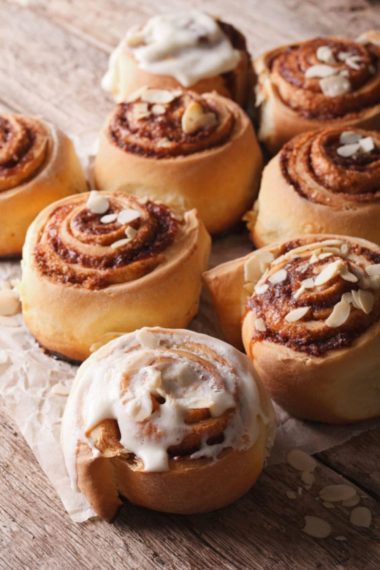
Seems like making Grandma’s Country Breakfast Cinnamon Rolls brings about memories of growing up on a farm. There was always something to do. Whether it was working in the gardens, pulling weeds, feeding the chickens, watering the livestock, hanging laundry outside on the clothesline, or helping in the kitchen, I can honestly say that I do not remember ever being bored.
Some of my favorite meals were (and still are), fried chicken, mashed potatoes, green beans, fresh apple or peach pie, and grandma’s homemade cinnamon rolls. So, so good!
To help support our blogging activities, our site contains affiliate links. If you make a purchase from a link on our site, we may receive a small percentage of that sale, at no extra cost to you. Blessed Beyond Crazy is a participant in the Amazon Services LLC Associates Program, an affiliate advertising program designed to provide a means for sites to earn advertising fees by advertising and linking to amazon.com.
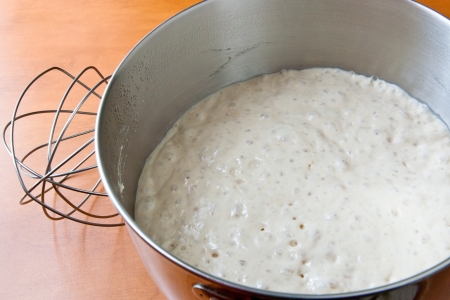
It all starts with yeast!
In a medium-size mixing bowl, dissolve one package of dry yeast in 1/4 cup warm water. The water should be about the same temperature as a baby’s bottle. If the water is too hot, the yeast will not rise properly. Add 1 teaspoon of granulated sugar. After 10 minutes the mixture should be bubbly.
Sugar is food for yeast and therefore will help increase yeast activity. As the sugar is consumed, the yeast cells expel ethanol and carbon dioxide bubbles. Bubbles help the bread to rise and are also an indicator that your yeast is fresh. If you do not see bubbles, then you’ll need to start over and use fresh yeast.
Combining ingredients:
In a saucepan, combine:
- 1 cup whole milk
- 1/2 cup sugar
- 1/2 cup lard or unsalted butter
Heat the mixture over medium heat until very warm and a cooking thermometer reads 120 to 130 degrees F. Allow mixture to cool until it is just slightly warm.
When cooled, add:
- 2 eggs, beaten
Now add this mixture to the yeast mixture. Stir until combined.
Next, add:
- 4 heaping cups of all-purpose flour (stir in one cup at a time)
- 1 teaspoon salt
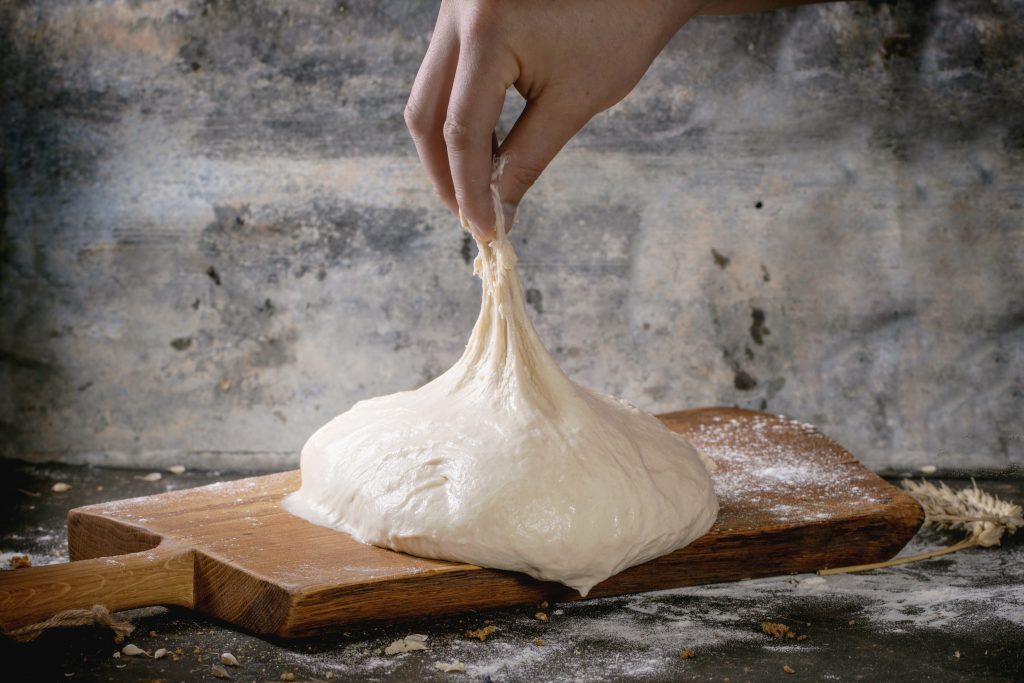
Stir until the dough is soft and easy to handle. The dough may be slightly sticky.
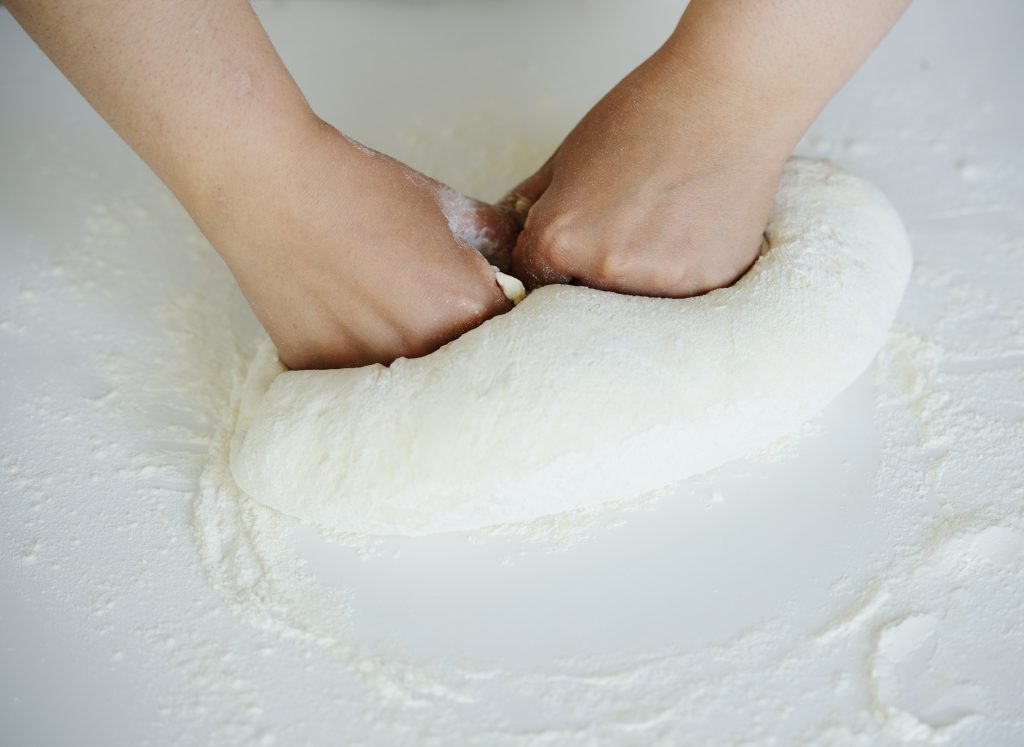
Kneading the dough.
Sprinkle all-purpose flour lightly onto a pastry mat. Place dough onto a floured surface. Knead the dough by folding the dough, then push into the dough with the heel of your hands (pushing away from your body). You may find that a slight rocking motion helps. Turn the dough about a quarter of a turn. Repeat the process. Continue kneading for about 5 minutes. If the dough starts to stick, sprinkle the surface with more flour.
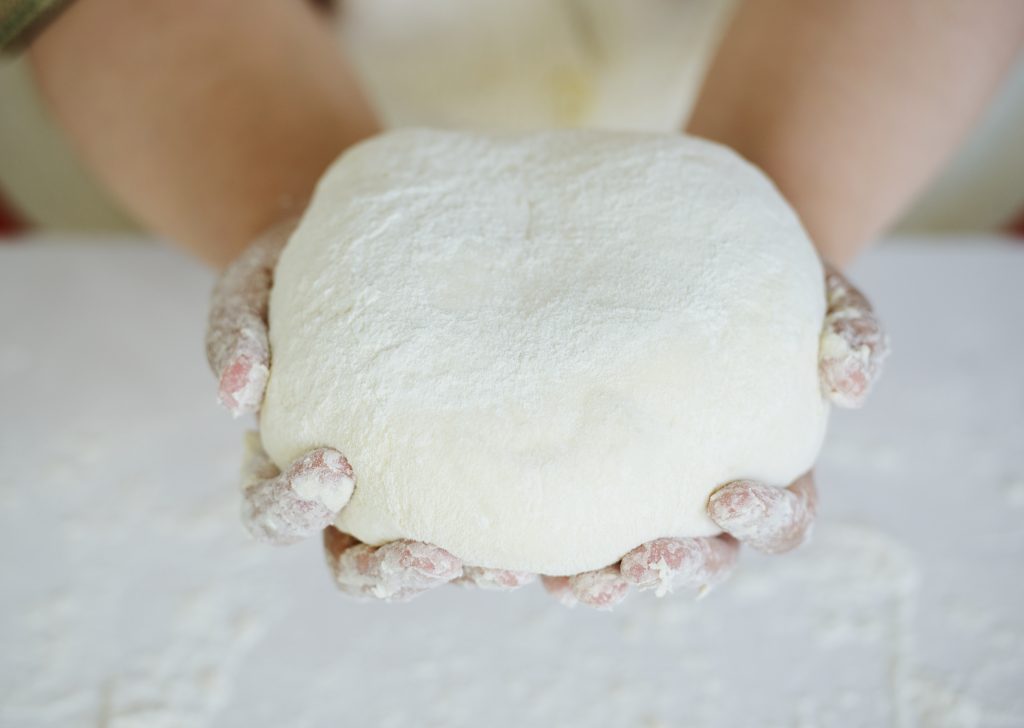
The dough is ready to rise.
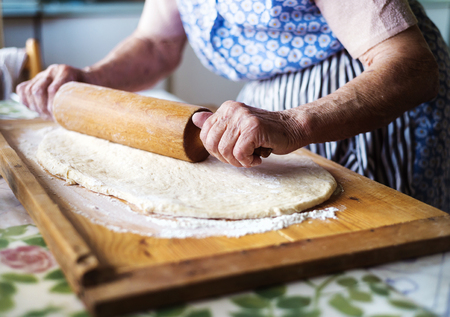
Knead until the dough is smooth, springy, and resembles a soft baby’s bottom. (Your dough should resemble something like the picture above.)
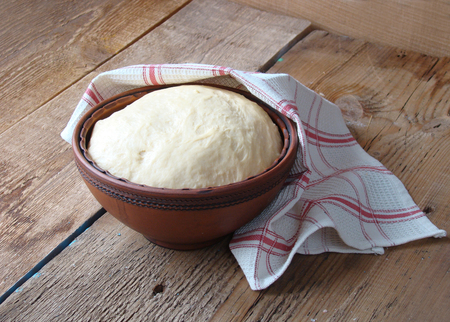
Let it rise.
Spray a large glass or crock bowl with cooking spray. Place the dough into the bowl and turn the dough until all sides have a light covering of grease. This will prevent the dough from sticking to your bowl and aid in the rising process.
Lightly cover the dough with a clean, lightweight tea towel. Let the dough rise in a warm place for approximately 1 to 1 1/2 hours, or until the dough has doubled in size. Things such as humidity, the room temperature, and the recipe itself will all determine how long it will take your dough to rise.
You can check to see if the dough is ready by gently sticking two fingers (to your second knuckle), into the center of the risen dough. Remove your fingers. If your fingers leave an indentation, the dough is ready. If not, cover and let the dough continue to rise.
Rolling out the dough.
Once your dough is ready, it needs to be gently “punched down.” This process releases some of the gas bubbles formed during the rising process. Push your fist quickly, but gently into the center of the dough. Pull the edges to the center and reform a ball.
Place dough on a working surface that has been lightly dusted with flour. Knead the dough 2 to 3 times to help release additional air bubbles. Now, allow the dough to rest for 10 minutes. This will allow the gluten to relax and your dough will be easier to work with.
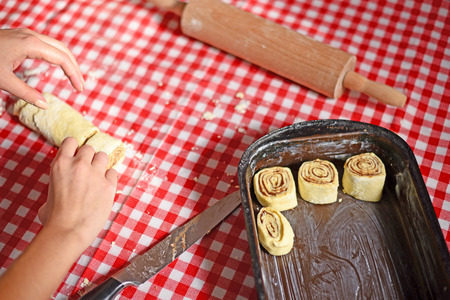
After your dough has rested, use a rolling pin to flatten the dough out into a rectangle. Spread 1/4 cup melted butter over the top surface of the dough (come within 1/2 inch from the edge). Sprinkle the mixture of 1/2 cup granulated sugar and 3 teaspoons ground cinnamon over top. (You may also add chopped nuts and raisins if you’d like.)
Start at one end and roll dough up tightly, forming a log shape. Using a 12-inch piece of thread or dental floss, cut the roll into approximately 1-inch segments. Place each segment into two well-greased 9×13 baking pans. Leave a little space between each slice (they swell as they bake). Lightly cover the pan with a lightweight tea towel. Let dough rise again for approximately 30 minutes, or until doubled in size.
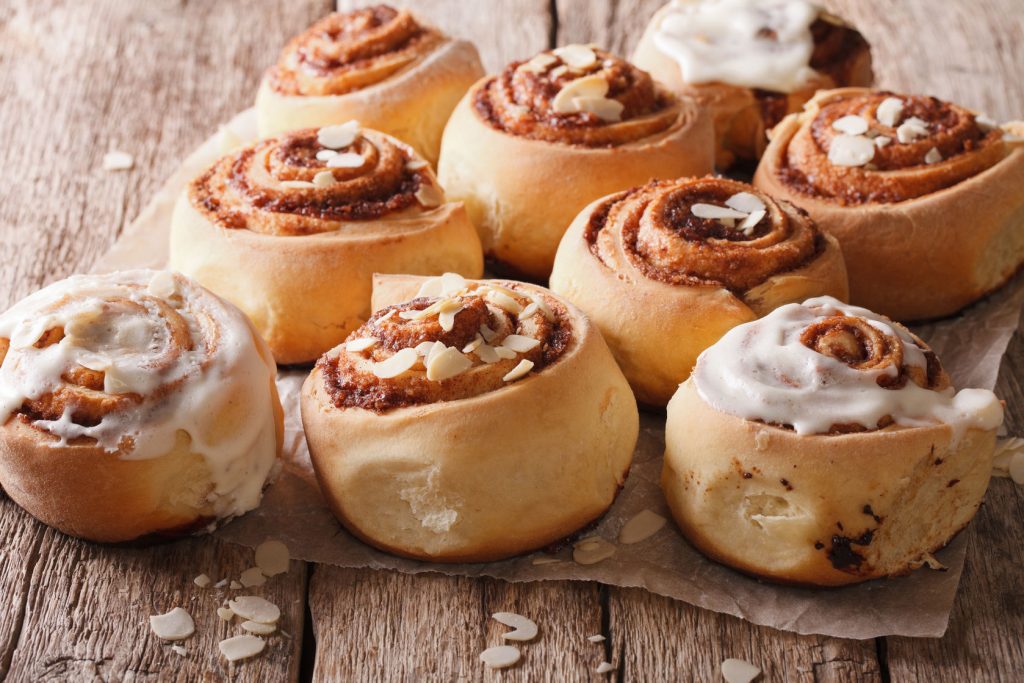
Bake the rolls.
Preheat oven to 350 degrees F. Remove towel, bake for 20 – 30 minutes or until golden brown. Remove cinnamon rolls from the pan and place right side up on a cooling rack. Cool for 5 minutes.
While rolls are cooling you can prepare the icing.
In a small bowl, combine:
- 1 cup powdered sugar
- 1 teaspoon butter, softened
- 1/2 teaspoon vanilla or maple extract
- 1 to 2 tablespoons whole milk
Stir all of the ingredients together and drizzle over top of warm cinnamon rolls. Smear icing over the top of rolls with the back of a serving spoon. Serve warm.
Additional garnish: slivered almonds or chopped nuts.
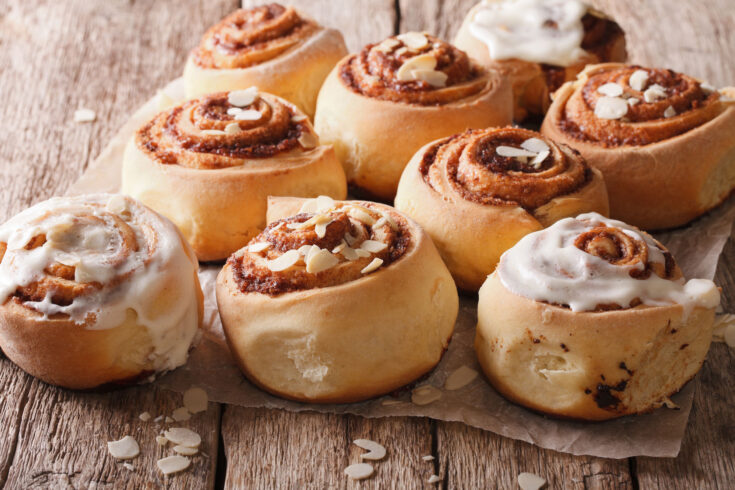
Grandma’s Country Breakfast Cinnamon Rolls
Ingredients
- Rolls
- 1 package regular or fast-acting dry yeast
- 1/4 cup warm water
- 1 teaspoon granulated sugar
- 1 cup whole milk
- 1/2 cup granulated sugar
- 1/2 cup lard or unsalted butter
- 2 eggs
- 4 heaping cups all-purpose flour
- 1 teaspoon salt
- Filling
- 1/4 cup butter, melted
- 1/2 cup granulated sugar
- 3 teaspoon ground cinnamon
- Additional Options: 1/2 cup chopped nuts and/or 1/2 cup raisins
- Icing
- 1 cup powdered sugar
- 1 teaspoon butter, softened
- 1/2 teaspoon vanilla or maple extract
- 1 - 2 tablespoon whole milk
Instructions
- In a saucepan, combine 1 cup whole milk, 1/2 cup sugar, 1/2 cup lard or unsalted butter. Heat the mixture over medium heat until very warm and a cooking thermometer reads 120 to 130 degrees F. Allow mixture to cool until it is just slightly warm. When cooled, add 2 eggs, beaten. Now add this mixture to the yeast mixture. Stir until combined.
- Add 4 heaping cups of all-purpose flour (stir in one cup at a time) and 1 teaspoon salt. Stir until dough is soft and easy to handle. The dough may be slightly sticky.
- Sprinkle all-purpose flour lightly onto a large cutting board or large baking mat. Place dough onto floured surface. Knead the dough by folding the dough, then push into the dough with the heel of your hands (pushing away from your body). You may find that a slight rocking motion helps. Turn the dough about a quarter of a turn. Repeat the process. Continue kneading for about 5 minutes. If the dough starts to stick, sprinkle the surface with more flour.
- Knead until the dough is smooth, springy and resembles a soft baby's bottom. Spray a large glass or crock bowl with cooking spray. Place the dough into the bowl and turn dough until all sides have a light covering of grease. This will prevent the dough from sticking to your bowl and aid in the rising process.
- Lightly cover the dough with a clean, lightweight tea towel. Let the dough rise in a warm place for approximately 1 to 1 1/2 hours, or until the dough has doubled in size. Things such as humidity, the room temperature and the recipe itself will all determine how long it will take your dough to rise.
- You can check to see if the dough is ready by gently sticking two fingers (to your second knuckle), into the center of the risen dough. Remove your fingers. If your fingers leave an indentation, the dough is ready. If not, cover and let the dough continue to rise.
- Once your dough is ready, it needs to be gently "punched down." This process releases some of the gas bubbles formed during the rising process. Push your fist quickly, but gently into the center of the dough. Pull the edges to the center and reform a ball. Place dough on a working surface that has been lightly dusted with flour. Knead the dough 2 to 3 times to help release additional air bubbles. Now, allow the dough to rest for 10 minutes. This will allow the gluten to relax and your dough will be easier to work with.
- After your dough has rested, use a rolling pin to flatten the dough out into a rectangle. Spread 1/4 cup melted butter over the top surface of the dough (come within 1/2 inch from the edge). Sprinkle the mixture of 1/2 cup granulated sugar and 3 teaspoons ground cinnamon over top. (You may also add chopped nuts and raisins if you'd like.)
- Start at one end and roll dough up tightly, forming a log shape. Using a 12-inch piece of thread or dental floss, cut the roll into approximately 1-inch segments. Place each segment into two well-greased 9x13 baking pans. Leave a little space between each slice (they swell as they bake). Lightly cover the pan with a lightweight dish towel. Let dough rise again for approximately 30 minutes, or until doubled in size.
- Preheat oven to 350 degrees F. Remove towel, bake for 20 - 30 minutes or until golden brown. Remove cinnamon rolls from pan and place right side up on a cooling rack. Cool for 5 minutes.
- While rolls are cooling you can prepare the icing. In a small bowl, combine 1 cup powdered sugar, 1 teaspoon butter, softened, 1/2 teaspoon vanilla or maple extract, 1 to 2 tablespoons whole milk. Stir all of the ingredients together and drizzle over top of warm cinnamon rolls. Smear icing over top of rolls with the back of a serving spoon. Serve warm.

I hope you enjoy Grandma’s Country Breakfast Cinnamon Rolls!
Enjoy!
Linda
More great ideas:



Leave a Reply