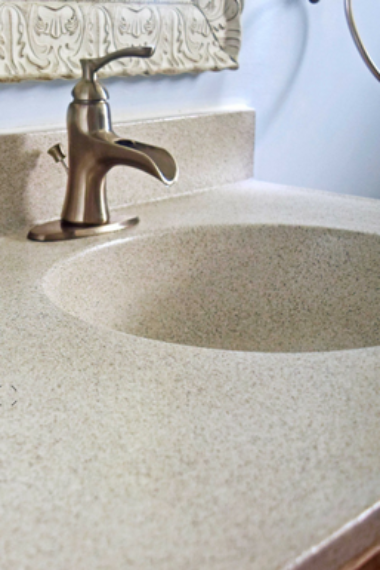
If you are planning on making a few updates to your home you just might want to read this post first. Before you paint a countertop make sure you don’t make these mistakes!
To help support our blogging activities, our site contains affiliate links. If you make a purchase from a link on our site, we may receive a small percentage of that sale, at no extra cost to you. Blessed Beyond Crazy is a participant in the Amazon Services LLC Associates Program, an affiliate advertising program designed to provide a means for sites to earn advertising fees by advertising and linking to amazon.com.
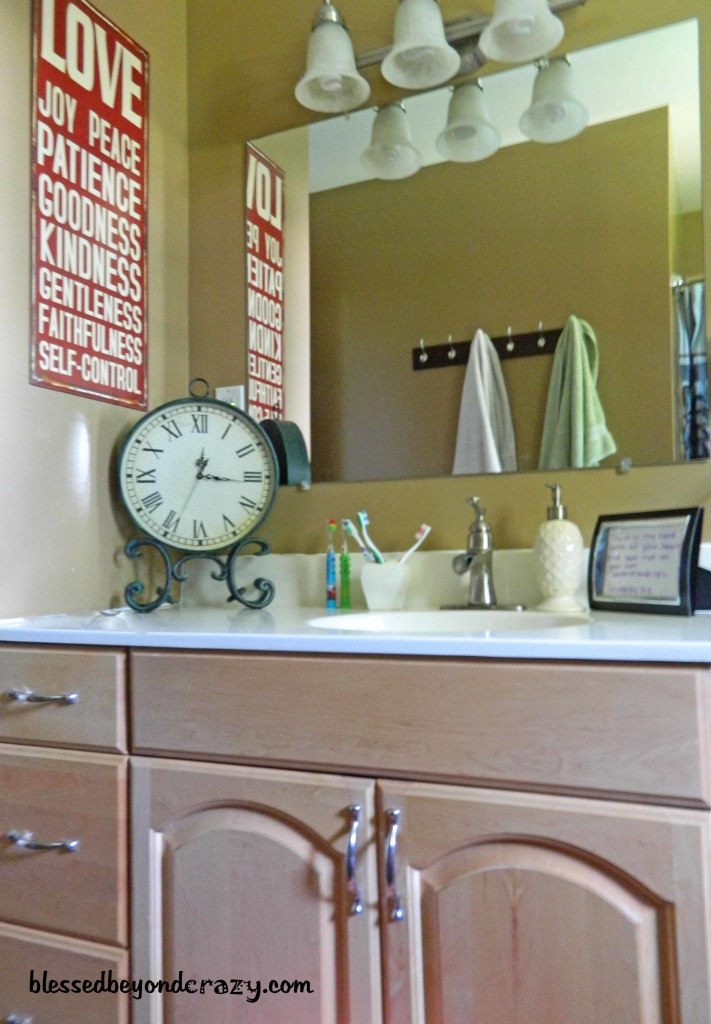
Once upon a time, we had an outdated bathroom vanity.
We painted our bathroom a light blue color and got a new mirror, which looks awesome! But now our vanity looked even more outdated! And clashed with the new paint color!
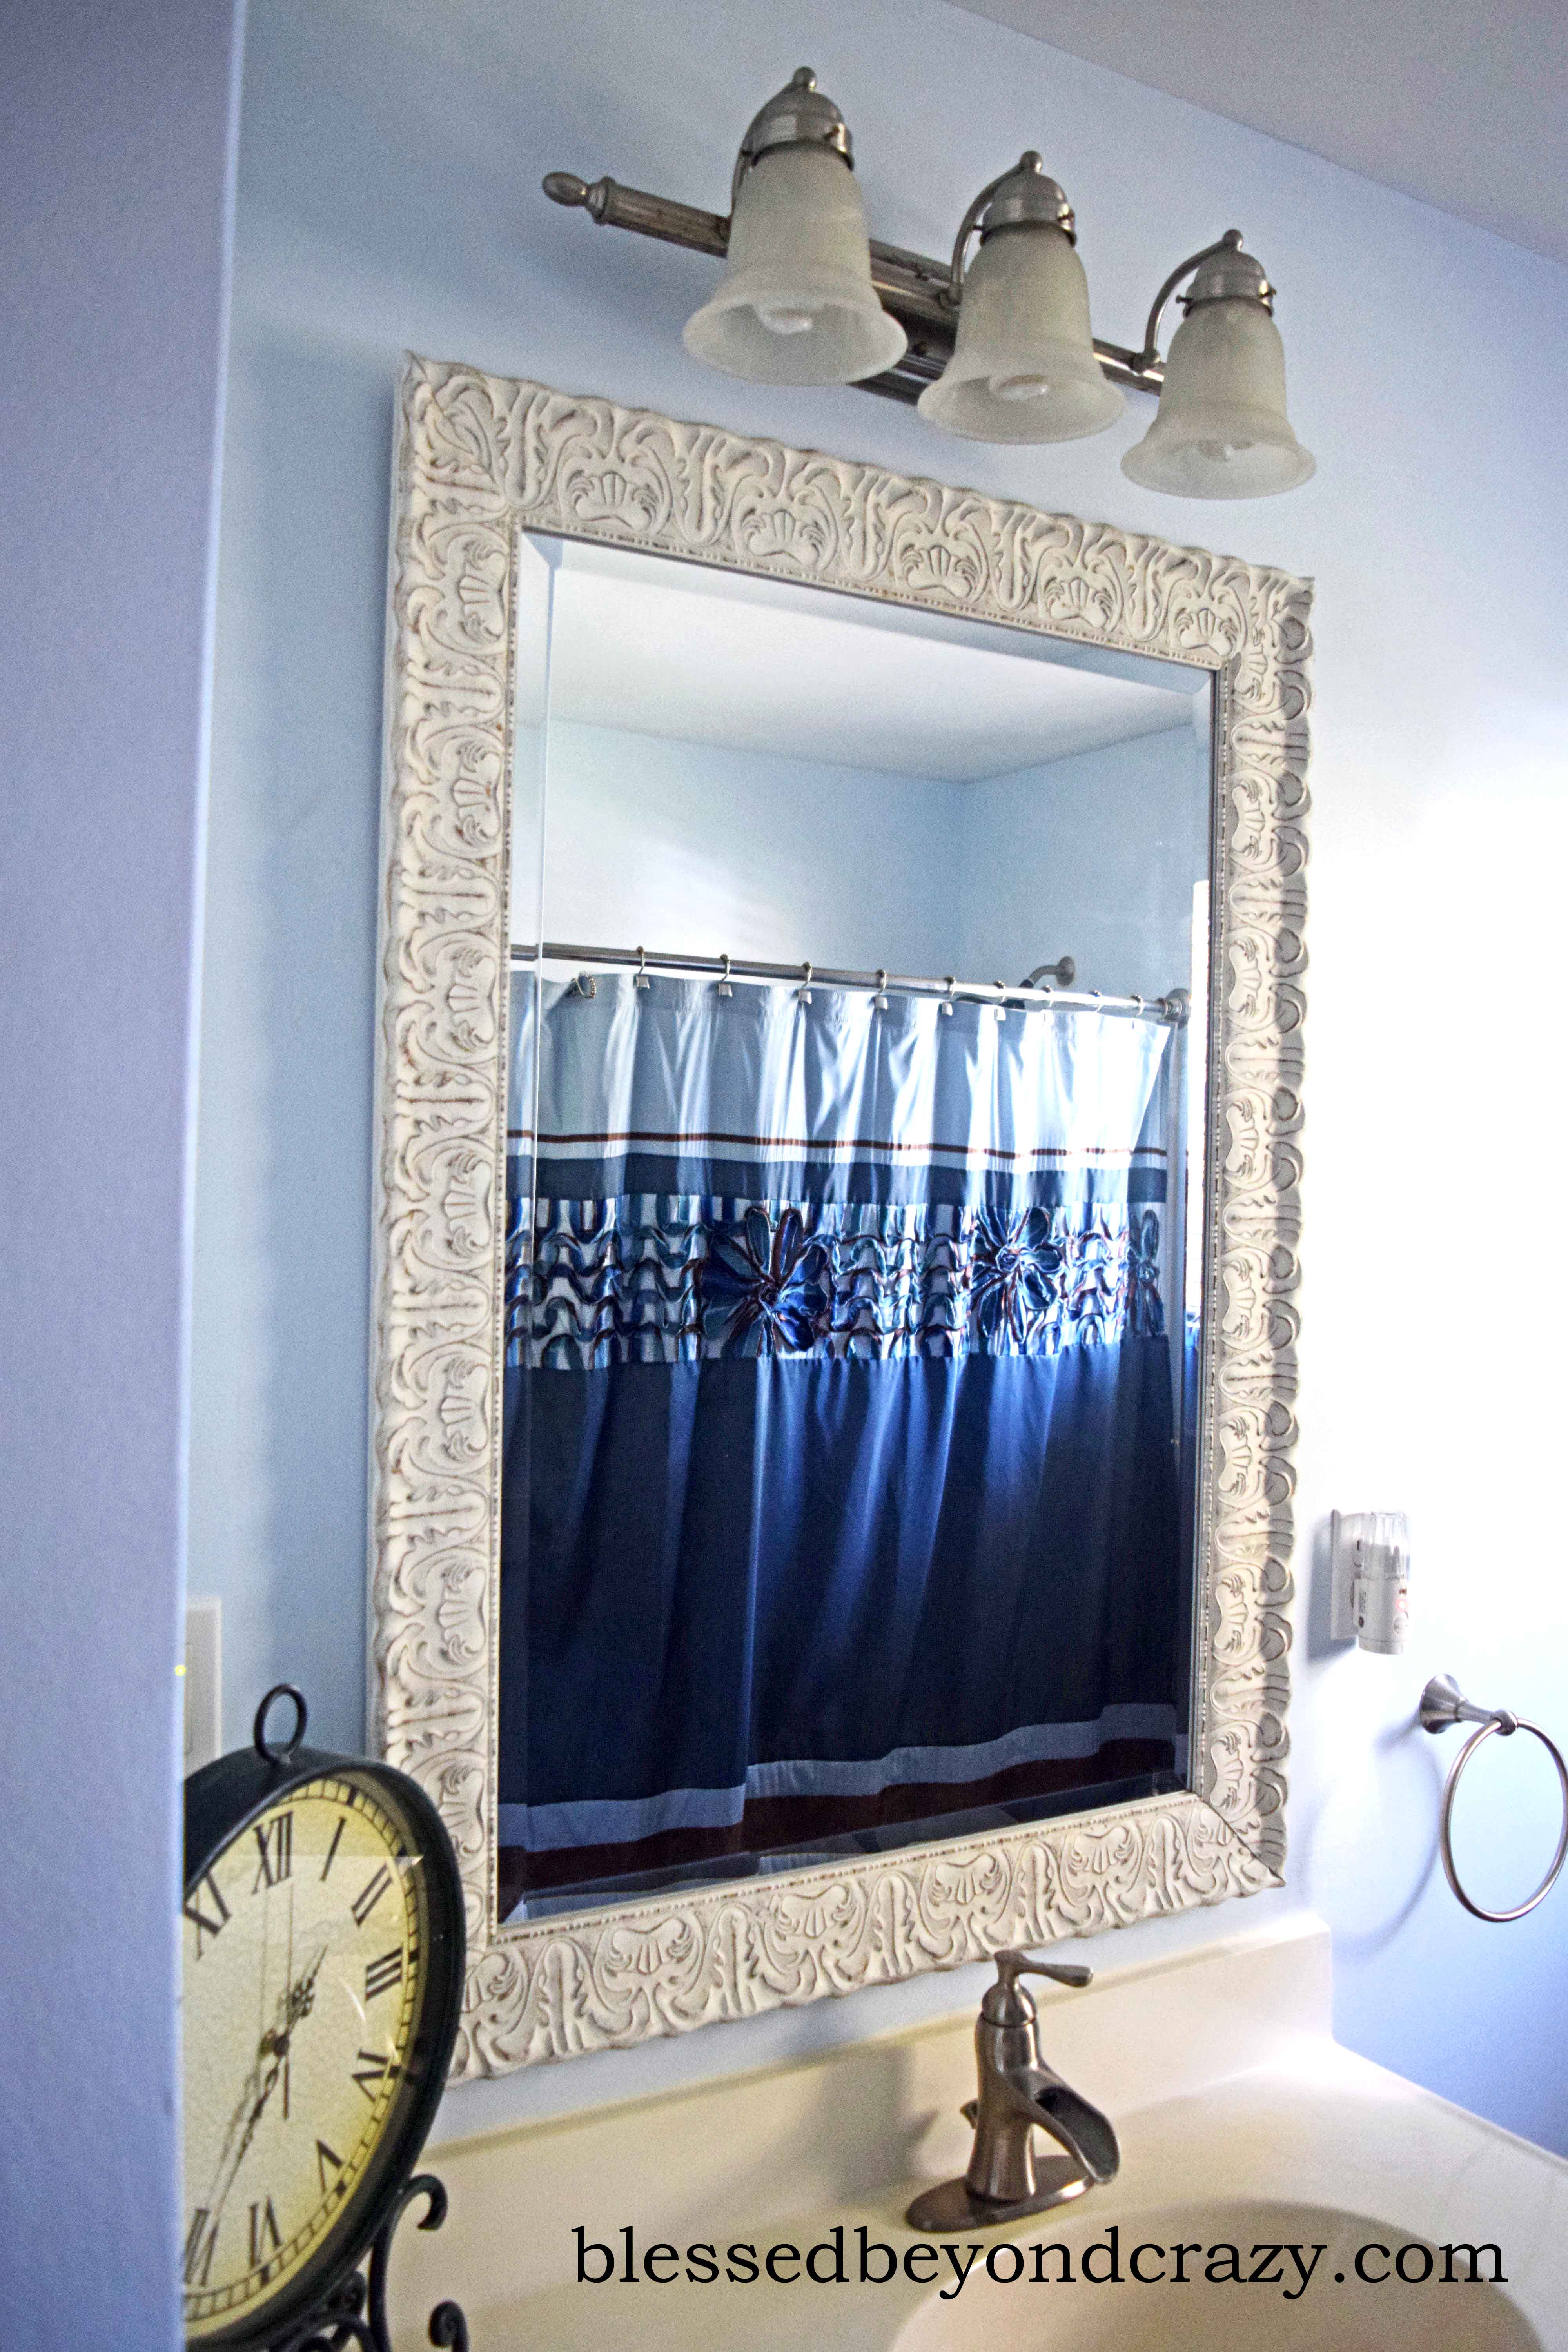
We decided painting would be the cheapest way to update our vanity. Only by saving us like literally $900!
Step 1: Research
I’m guessing that if you are thinking about painting your countertops, you are in this step right now. That is probably how you ended up reading this post.
I did lots of Pinterest research on how to paint a countertop. Every post I read did a great job of going into detail about how they painted their countertop, but none of them talked about running into problems. Everything for them went smoothly. No problemo!
Maybe I had false hopes on how easy this would be.
Please learn from my mistakes!
Step 2: Decide on a Method & Buy Supplies
You can brush/roll the paint, sponge paint, spray paint, or even buy marbling kits that will make your countertop look like it is a marble.
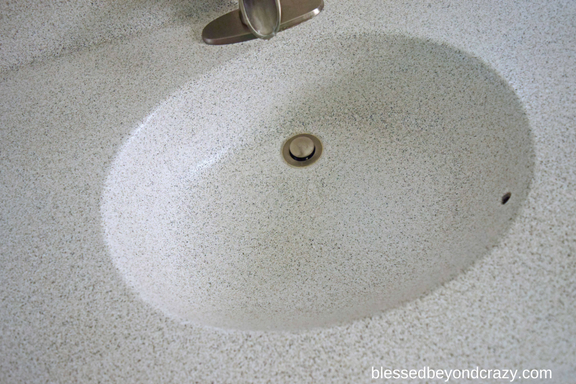
We went with spray paint because it looked like the easiest method. And I liked this look:
Step 3: Prep Countertop
- Remove any caulking around the countertop. An Exacto knife and screwdriver work well for this. Be careful not to gouge the drywall.
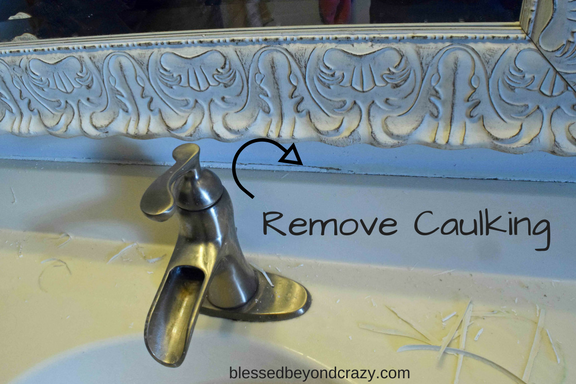
- Remove faucet and drain.
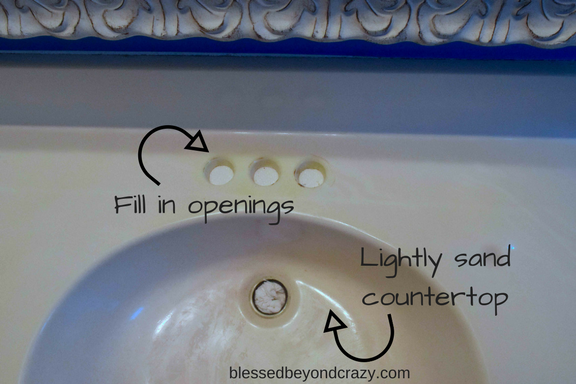
- Plug faucet holes with paper towels or something to prevent paint from going down those openings.
- Put a baggie over the drain pipe and secure it with a rubber band to prevent sewer gas from coming into your room.
- Tape edges with painter’s tape.
- Lightly sand the countertops. We first used 150 grit then went back over it with 220 grit.
- Use painter’s tape to tape up drop cloths around the room (only if you are using spray paint… to prevent the spray paint mist from covering areas you don’t want to be painted).
- Wipe down the countertop with paint thinner to make sure they are completely clean before you start painting.
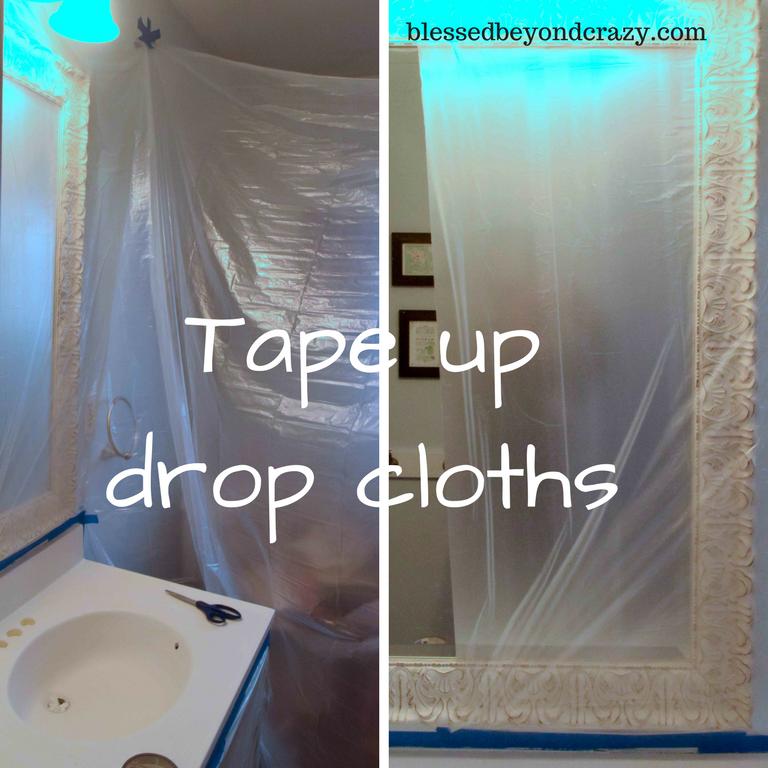
- Make sure you ventilate the area well! Open a window, place a box fan in the window pointing outside to suck the fumes out, wear a respirator, and turn on a vent fan if you have one!
Step 4: Prime Countertop
Since we were going to spray paint our countertops with this stone textured spray paint, we wondered if this step was necessary. Our countertop was already a light yellowish color, so we didn’t need to lighten it, and we assumed that the spray paint would cover it completely.
We ended up priming it anyway since we already had a can of white paint… it couldn’t hurt anything.
Well, this ended up being MISTAKE #1!
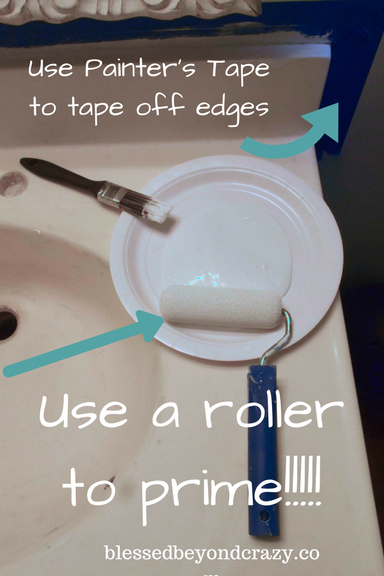
We brushed on white paint as a primer. We definitely needed to prime it because the stone textured spray paint we used was more of just colored specks and not a solid color. So priming was a good thing. The mistake was using a paintbrush! We could easily see the brush strokes through the paint! 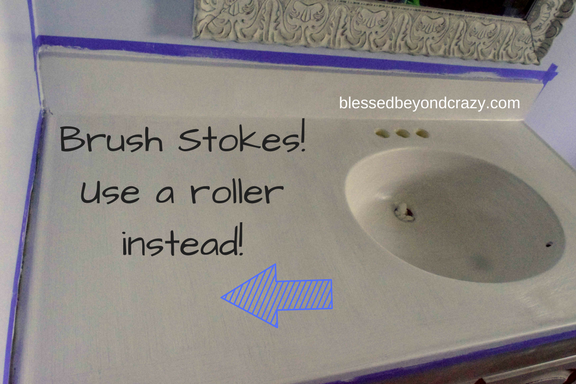
The brush gave great coverage and was easy to apply, but left some terrible-looking brush strokes. This was one of the mistakes we decided to fix the second time around by using a roller, and now there are no brush strokes!
Use a 4-inch foam roller and handle.
Step 5: Spray Paint
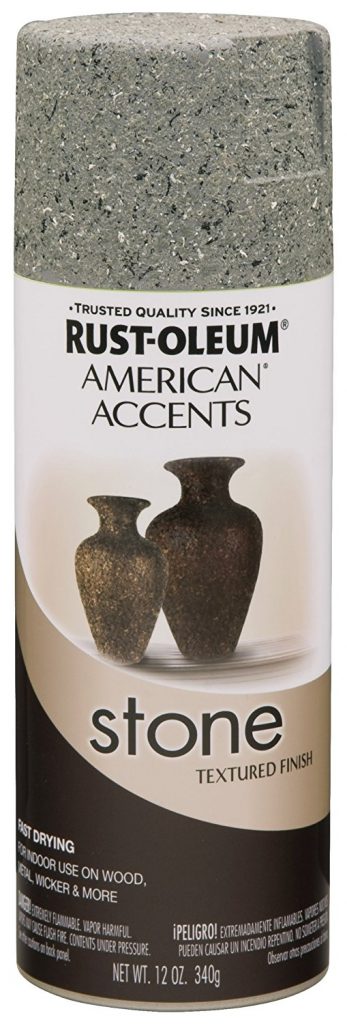
Once again, we got the opportunity to do this twice (the first time which had to be stripped off, and then the re-do). So here is how the second time was improved upon!
- Shake the can really well — since ours was speckled, we wanted the texture and colors to be even. And then continue to shake it often… like really often the whole time you are using it!
- Start painting from the back and work your way towards the front edge. If you painted from the front and worked your way back, the spray mist would cover the back before you got there, and it would have a heavier coating than the front (which is what we did the first time, and it was noticeable). Starting at the back and working your way toward the front will give your counter a more even coverage (which we did the second time, and it looked better).
- We gave our counter 2 coats, waiting 15 minutes between each coat. My husband has work lights that get really hot and put off a lot of heat. We set those up in the bathroom to help it dry faster.
At this point, I’m super excited! Our countertop looked amazing! I was so happy that it turned out and looked like a whole new countertop!
But my excitement didn’t last long…
Step 6: Clear Coat
Then everything went down the drain…
My husband went to the hardware store and asked the man at the paint section what to put on top of this to seal it, explaining our project to him. He (poorly) advised that we put POLYURETHANE: Clear Satin on the top.
He was working at a paint counter at a hardware store… we assumed he knew best!
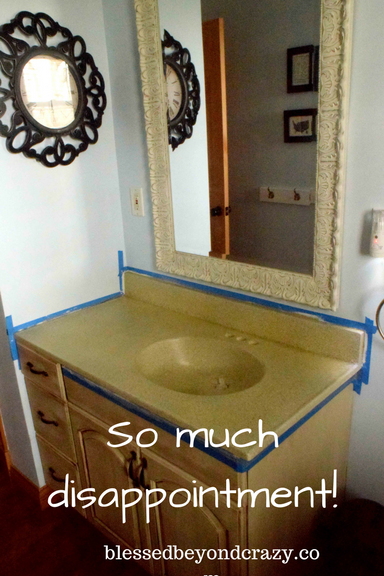
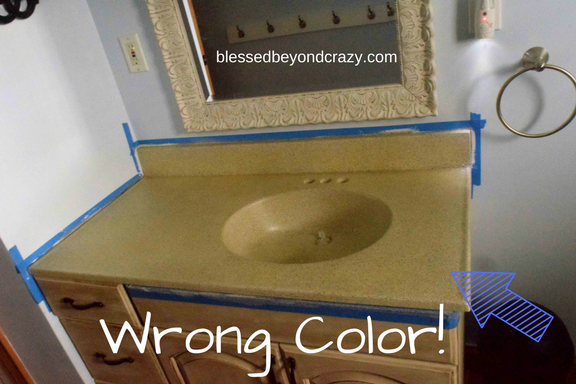
We brushed the first coat on. It looked yellow… but the can said CLEAR SATIN! It should dry clear, right? Not to mention, there were now a lot more visible paint strokes.
We applied 3 coats like what was suggested. And I was very sad.
The whole reason we wanted to paint our countertop was to get rid of the yellow color. Now our countertop was even more yellow! The texture was amazing, but the color was horrible!
I very sadly told my husband that I did not like this, and he agreed.
Time to start over!
He stripped it down with Klean Strip, which is used to strip furniture. This chemical might not work on all surfaces, such as laminate so be careful if you decide to use it.
While this was disappointing, it was a very inexpensive mistake. It cost us less than $10 to fix, but it was a time-consuming mistake.
Repeat All the Steps 🙁
- Prep
- Prime (with a roller!)
- Wait 2 hours
- Spray paint 2 coats, 15 minutes between coats
- Wait 4 hours
- Clear Glaze, see below, 3 coats, 10 ish minutes between coats
- Wait 24 hours before reinstalling faucet or using counter
This time we used a spray-on Clear Glaze. 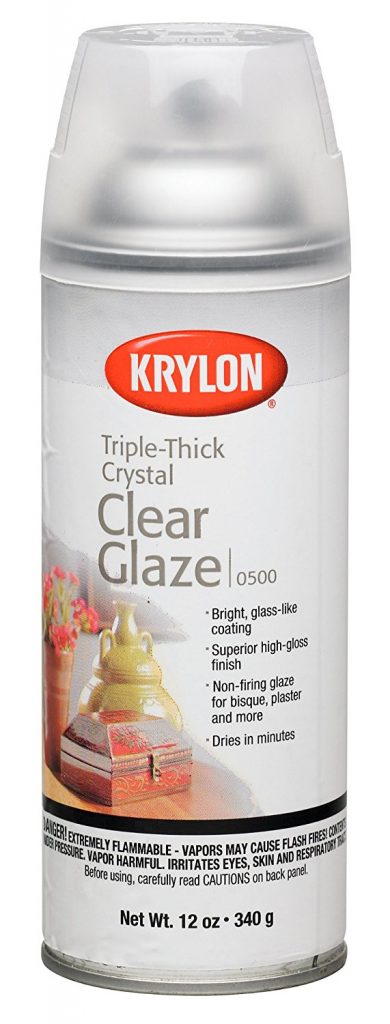
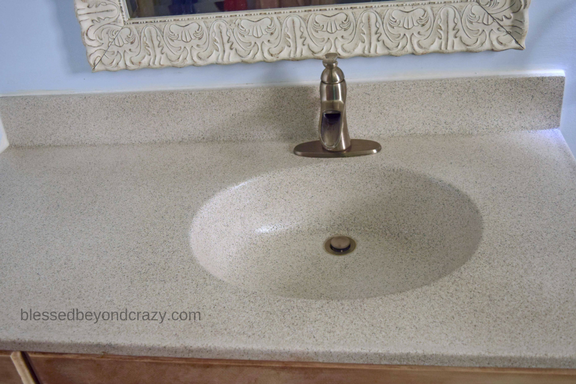
And this time it really was clear!
The spray paint we used does have a small bit of a rough texture to it.
I love how this speckled look helps to hide dirt and messes. There are also NO brush marks!
Step 7: Re-caulk
Wait 24 hours before doing anything with your countertop.
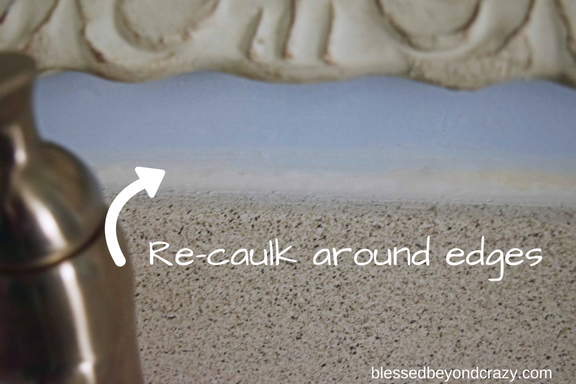
Now you need to re-caulk around the edges to prevent water from settling into the spaces between your counter and wall.
Use a Bath and Kitchen Waterproof Caulk to help it last much longer.
Tips for helping caulk look nice:
- Wear a latex glove
- Have a glass of water nearby
- Caulk the edges
- Dip a gloved finger in water and run it over the wet caulking — this helps give it a smooth finish
- Re-dip finger in water as needed to smooth out the caulk
Step 8: Reinstall Your Faucet
And enjoy your newly painted countertop!
Once more, here are all the steps in order:
- Prep
- Prime
- Wait 2 hours
- Spray paint 2 coats, 15 minutes between coats
- Wait 4 hours
- Clear Glaze, 3 coats, 10 ish minutes between coats
- Wait 24 hours before reinstalling the faucet and re-caulking, or using counter
Have you painted a countertop? How did it turn out?
Anna
Update:
If you have read the comments section of this post, then you will see that almost everyone wants to know how my counters have held up over time. Well here is the first update. It has been almost four months.
Sadly, my daughter spilled fingernail polish remover on one spot. After about a week or so, the textured part of the paint slowly started wearing off until it was just the white primer was showing in that spot. As we kept cleaning the counter, more of the paint was wearing off. We ended up trying lots of different methods on how to repaint just one small spot. What worked the best was spraying the spray paint heavily on a paper plate, then using a small paintbrush to carefully brush the speckles back on. We let it dry and added another layer of the clear coat.
Moral of this story: Be very careful with Acetone (fingernail polish remover) and what cleaners you use. A vinegar cleaner would probably be the safest bet!
P.S. I seem to have blogged a lot about this bathroom! Check out these posts:


kathleen says
I have done 3 sinks and a bathtub and always used epoxy usually the ones for tub and tile.( Sometimes it is in the bath plumbing areas of the big box stores.) Those are needed for when you will be soaking in hot water. I have used spray epoxy for appliances to add faux stone effects to the countertops but not the sink bowls. Those are good to touch ups when the finish gets damaged which I only needed to do once or twice in ten plus years.
Those cool textured stone look sprays are not strong enough with out a thick epoxy overcoat.
Lisa says
Thank you so much for your awesome instructions! I am remodeling my bathroom & was worried about how to do the countertop. I’m no worried anymore! 😊
Blessed Beyond Crazy says
Yay! Glad we can help! Have fun! Anna & Linda
Sandy says
would epoxy have worked better instead of clear glaze? the acetone is worrisome. what do you think
Blessed Beyond Crazy says
It might. I have never worked with epoxy, so I couldn’t give advice on that.
Cindie Groth says
I also decided to refurbish my bathroom vanity top. Mine was the old builders grade white with gold flecks 🤮 Hubby was out of town for 5 days so I decided to give it a shot. Started out with a light sanding and caulk removed. Rust oleum makes a countertop paint. Supposed to be medium to dark gray.. Not. It was an awful green gray.but that was just first coat. Got out my craft paints in browns beiges and gray-blue. Sponge painted starting with darkest brown to light cream color. Each color had its own sponge and plastic dish. Three coats of clear poly later it looked like granite. Unfortunately I didn’t calk around the sink and eventually water got under the paint and started peeling. If I can find them I’ll add photos! Okay I found pics but not sure how to get them here. There are 7
Courtney says
I wish I had found this prior to doing mine. I had to sand mine down and start over a few times. Mine scratches easily and looks pretty bad, all things considered. It was just a bandaid before a remodel, but I won’t be doing it again!
Julie M Randolph says
Oh man, this is so helpful! I was looking for tips on kitchen counters, but this is so easy, I might end up using this for my kid’s ugly bathroom!
Wendy says
I really love the REAL part of this!! These are the things that we really REALLY need to know!!! Keep posting!!! Your helping more than you know!!!
Thank you again!!!!
Wendy from GA
Blessed Beyond Crazy says
Thank you for your kind comment! That means so much to me!
Melissa Workman says
What type of primer paint was used?
Allison says
Hi
I think I am going to do this in my laundry room. Our countertop is currently solid black laminate. Do you think it would cover it up?
Kim says
I followed you directions specifically but the paint keeps washing away and the primer can be seen in the sink. What do I need to do?
Jennifer says
Hi there, this looks excellent! Did you only require one can to cover two coats?
Thanks!
Blessed Beyond Crazy says
It depends on the size of your countertop.
Kimberly says
I just used your method last week in my sons bathroom and the countertop and sink look amazing! It was a drastic improvement from what was there before. I followed your steps from the second time and had no problems at all. My only question is what do I clean the counters and sink with. I see you said a vinegar cleaner. Should I just mix vinegar and water in a spray bottle? Thanks so much for your thorough post! I may do my other restroom this summer!
Blessed Beyond Crazy says
An equal mix of vinegar and water could work.
JILLANN BARNES says
I was just online looking for suggestions to seal a countertop I came across your blog. I did the same thing to my countertop almost two and a half years ago I did the primer I did the flex exact color that you used and did the same polyurethane that the expert paint guy told me to get and it yellowed ….yuck.
.had to take it all up and then I did the same thing and got the clear spray paint like literally your whole blog was the whole story I went through very time-consuming I feel every ounce of the pain and frustration I’m sure you felt. Interesting though I didn’t do the sink I just did the counter top part. The reason I was searching for a sealer is because I’m wondering if there is something thats little bit more sturdier then the crystal clear glaze.
Andrea says
there are several options, like a top-coat of epoxy for countertops (there are several really good companies, like Leggari, Countertop Epoxy, and Stone Coat) – these will be pricier, but are used for floors in commercial spaces, so they hold up really well. Usually you can get smaller quantities, too. (usual steps, tape and mask everything off, mix exact quantities they say, stir together really well, apply with roller or squeegee, let dry. That easy for a clear top coat.)
There are other sealers that I’ve seen others use over their painted floors that have held up for years. I would almost bet that a spray isn’t the best option.
ALSO, I would ask the person at the counter what their PERSONAL experience it, and what they’ve heard from other purchasers. If they can’t or won’t say, go elsewhere, and/or keep researching online.
Happy updating!!
Janet says
Hello,
I just found your post on spray painting your countertop in your bathroom. Looks like you did that back in 2017. Is the countertop still holding up? Thank you.
Blessed Beyond Crazy says
Hi Janet, we actually just sold our house this past year. We did end up replacing the counter-top in order to help sell the house. It held up PERFECTLY for about a year. Since this was our primary bathroom for 6 people, it got a TON of traffic and it was starting to chip around the edge, where people lean against the counter. If this was in a bathroom, that was not the primary bathroom, then I think it would have held up a lot longer.
Roxanne N. says
May I ask what color of stone spray you used? I love the look in the pic, but not sure if it’s Bleached Stone Or Travertine by Rustoleum. I’m going for a lighter color with brown flecks in it! Please and thank you. Roxanne
Blessed Beyond Crazy says
Hi! I linked to the exact paint that I used. If you would like to read more about the paint color click on the picture of the spray paint and it will take you to Amazon.
carla says
I have painted my wooden kitchen countertops with Rustoleum Red. I tried others but this color and gloss is what I love. Now, I need the right kind of protective coating. I have used poly over the years and it doesn’t seal well from water stains which really show up on the red. I’m working on counters now before Christmas arrives. I need suggestions on the best clear coat Thnx!
Roseann says
Do you think this will work in a shower stall?
Blessed Beyond Crazy says
I haven’t tried that, but I do think it would work! Let us know if you try it!
Mandy says
I am contemplating doing my kitchen counters this way. I dont cut on them or put raw food on them I use cutting boards. I have the slick laminate formika (sp?) Dark green tops… advice??
Bre says
Hey Mandy! I just did my kitchen counters this way (yesterday!). BUT I need it sealed them yet. I’m nervous to use polycrilic bc of water spots. I think I might use envirotex epoxy but I wish I could find someone who had used it on top of stone effects to let me know how it goes!
Did you decide to paint yours?
Dory says
Bre,
I have used envirotex epoxy on painted laminate counters. I painted using normal every day paint and I can’t see any reason why you couldn’t use it over what you are using. It will give a thick coating so you shouldn’t have that ruff texture from the paint. Word to the wise…don’t buy off of Amazon. The epoxy has a short shelf life apparently. I had bought from Amazon and did 2 vanity tops. I couldn’t figure out why I had bubble developing 4hrs after I had poured it on. That’s when I found out about the shelf life. I went to Ace Hardware and bought off the shelf and just by opening box and saw the color of the 2 realized the 1st one was old. If you keep that in mind and have a helper you should do fine. Hope I’m not too late in sending this to you.
Ashley says
I used a cement sealer and didn’t yellow and my counters are going on 2 years
Mary says
So you used a cement sealer on epoxy and the counters didn’t yellow? What color?
Holly berry says
Hi! To seal kitchen and bath countertop properly use an alkyd paint! It’s oil based and extremely durable! Many great benefits! Or epoxy!
Ally Stone says
Very interesting. I can imagine the fun of going through with the painting but I have a quartz surface which I am not sure would work well. Even if it would, I’d prefer keeping the worktop as it is.
Marcia says
I was wondering if you used oil based or water based polyurthane? The water based isn’t supposed to yellow. I am asking because I just bought that same spray paint and plan to do this in a few months.
Jake Escaravage says
I’m so glad I found this page!! I did the same prep steps and painted the counter with the exact same paint. I heard Poly as a clear coat too but was searching to be sure. so happy you had trouble because it saved me lots of trouble! It looks great. THANKS!
Mark says
Thanks tons. I thought I was the only one making things worse at first.
I could do this approach in the bathroom — small bathroom– but the kitchen is much larger. Just spraying that in the kitchen! Plus I’d have to take the sink out — it took a plumber to install that and he ran into trouble and it will be harder for the next guy.
I know it sounds silly, but the more I go along in life, the more I’d be happy with just a very simple, plain, everything. Put art on the walls, have music, family stuff around, and people around. If I could go back to my 20’s that’s what I’d do. I’ve been a “slave” to my houses for 40 years, mostly to make them look a certain way so that people would come in and say “Oh this is so nice”.
Not that that’s bad, it’s just kinda silly to me now. They didn’t really care that much — I did the same routine at their houses “Oh that’s so nice” I’d say. Kinda like kids with the toys to show off to others.
No one told me that, I wish they would have!
Sandy says
What kind of countertops can you do this on…can it be done on a porcelain sink?}
chris says
I just followed these exact instructions on my kitchen countertops 2 weeks ago! Loos amazing and we are so happy with how it upgraded our kitchen, however, every time I’ve dropped something on it (once a wood cutting board, and second time my coffee grinder), it has chipped. Significantly. I’m feeling discouraged that we will now HAVE to replace the counters, $$$, do you have suggestions? Should I apply more varathane finish? (I did 6 coats already) Or would you suggest a different finish product…? Thanks for any suggestions!
Blessed Beyond Crazy says
A kitchen counter is probably going to experience more abuse than a bathroom counter. You may want to try a different finishing product.
Sam says
Hi I am really wanting to do this to my kitchen countertops as well what finish did u end up using ? Did anything work or did u have to replace them altogether ?
Meg says
Seems like this job was done about 1 year ago; am I right? How is it holding up now? Is there anything you would change/recommend? I’m on the fence about doing this to our bathroom counters, as well. I want to make sure it is durable and will hold up over time and use.
And THANK YOU for creating such a useful tutorial! Certainly the “don’t make my mistakes” tips are appreciated!
Amy Day says
I wonder if using an epoxy type top coat would help? I really want to continue cleaning with my bleach spray. Bathrooms tend to get germy.
Blessed Beyond Crazy says
Hey Amy, I think so! If you want to clean with bleach I would suggest trying a different type of epoxy. Let me know what you used and how it worked!
Jaime says
I have painted and then epoxy coated my kitchen island. Holding up like a charm after 2 years….it does yellow so if you want white it won’t work. Epoxy has a natural tint to it that will come out after drying.
Ashley says
Hi! I love your tutorial, happy to see it worked out with this product. Did you sand at all to reduce the texture before the glaze?? My husband is concerned about using this as it may be rough even after the glaze. Thanks!
Blessed Beyond Crazy says
We lightly sanded the original counter to help the paint stick. We did not sand after the spray paint. If you do this you will cause the little speckles to smear and it will look streaky. You could use a different spray paint that is not textured if you do not want a textured counter.
Lizz says
I called the company that sells it…. they said IF you sand it.. YOU HAVE TO WAIT 24 HOURS BEFORE YOU PAINT IT AGAIN.
Bobbi DG says
Have you ever tried painting a faucet??? I am curious, as we have rental that will need redoing when the next tenant moves out. Thank you.
Blessed Beyond Crazy says
I have not tried that before.
Courtney says
How did you get the textured spray paint even in the bowls ? I’ve tried this and it’s horribly uneven the inside of the bowls look awful we are trying to strip and sand now and that’s not going well either
Any suggestions ?
Susan Pullig says
Short, even blasts or wisps…does wisps sound better? Almost like doing a check mark in the air. Ours was well-covered with no drips or globs. I just did it yesterday…now I’m wanting to seal it, because I’m not at all impressed with how matte it is.

Gina says
Just wondering if you would recommend poly for dark surfaces?
Blessed Beyond Crazy says
That’s hard to say. It might work out just fine with a darker surface. However, it did alter the color of my counter which makes me hesitant to suggest it. I think a clear coat is always a safer bet.
Cari says
I wouldn’t, personally. Poly is great for wood and a few other applications, but for this, even with a dark color, I’d go with something else. Poly has a tendency to just plain not dry if it has an odd issue with the undercoat, has a slow dry time meaning it can get things like dust specs and fur and the like in it easily, and may peel if it doesn’t like the undercoat as well. It’s also stinky. Lol.
Karlie says
Great Job, looks beautiful. 2 questions.
Wondering what you used to protect yourself from the paint fumes while you were doing the job, face mask, fans etc? Has anyone ever tried the epoxy or pour on high gloss finish?
Thanks For the Advice.
Karlie
Blessed Beyond Crazy says
Hi Karlie, Yes! A face mask, fans, and do this project when the weather is nice so you can open windows! We also did this right before we had a weekend vacation so we wouldn’t be home when the fumes were still strong.
Gloria Zack says
Use water based clear sealer which doesn’t yellow. Oil based will yellow!
Also, try sealer on a sample first and you will save a lot problems.
Blessed Beyond Crazy says
I wish I would have known this first! Thank you!
Kathy says
Exactly what kind of countertops are you painting. We have a plastic imitation marble stuff. I’d love to paint it, but wonder if it would peel right off. Any ideas?
Kristen Owens says
I had the EXACT SAME issue! I painted my countertops (spray painted) white — then added a clear satin spray coat — and NOW they are yellowed! And, it looks like I must ‘do-over’ — so disappointed 🙁
Thanks for the ‘tip’ about the Clear Coat Spray you suggested above.
Blessed Beyond Crazy says
Oh, I feel your pain! Sorry that this happened to you! Glad you found my post, hope it helps!
Kim says
How have you been cleaning the counter? We just did this update this weekend and we love our new counter look! Thanks for a great tutorial!
Gail says
Love these projects! I have done this before an d my only complaint was brush strokes at certain angles. This time I let the stone spray dry for 5 days since I used 3 light coats to cover a defect in a new home’s counter. I use floor poly because it is harder and tougher wear. There was no yellowing and I got a beautiful satin finish. However the project was ruined when I painted the poly on as it dissolved the dark stone leaving a blurry mess. Any ideas?
Anna Martin says
How disappointing! I would try a different poly. It sounds like the type you used was too harsh for the spray paint.
Paul says
Hi Anna I enjoyed reading your post. And how nice your husband is and how well you both work together. A pleasure of a post!
I like renovating and so does my better half Anna, and my last name is Marton, funny!
Cheers
Stephanie says
Can I ask what the exact brand and make of poly you used so I don’t use it either? I hear mix reviews on poly just want to see which one you used.
Anna Martin says
I don’t remember the brand but it was a brush on wood (clear) stain.
Michelle says
Help! I did everything you said, including using exact brands of paint but my glaze isn’t sealing. If I get the sink bowl wet, the paint lifts and smears….
Anna Martin says
Hmm, that sounds weird. Did you let it dry and cure for 3 days? We did not use our bathroom sink for three days to make sure everything was dry. We also set up work lights that put off a lot of heat to help it dry faster. You definitely don’t want to touch it until it is completely dried.
Diana says
Could you please give another update on how this is holding up?
Anna Martin says
Hi Diana, No further updates yet, the last update was less than a month ago so nothing new to report!
Colleen says
Going to try this????
Susan Peters says
Hello. I also loved your counter. I did the project however the glaze coat gave me problems. I have put several coats on it but it does not appear uniform. It seems patchy. The spray cans did drip in a few places thus I have shiny spots here and there. And my trigger finger is KILLING me! Should the counter look more uniform when completely dry? And yes, it does feel rough. Any problems with water settling in the rough spots? Thanks Sue
Blessed Beyond Crazy says
We put three coats of the spray poly on our counters. It won’t hurt to put more coats of the clear coat on. We paid special attention to the sink bowl since that would be the most abused part of our sink. Everything did dry uniformly. You should try to spray pretty evenly left to right so it doesn’t get too patchy. The rough spots haven’t given us any issues as far as cleaning.
Karen says
I am having the same problem after spraying the clear spray. I’m not sure what to do to fix it. Anyone figure out how to make it look even. We have gone through 3 cans of spray.
tami says
Ok, so I am not crazy? I have gone through 2 cans of the same brand and style of clear coat and I have glossy spots and cloudy spots! It is so frustrating that it is not coating evenly!
Dawnel Smith-Haney says
I used this stone spray on my real stone fireplace to match my decor in my living room I love it! Getting ready to do my counter tops but not quite sure on this!
Kayla says
Really curious to see how yours will hold up over time. A friend of mine used the same process though I’m not sure what top coat she used and hers started peeling around the drain area within a few months! So sad because it looked beautiful! I’d love to try your approach if it does hold up for you!
Blessed Beyond Crazy says
Oh, that would be really sad to have them peel! So far, so good! I will update this post if I have any issues with them.
Tamara says
Our temporary fix for when ours started to peel around the drain is that we placed small river rocks in the bottom of our sink. It hid the issue, and looked great!
Anna Martin says
How brilliant! Would love to see a picture of that!
Kimberly says
Did you glue the river rocks down?
Becky says
By far the best tutorial I’ve seen yet. I moved into a home with ugly brown and yellow 60-70’s era counter tops and Ive been looking for a cost effective way of updating them. I will give this a try for sure and let you know how it turned out.
Blessed Beyond Crazy says
Thanks Becky! Please keep us updated!
Wendy says
How is the paint holding up?
Blessed Beyond Crazy says
So far so good! Still looks perfect!
Amy says
That looks great! I have seen a lot of people recommend polyurethane, I didn’t think it would yellow that much! Do you think the spray glaze will be just as waterproof? I’m worried about how it will hold up in a sink.
Blessed Beyond Crazy says
Hey Amy,
Your exact concern was what led us into using polyurethane in the first place. I wouldn’t think it would be yellow either since it said CLEAR on the can! But since it is made for wood I guess it’s supposed to look clear on wood, not on a white surface. Anyway… the spray glaze is holding up perfectly so far and it’s been about 6 weeks. This sink gets used often since we have 6 people using this one bathroom! I couldn’t be happier with how it turned out in the end and how it is holding up. If I ever have any issues with it I will for sure update this post!
Karen says
It looks wonderful! Have you had any problems with it dulling, since you painted it? Do you think it holds up as good as Rust-Oleum tub and tile paint? I would love to do something that doesn’t require a mask or respirator. I have asthma, and I don’t think I could handle days of horrible smell in the house.
Blessed Beyond Crazy says
Hi, Karen! We have not had any problems with dulling but it has only been one week since we painted it. I’ll update my post if we experience any problems over time. I have never used the tub and tile paint but the spray paint we used was Rust-Oleum so I would assume it would have the same quality. As far as fumes: the respirator really helps block out all fumes! We did this in the spring so we were able to keep our bathroom window open with a fan. We also kept the door closed and a towel shoved up against the bottom thresh hold. Another thing was we planned to paint this right before we were gone for a weekend so it would have time to dry and fume out. However, it ended up not working since we had to repaint it when we got home to get rid of the ugly yellow color. If you know you were going to be gone for a few days I would suggest painting it right before you leave.
Thanks for your comment,
Anna
Kelly says
I love how your counter turned out. I think it is a great idea for updating!
Also, if you are flipping a house and want to update I think it is great as well!
What kind of primer did you use? Does it scratch off at all?
Thanks!
Blessed Beyond Crazy says
Hey Kelly! I didn’t use any special primer just some plain ole’ white paint we had sitting in our garage. No, nothing scratched off, of course, we didn’t try until after we got the clear glaze on.