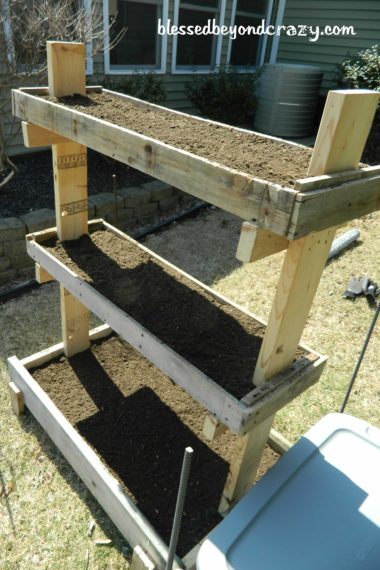
Have a few extra pallets lying around? If so, how about making an inexpensive DIY Gardening Box?
To help support our blogging activities, our site contains affiliate links. If you make a purchase from a link on our site, we may receive a small percentage of that sale, at no extra cost to you. Blessed Beyond Crazy is a participant in the Amazon Services LLC Associates Program, an affiliate advertising program designed to provide a means for sites to earn advertising fees by advertising and linking to amazon.com. As an Amazon Associate, I earn from qualifying purchases.
All winter long I have talked about starting a garden in the spring.
I thought it would be a great hobby for my husband and me. One small problem: he doesn’t want anything to do with a garden.
He has been very honest about it. And I have to say he makes some great points and it’s hard to disagree with him.
- It’s a lot of work.
- I’ve killed everything I’ve tried to grow in the past years…
- My grandma has a huge garden and she generously shares all her food.
- We have a small yard… like 40 minutes push mowing and you’re done, small.
But still, I kept talking about gardening.
- It would be great for the kids to help with and learn from (after all we homeschool–this is science!)
- I’m never going to get better at keeping plants alive if I don’t keep trying.
- If I do succeed in growing something it would save us money and be healthy at the same time!
- I’ve grown three children, how hard can broccoli be?
- And, I want to…
A piece of advice I have heard is to start small. So I was thinking starting with some herbs would be a great idea.
I was on my Pinterest Gardening Board looking back at all the things I had pinned. I was thinking of a small raised bed somewhere in the yard.
There were a lot of ideas for gardening boxes. I pointed a few out to Seth.
He told me which ones he could realistically build and which ones were outside his carpentry skills… ya know “hypothetically.”
So I was delightfully surprised when one morning he went outside, grabbed a few pallets to tear apart, and started building me a gardening box! He is so good to me!
Seth claims that his carpentry skills are minimal. I don’t think he gives himself enough credit. So I just want to let you know, that while I did not build this, apparently it is an easy-level project.
DIY Garden Box from pallets
Items needed:
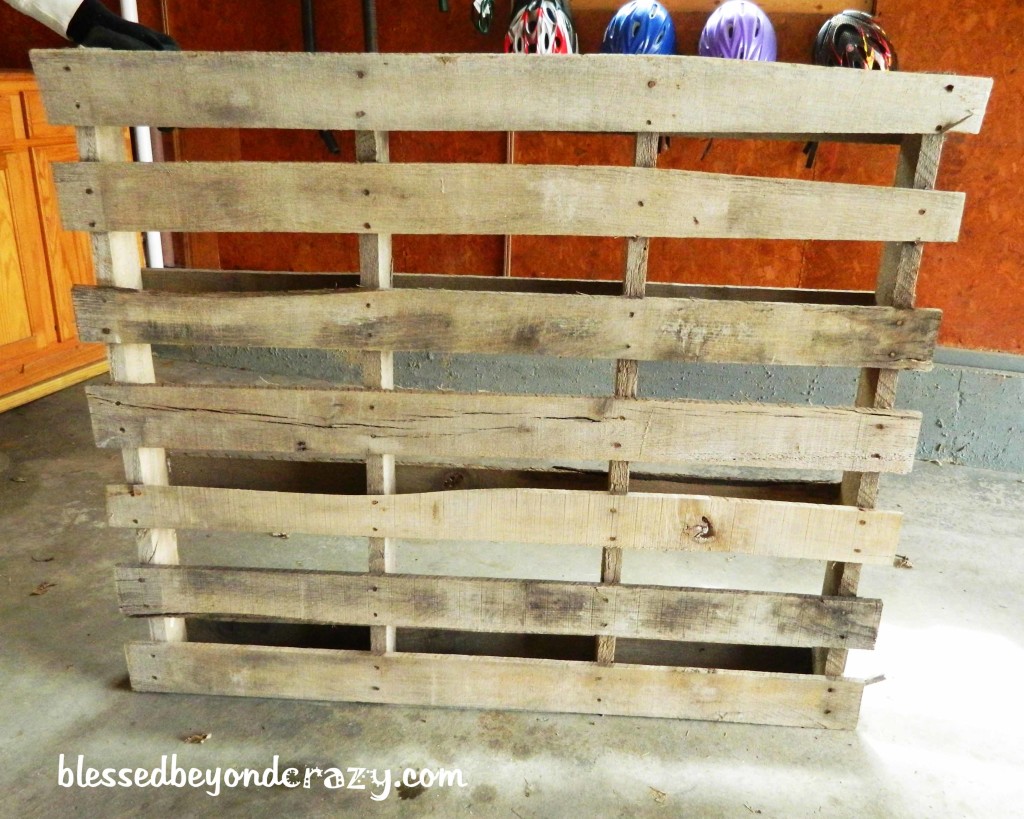
- Four pallets–disassembled
- Tape measure
- Several pencils (you will loose them)
- Level and square
- Circular or table saw
- Ear and eye protection
- Drill
- 2 1/2 in and 1 1/4 general purpose screws
- 2×6 and 2×10 boards for the base and support posts
The base is made from scrap wood that we had leftover from building shelves in our storage room. This wood was sturdier than the pallets we had. It depends on the quality of pallets you are able to get ahold of.
The tiers are made from disassembled pallet wood.
I’m going to roughly tell you how this was built. You can make this as big or small as you want– customize it to whatever suits your needs.
The Base:
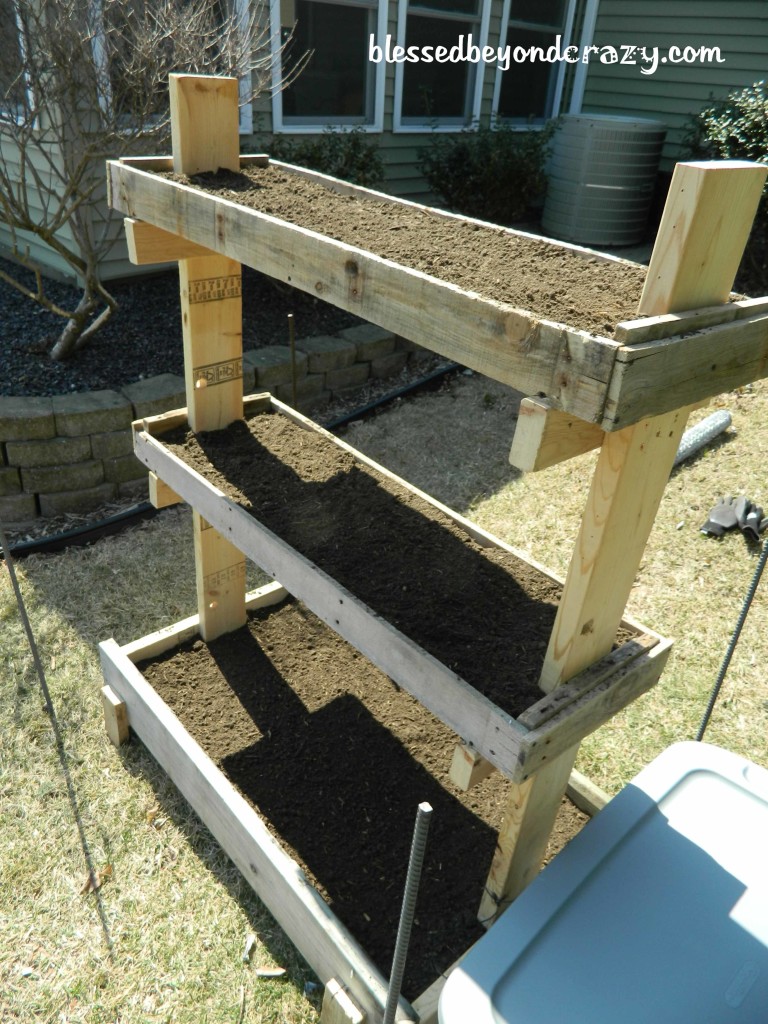
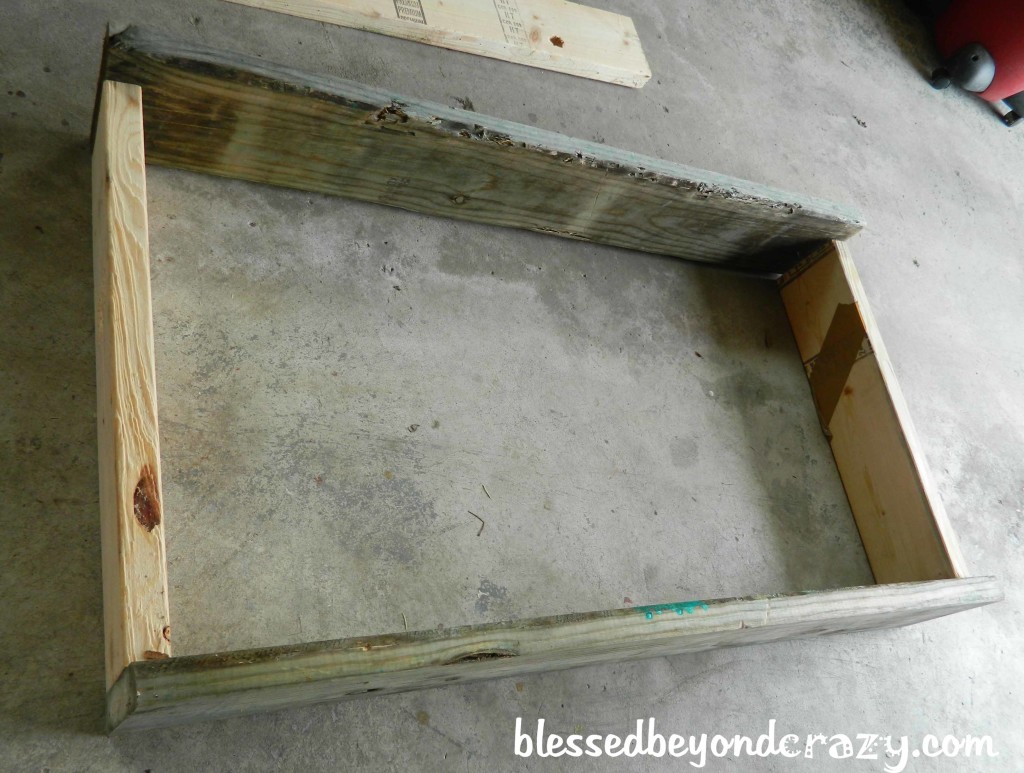
Here is the base of the box. Simple: 4 pieces screwed together to make a box. Make it as big as you want. The base will be the biggest “tier.”
The box was made from scrap 2×10 boards and is 2-foot wide by 4-foot long. He used 2 1/2 inch general purpose screws to hold the boards together. There are four in each end to make sure nothing wiggled loose.
The reason the base is this big is that that is is how long our pallet boards were. This made it easier to assemble because the disassemble pallet boards didn’t need to be re-sized in any way. To make this project easiest, adjust the base to be as long as your pallet boards.
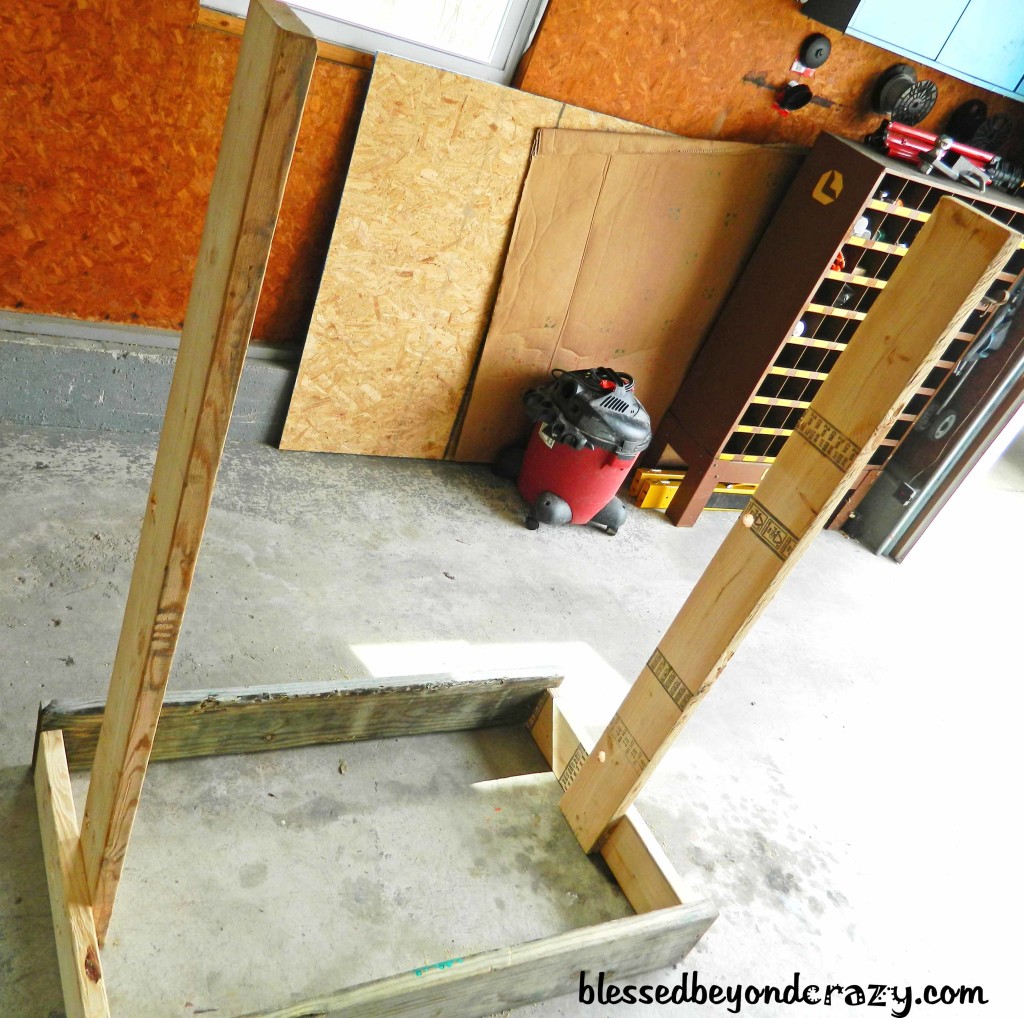
Next, add the two support posts. Make it as tall as you like. Just make sure your boards are strong enough and have enough support that they won’t fall over in the wind. You also want to make sure your box isn’t top-heavy, so keep this in mind.
The support posts are approximately 50 inches tall and made from scrap 2×6 boards.
Make sure that you find the center of both boards and line them up to ensure your tiers are straight. There are 5 screws in each to hold everything together.
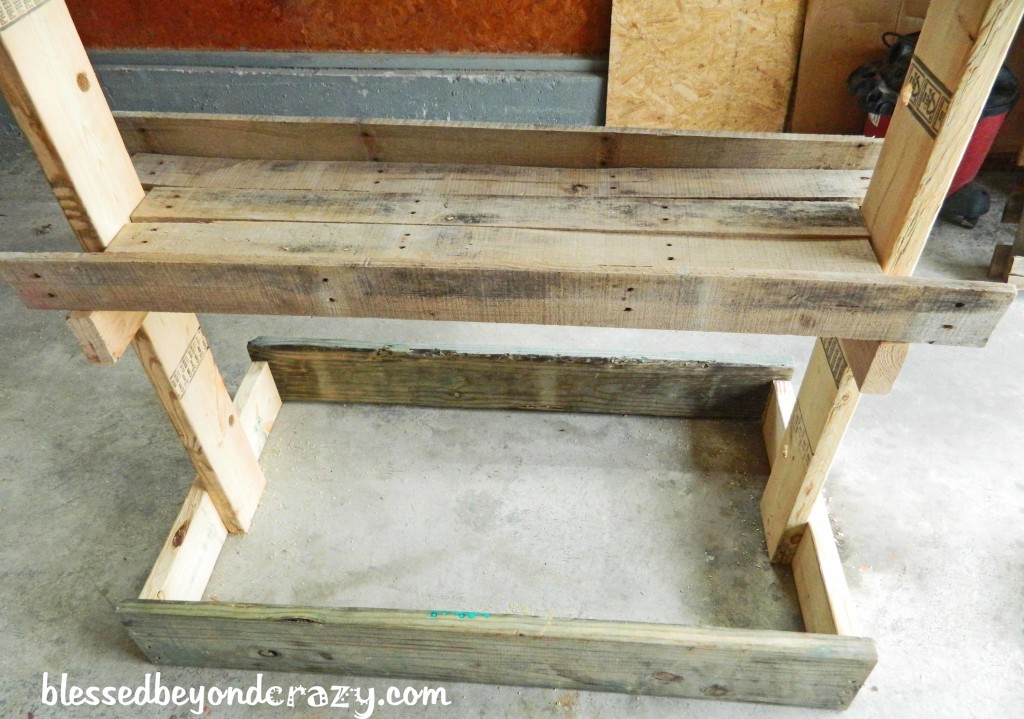
The first tier was around 20 inches above the bottom tier to allow plenty of space and sunlight for the plants below.
A piece of 2×4 was added as a support bracket under each tier to help with the weight of the dirt.
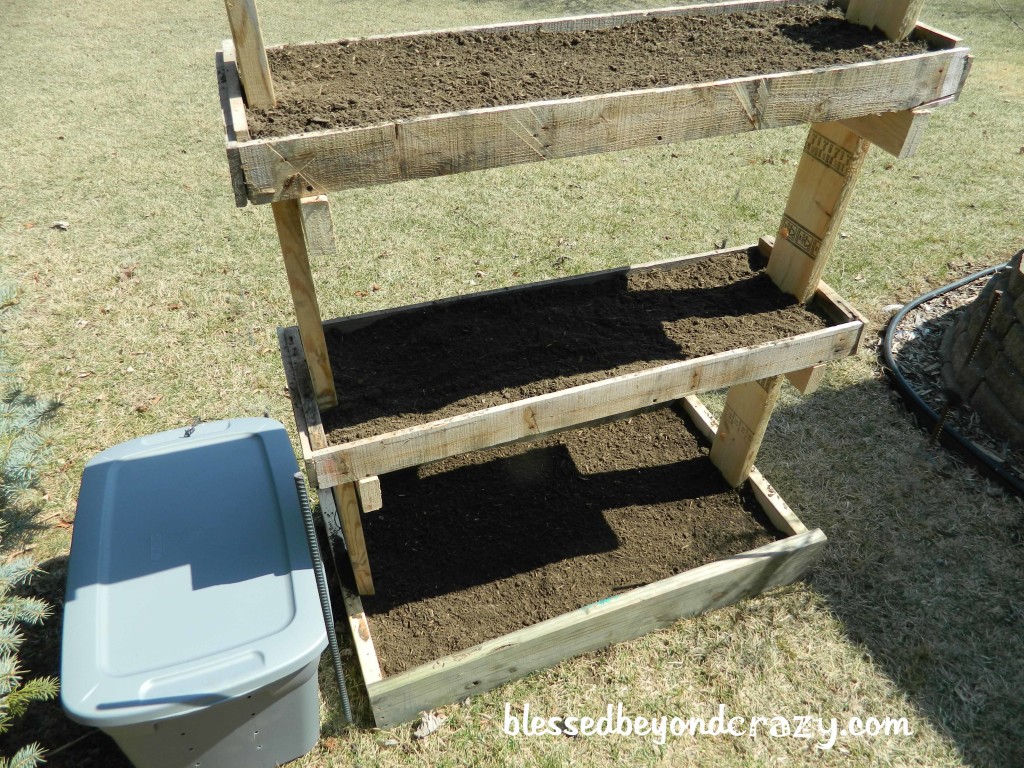
The bottom of the tier was made with four pallet boards (two short and two long). Another two pallets boards were added to make the sides. He also cut a piece of a pallet to act as a cap on the end of each tier to keep the dirt from falling out of the end (you can see this in a later picture).
For the third tier, just repeat exactly what you did for the second tier. The third tier was also 20 inches above the second tier.
You could make the third level a little bit smaller than the second one if you wanted, but don’t make it bigger…remember the top-heavy thing we talked about?
We did not worry about painting because these pallets are pine, which holds up to the weather pretty well.
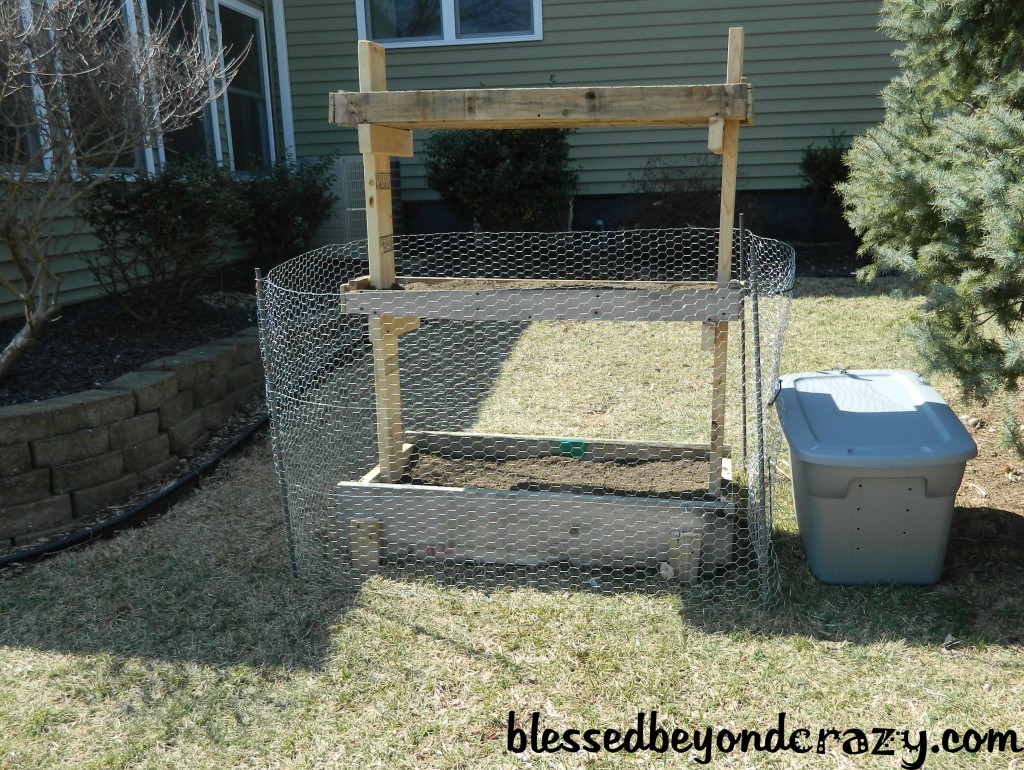
Move to the location of your desires, then fill with dirt and plant! (The tote is filled with compost)
This box is perfect for our small yard! I can grow a few things without taking any space away from my children’s play area.
This is in a pretty sunny spot in our yard. Plant the things that do well in the sun on top, and the things that like a little bit of shade on the bottom and middle tier. This is really just a suggestion because I don’t have any advice when it comes to gardening.
Also, that is my dining room window right behind the garden. I will be able to easily check on it when things start growing!
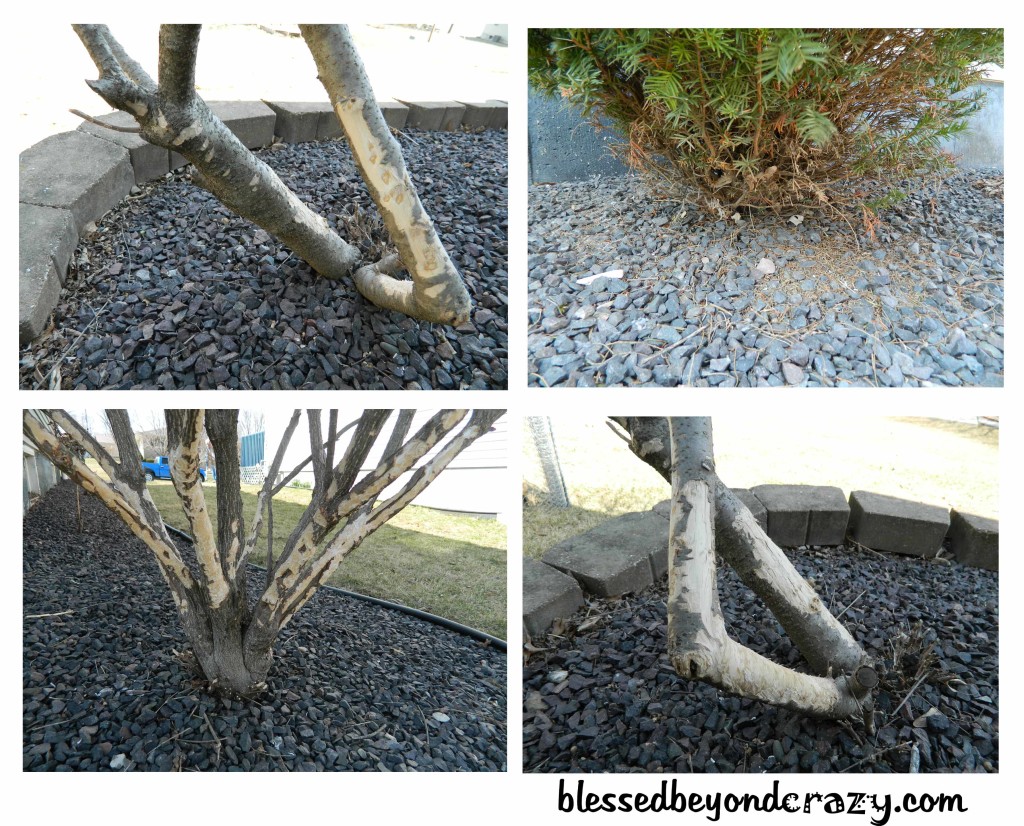
Here are a few pictures of the bushes and shrubs in our landscaping. We have a few hungry critters in our neighborhood.
So for this reason, we added some chicken wire around our garden. I also don’t have to worry about my kids playing in the dirt either 😉
We drove four 4-foot re-bar stakes into the yard around the garden box and stretched chicken wire around them. We secured the chicken wire to each stake and then left the very last piece open, acting as out “gate”. This piece is pulled shut and bungie strapped to the first panel to keep it secured and also allows for easy access.
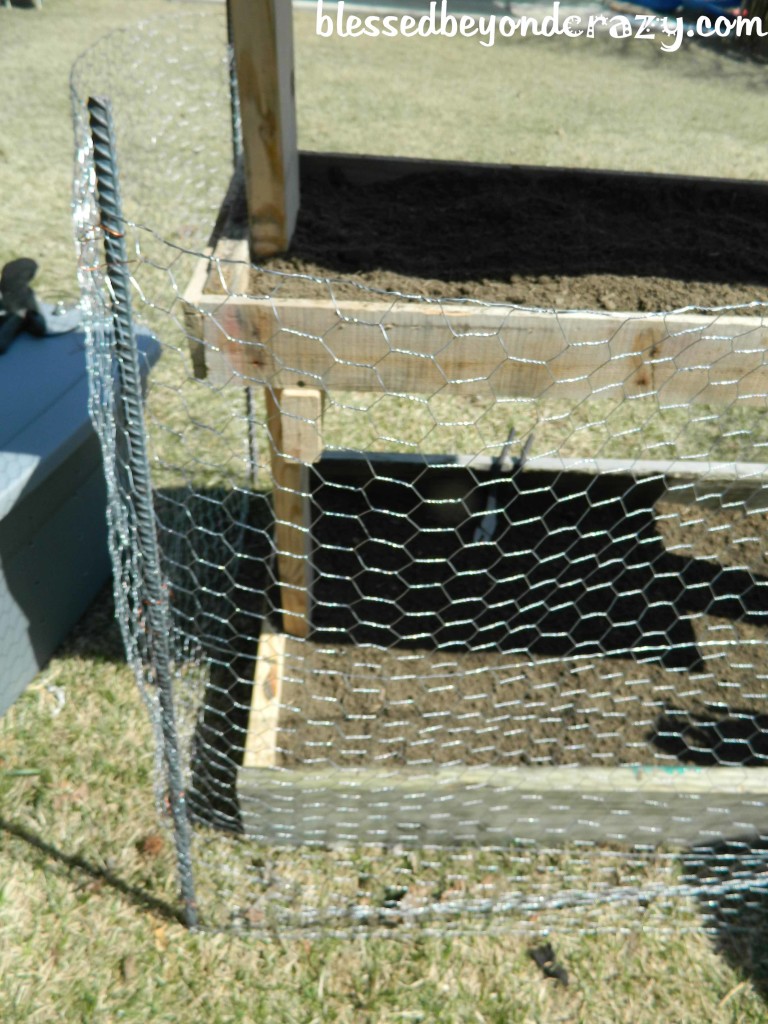
We added chicken wire around our box so rabbits wouldn’t eat our garden.
I hope this can be of some help for those of you with gardening hopes and small yards!
I would love for you to share with me your small yard gardening solutions! Comment below!
–Anna

Denisa says
I just love this DIY gardening box with tiers, it’s a wonderful idea for saving space and growing multiple crops at the same time. Tomatoes or peppers or cucumbers could grow wonderfully on the lower tier and herbs or leafy greens on the other two.
Greys says
Great idea for my next diy project! Thanks for sharing this, Anna, the steps look really easy to follow, I hope I`ll make it right!
Blessed Beyond Crazy says
Hi there! I’m sure you’ll do a great job! Thanks for stopping by and have fun!
Anna
Talia says
Hello, I am looking to make this as a gift for my boyfriend as he really wants to get into gardening! I am also growing seedlings to give him with it as well. How many plants fit in this? I am new to gardening also and am unsure how many you can fit in it. Thanks 🙂
Blessed Beyond Crazy says
Hi Talia,
That depends on the size of your box and what you are planting. Different vegetables require different amounts of space. Look on your seed package and it should tell you how far apart to plant the seeds.
Laura Boyce Monaghan says
Thank you very much for the instructions. Need this big time for my small yard.
Blessed Beyond Crazy says
Hi Laura,
We are glad that you like this post and hope that it helps you with planting/gardening in your yard this year.
Thanks for stopping by!
Linda