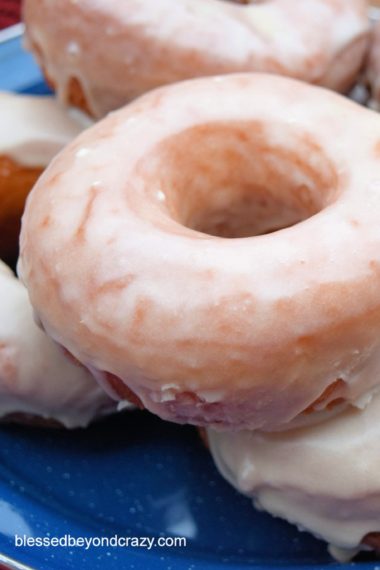
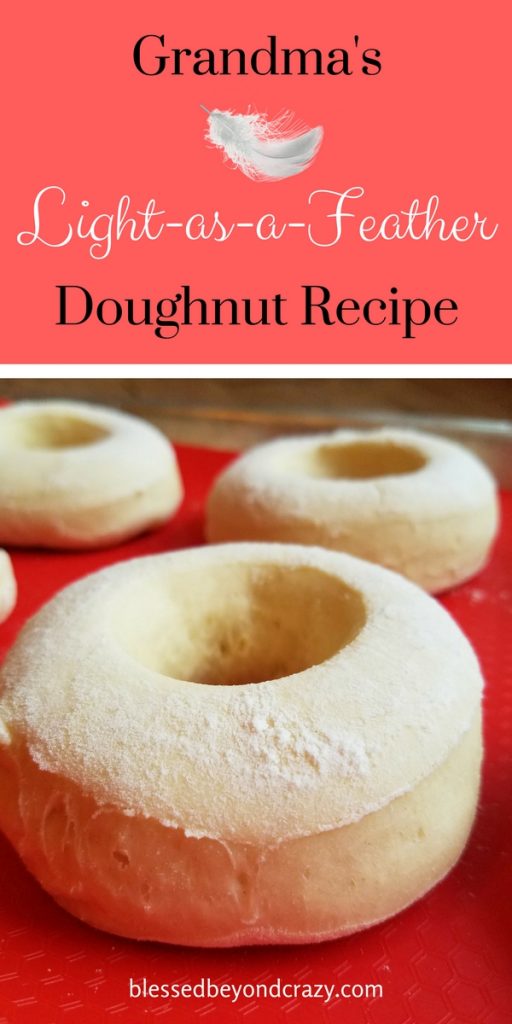
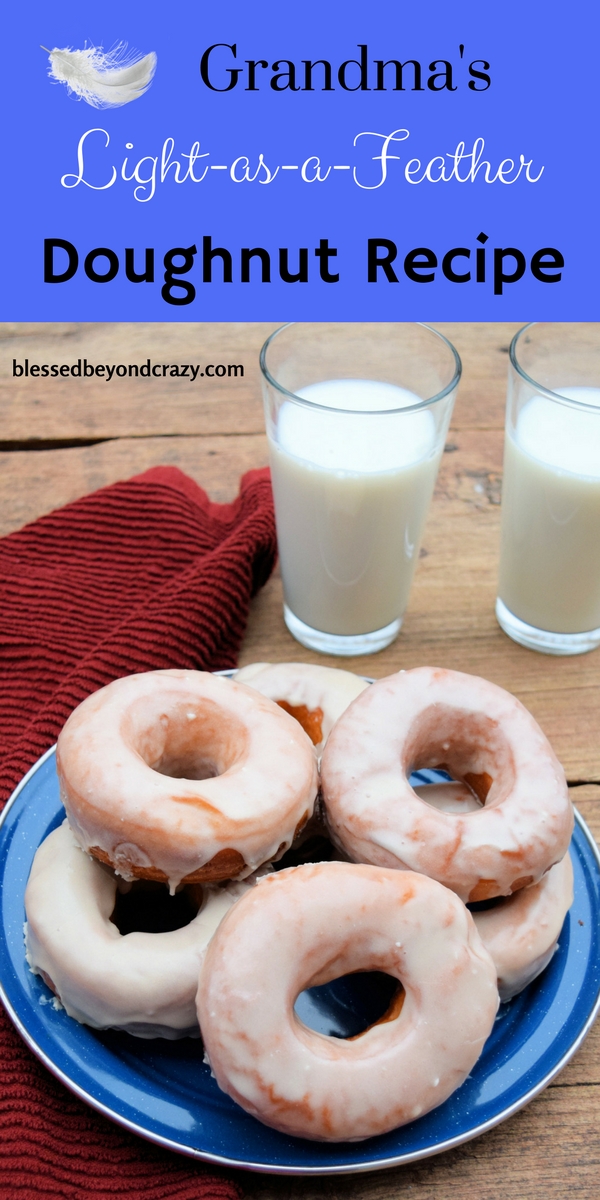
First of all… there are doughnuts, and then there are DOUGHNUTS!!! I mean seriously, most doughnut recipes don’t stand a chance in comparison to Grandma’s Light-as-a-Feather Doughnut Recipe. These doughnuts are light, fluffy, and absolutely delicious (hence the name)!! I’ll give you fair warning in advance, it’s hard to eat just one!

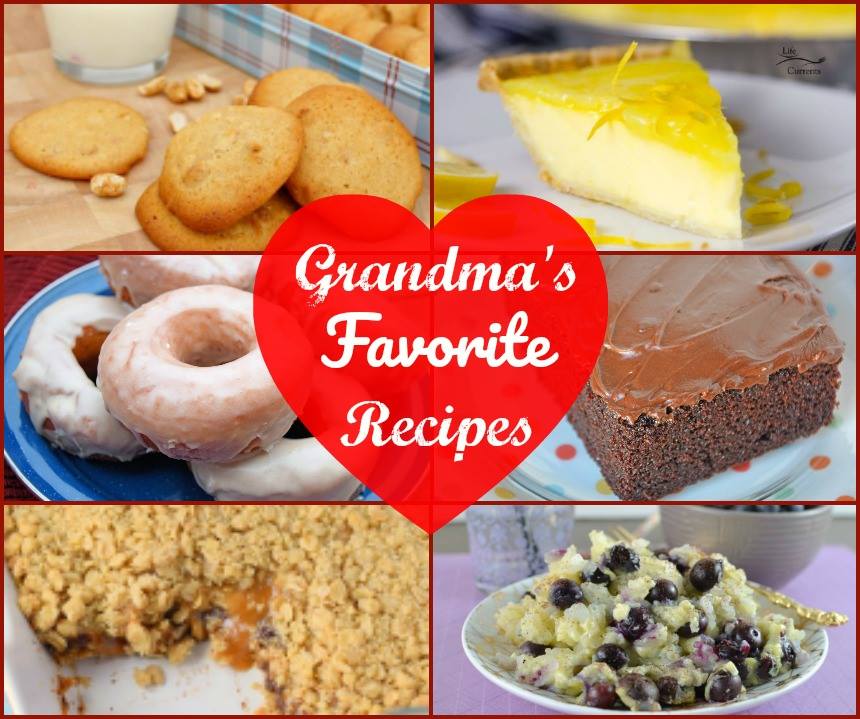
Along with Grandma’s Light-as-a-Feather Doughnut Recipe, we are delighted to share 5 other amazing recipes that feature beloved recipes from grandma. (Scroll to the very end to find them.)
To help support our blogging activities, our site contains affiliate links. If you make a purchase from a link on our site, we may receive a small percentage of that sale, at no extra cost to you. Blessed Beyond Crazy is a participant in the Amazon Services LLC Associates Program, an affiliate advertising program designed to provide a means for sites to earn advertising fees by advertising and linking to amazon.com.

When I was growing up, it wasn’t unusual to find mom either in the garden or in the kitchen busy whipping up a batch of her yummy doughnuts on a Saturday morning. And, as time went on, she also treated her grandchildren to her scrumptious doughnuts. To tell you just how impressive these doughnuts are, my adult children still remember a doughnut-making day in Grandma King’s kitchen!
You can see the majority of steps involved in making Grandma’s Light-as-a-Feather Doughnut Recipe in the picture collage above, however, I will also highlight them for you below.
Grandma’s Light-as-a-Feather Doughnut Recipe:
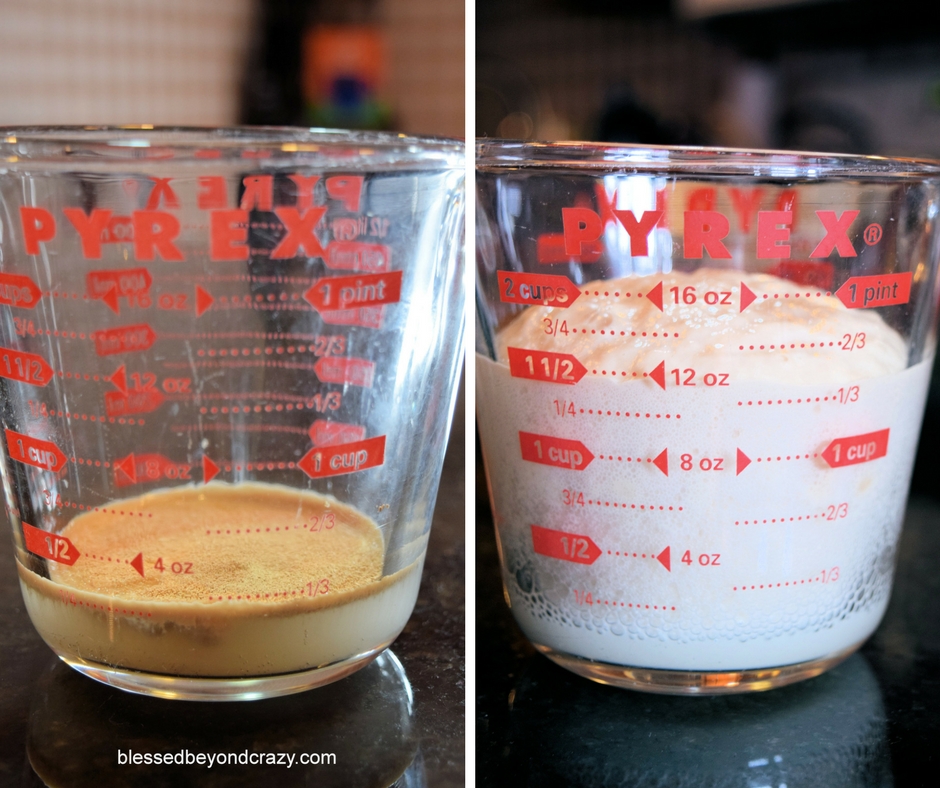
Dissolve a packet of yeast in warm water until it doubles in size.
Warm milk + sugar + salt + butter in a saucepan over low heat until butter is melted; cool to room temperature.
Add activated yeast to milk mixture; gently stir together.
Next, add the liquid mixture to a slightly beaten egg and stir together. Add flour; mix together until well combined (dough will be slightly sticky). (I used my KitchenAid mixer with a KitchenAid dough hook attachment to mix my dough, although you can use a regular mixing bowl and mix the ingredients together by hand.)
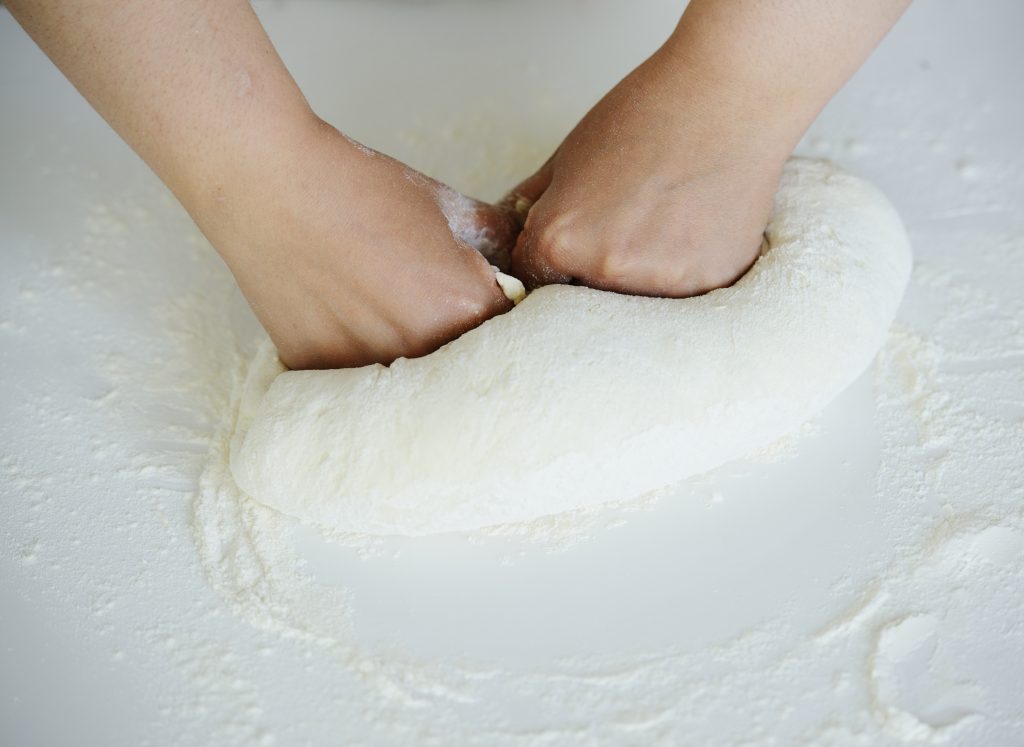
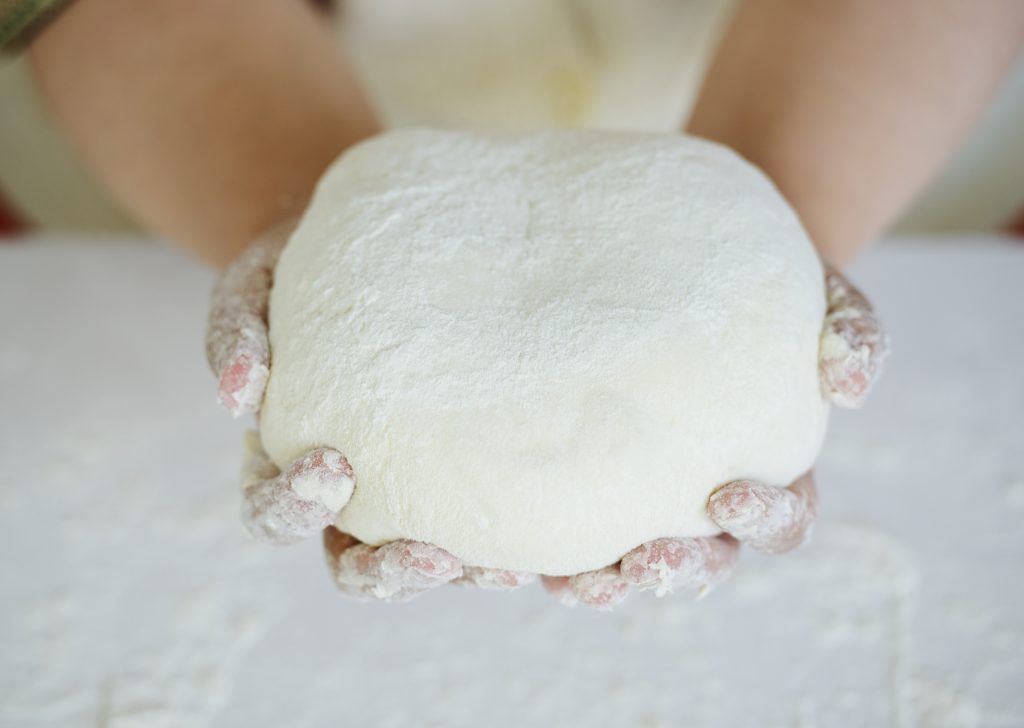
On a well-floured working surface, knead the dough until it is soft and smooth (like a baby’s bottom).
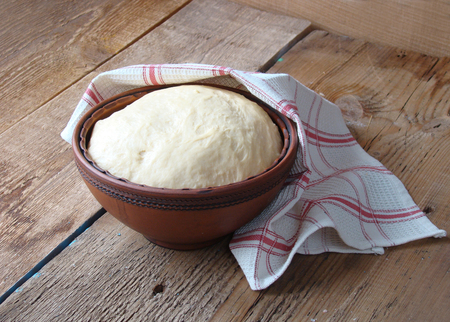
Place dough in a large, lightly greased bowl. To the dough from drying out, give the top a light coating of melted butter and to help the dough rise quicker, cover the bowl with a clean tea towel and place it in a sunny warm spot in your home.
Allow the dough to double in size. This process usually takes at least one hour, depending on how warm (and humid) its environment is.
When the dough has risen, use your fist to gently punch the center of the dough. This step helps remove some of the gas bubbles formed by the yeast during the rising process. It also helps the fermenting process the second time the dough rises.
Now flip the dough out onto a well-floured working surface and knead again until it’s soft and smooth.
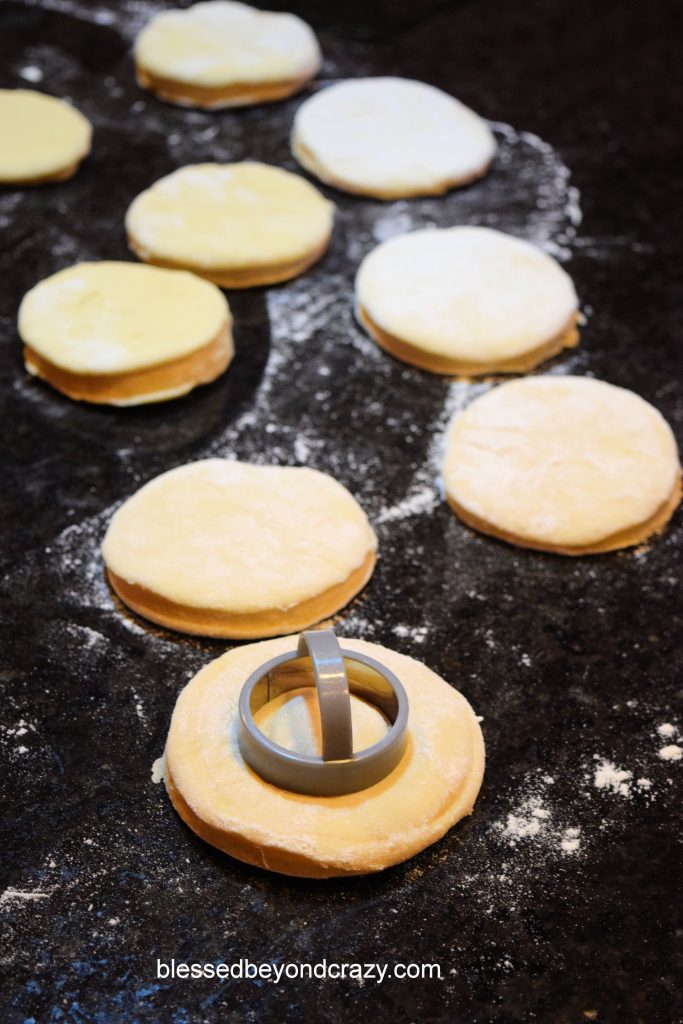
Using a rolling pin, roll the dough out to about 1/2-inch thickness (see the picture at the beginning of this post). You may need to add a light dusting of flour from time to time to keep the dough from sticking to your rolling pin and/or working surface.
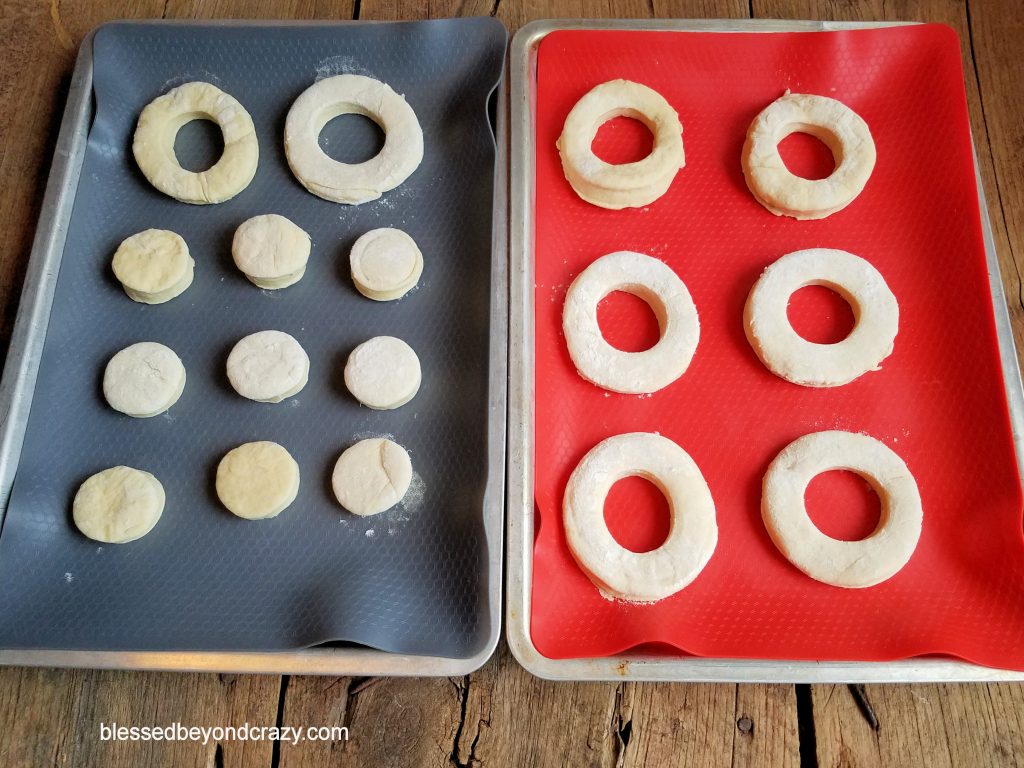
Cut the dough into doughnut shapes using a doughnut cutter or two different sized (3-inch and 1 1/2-inch) biscuit cutters. Place doughnuts and holes onto two large baking sheets lined with silicone baking mats or parchment paper.
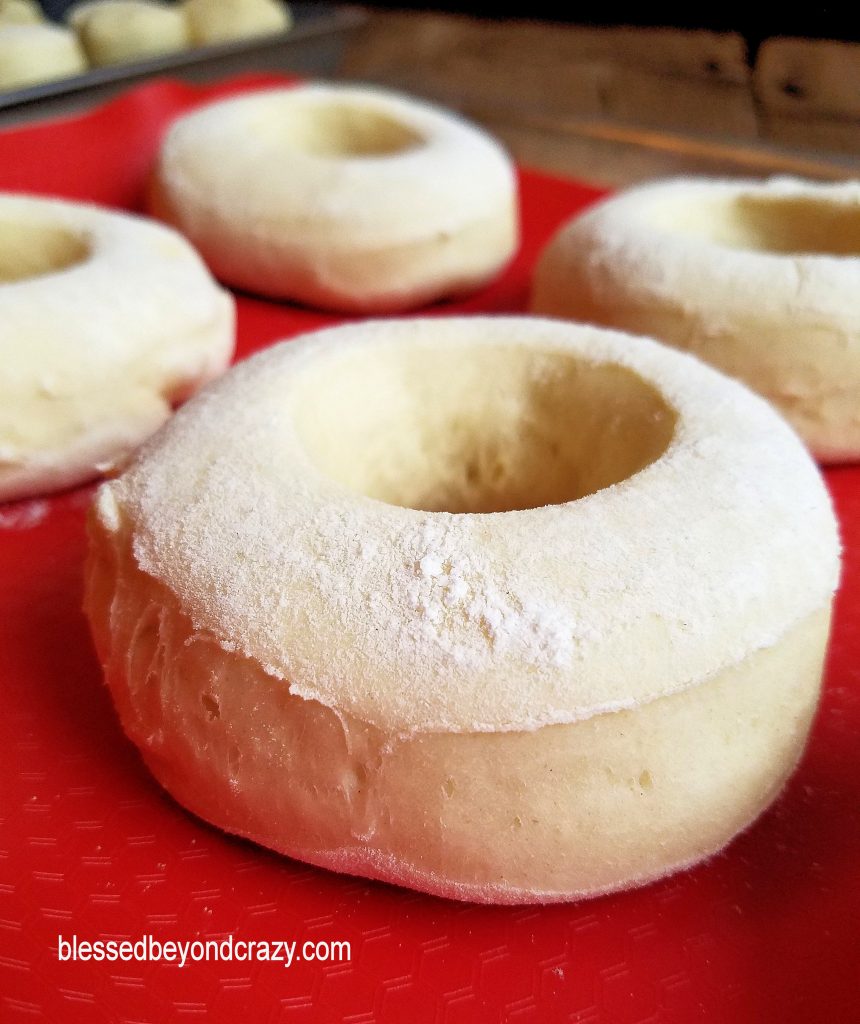
Again, cover the dough with tea towels and allow it to rise until doubled in size.
Fill half of a small stockpot with melted shortening or canola oil. Heat oil to approximately 375 degrees F. (I suggest you use a deep-fry thermometer to check the temperature.)
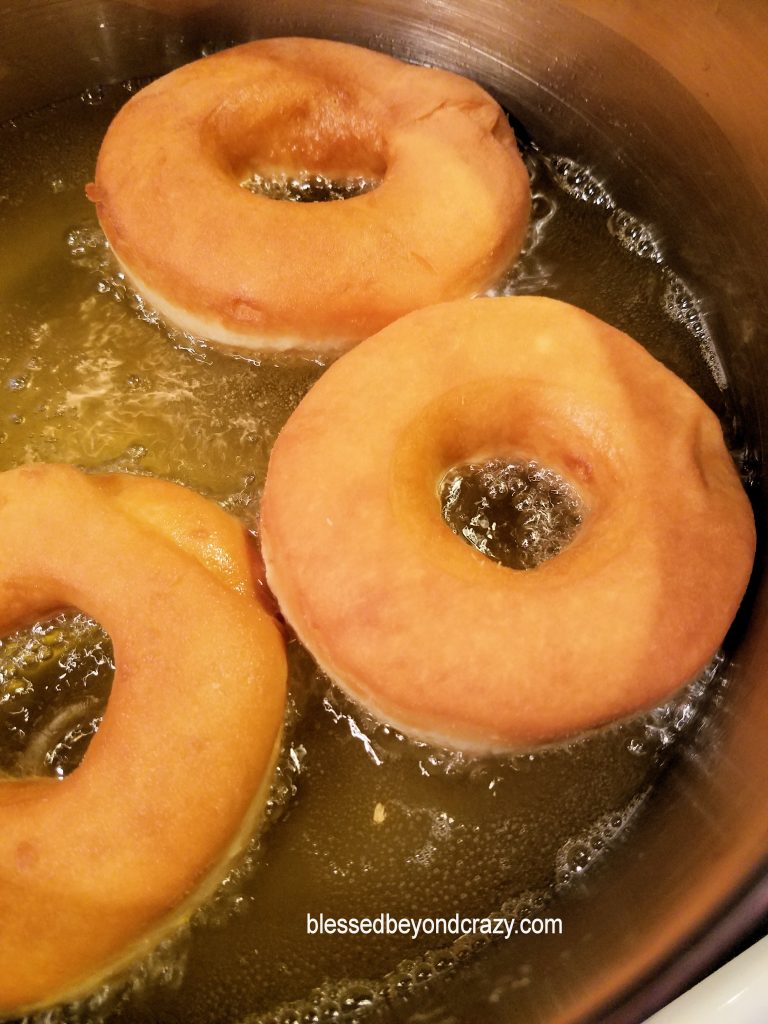
Carefully drop doughnuts into the hot oil (I fry 3 at a time). When golden brown on the bottom, flip the doughnuts over. The frying process only takes approximately 45 – 55 seconds on each side. Be careful not to over-fry them!
Using a slotted metal spoon, remove the doughnuts from the hot oil. In order to drain any excess oil, immediately place the doughnuts onto a stack of folded paper towels.
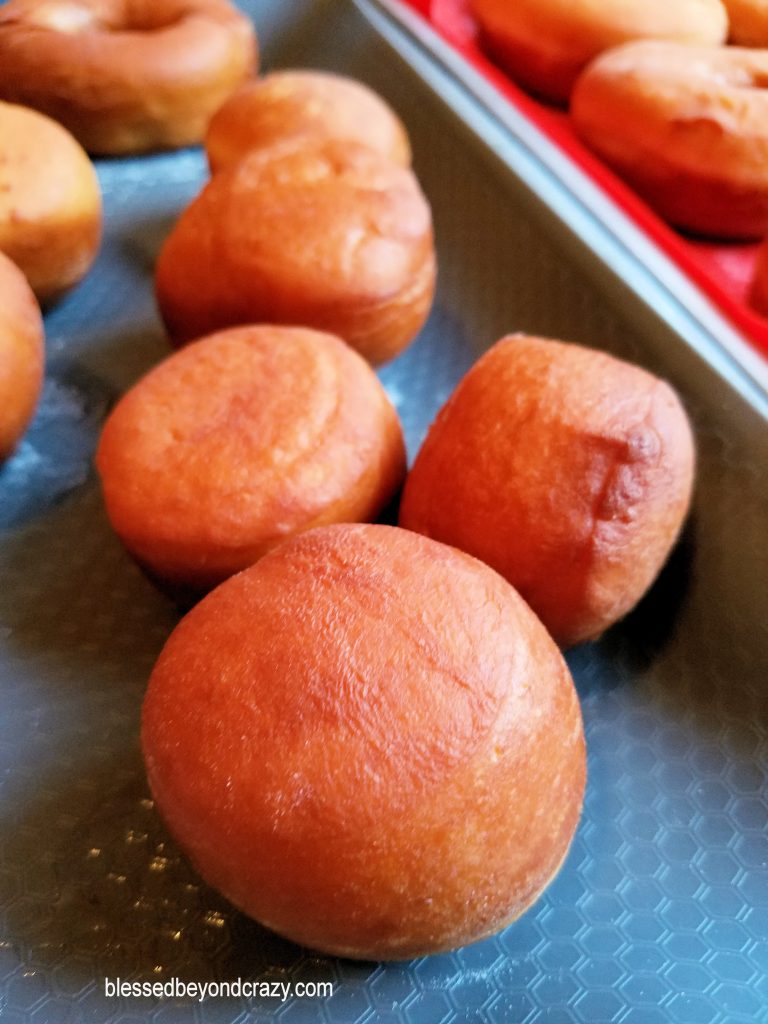
Repeat the process for frying the doughnut holes (the holes fry even faster so be careful to not over fry them!)
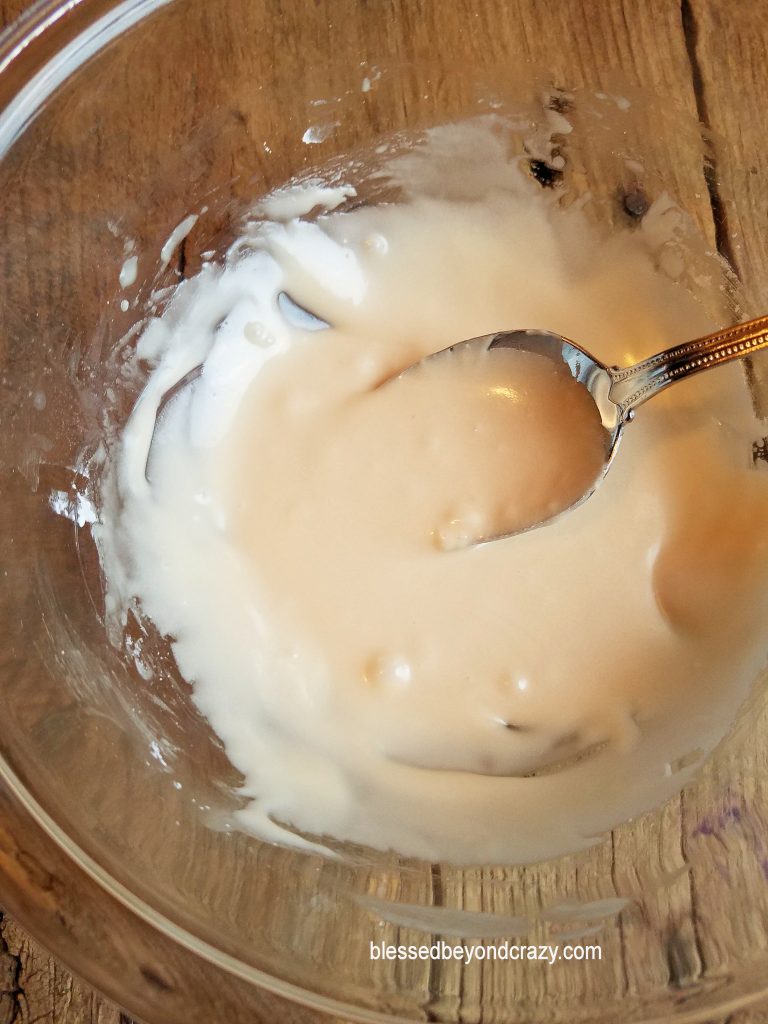
Place all of the ingredients for the glaze into a wide-mouth mixing bowl. Dip each doughnut into the glaze until it is submerged. Run an extra long handled stainless steel spoon or long-handled silicone serving spoon through the center of the doughnut. Hold it up and allow any excess glaze to drain off for a few seconds. (If you’d like, go ahead and dip both sides of the doughnut into the glaze, although I personally only dip one side. To obtain thicker glaze, simply double-dip the doughnuts or drizzle any remaining glaze over the top of each doughnut.)
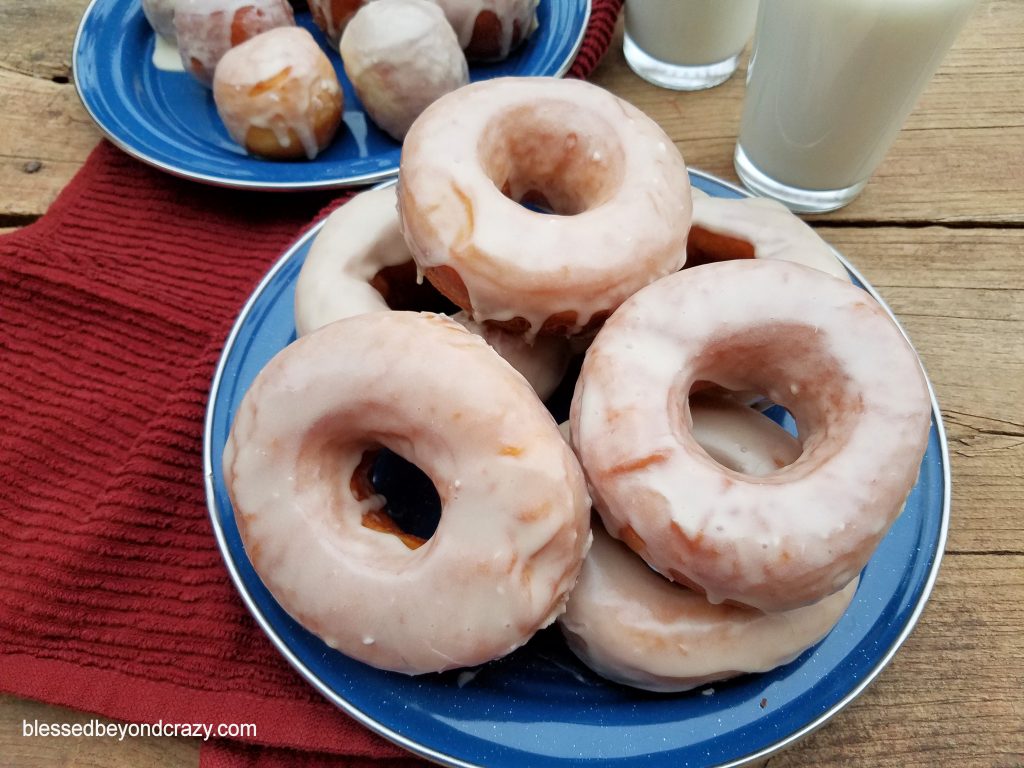
Place the doughnuts on a cooling rack (now is the time to add candy sprinkles, chopped nuts, mini chocolate chips, etc…), until the glaze hardens.
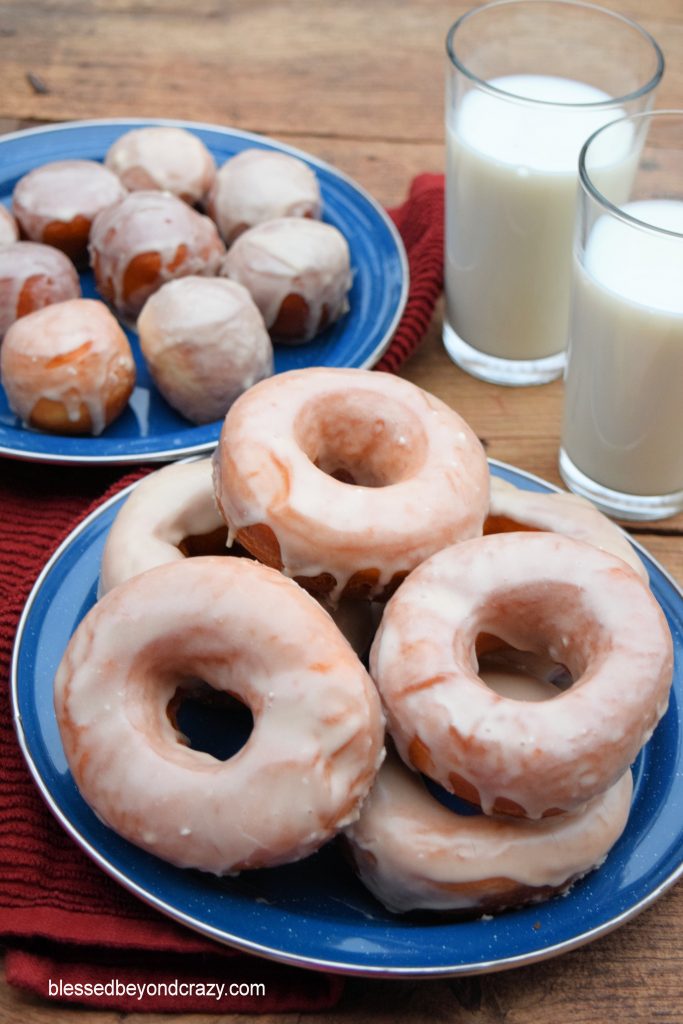
Grandma’s Light-as-a-Feather Doughnuts are always best when served fresh, although they do freeze well up to 2 weeks. When ready to serve, thaw the doughnuts, then warm them in a microwave, toaster oven, or on the grill. Serve with a glass of milk or hot beverage.

Grandma’s Light-as-a-Feather Doughnut Recipe
Grandma's homemade doughnuts that are delicious and truly, light-as-a-feather.
Ingredients
- Doughnuts
- 1/4 cup water
- 1 package yeast (1/4-ounce OR 2 1/4 teaspoons)
- 3/4 cup milk (whole)
- 1/4 cup granulated sugar
- 1 teaspoon salt
- 1/4 cup (1/2 stick) butter
- 1 large egg
- 3 1/4 cups all-purpose flour
- Glaze
- 3 cups powdered sugar
- 1 teaspoon Knox gelatin (To prevent clumping, stir gelatin into the powdered sugar before adding the wet ingredients. The Knox gelatin helps solidify the glaze and resembles the glaze on Krispy Kreme doughnuts.)
- 1/2 teaspoon butter, melted
- 1/2 teaspoon vanilla
- 1/2 cup milk (or enough to make the glaze thin enough to drizzle)
Instructions
- Place water into a glass measuring cup and warm until it reaches the temperature of a baby's bottle. Add yeast and allow it to activate until it doubles in size. (You can add a pinch of sugar to help "kick start" and speed-up the activation process if you'd like.)
- In a medium saucepan heat milk, sugar, salt and butter over low heat just until butter is dissolved. Cool to room temperature.
- Gently stir yeast into cooled milk mixture. Add slightly beaten egg.
- Add flour (one cup at a time); incorporate well.
- Sprinkle a light dusting of flour onto dry, flat work surface. Knead dough until it resembles a soft baby's bottom.
- Place ball of dough into a large, lightly buttered mixing bowl and add a light coating of butter to the top of the dough. Cover with a clean tea towel and set in a sunny warm spot in your home.
- When dough has doubled in size, gently punch it in the center with your fist; roll it onto your floured working surface.
- Using a rolling pin, roll dough out to 1/2" thickness. (You may need to add additional sprinkles of flour to prevent sticking.) Cut doughnut shapes out using a doughnut cutter or two different sized biscuit cutters (3-inch and a 1 1/2-inch).
- Place doughnut on baking sheets lined with silicone baking mats or parchment paper. Cover again with tea towel and place back in sunny warm spot.
- When doughnuts have doubled in size, remove tea towel.
- Fry in oil that has been preheated to 375 degrees F. approximately 45 - 55 seconds per side, or until golden brown. Remove doughnuts from oil and immediately place them onto folded paper towels.
- Repeat the frying process for the doughnut holes but shortening the frying time to approx. 30 - 40 seconds.
- In a separate mixing bowl, combine all glaze ingredients; mix well. Dip each doughnut into the glaze, coating as evenly as possible (dip one, or both sides). Run a long handled spoon through the center of each doughnut, hold it up and allow excess glaze to drip for a couple seconds. Place doughnuts onto cooling rack. (Now is the time to add candy sprinkle, chopped nuts, mini chocolate chips, etc...)
- When the glaze has harden, the doughnuts are ready to serve.
Notes
Doughnuts are best served fresh, however, they also freeze well up to 2 weeks. When ready to serve, thaw and warm in microwave, toaster oven or on the grill.
In the end, I believe that you’ll also love and cherish Grandma’s Light-as-a-Feather Doughnut Recipe as much as we do.
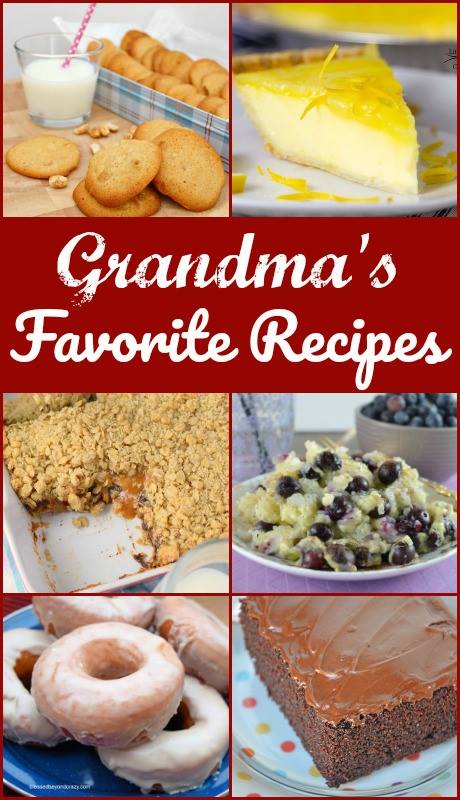
Check out all the delicious recipes from our Grandmas:
- Grandma’s War Time Peanut Drop Cookies from Lovefoodies
- Grandma’s Lemon Custard Pie from Life Currents
- Granny’s Ooey Gooey Oatmeal Bars from Who Needs A Cape?
- Granny Gertrude’s Blueberry Rice Pudding from Hot Eats and Cool Reads
- Grandma’s Chocolate Mayonnaise Cake from Savory Experiments
- Enjoy!
- Linda
Don’t Forget… Pin it!
More great ideas:
Misty says
Hello I am a newbie at donuts I’ve tried one recipe and they aren’t quite fluffy like I am wanting. So I cannot wait to try out your recipe. My question is what is it that makes the donuts fluffy and light.
Blessed Beyond Crazy says
Hi Misty,
Yeast is what makes the doughnuts rise, however, for the best results, please be sure to read the entire blog post because we provide step-by-step directions. Grandma’s Light-as-a-Feather Doughnut Recipe does require time, but it’s definitely worth it. This particular recipe is one my mother passed down through the generations. Yes, it really is that good! Thanks for stopping by and have fun making your very own homemade doughnuts! Linda & Anna
Bambi says
Which oil is best to use for frying? Shortening or vegetable oil? Thank you
Blessed Beyond Crazy says
Hi Bambi,
We like using canola oil the best.
Enjoy!
Linda & Anna
CM says
Hello,
Can you please share what type and brand of yeast you use? (ie. fast acting or regular, etc)
Thank you!!
Blessed Beyond Crazy says
Hi there! I usually use Fleischmann’s yeast. Either the fast-acting or regular should work just fine in this recipe. Take care,
Linda
Andromeda LeTourneau says
Silly question: do we dip finished donuts while they’re warm or after they’ve cooled down completely?
Blessed Beyond Crazy says
Hi! You can dip the doughnuts into the icing while they are still slightly warm or after they have cooled to room temp. However, personally, I like to dip them into the icing while they are just a tad bit warm. Take care,
Linda
Margaret says
Hello! I made these in hopes that they would become less dense than a previous recipe. Over all, I enjoyed these doughnuts more! But I had a few questions….my dough didn’t rose as much as yours..when I put the yeast into the water it did rise but not as much as your picture. Mine wasn’t bubbly. My dough did rise very nicely though! When I cut out my doughnuts I rolled the scrap dough up and made more. My scrap doughnuts rose more on height than The first roll out – is it possible I rolled them too thin the first time?
Biting into these they have a great flavor and I love the icing! I added some coco powder to half the icing – YUM! But the doughnuts are still a bit dense. Flavor and texture are amazing.
So what steps should I look out for or what other tips do you have to have these doughnuts rise heigh and become less dense??
Thank you!
Blessed Beyond Crazy says
Hi Margaret,
Hey, thanks so much for trying this recipe and I’m happy to hear that you liked the flavor and texture. The addition of cocoa powder sounds really good! Thanks for the tip! To answer your questions: First, make sure that your yeast is fresh (check the expiration date on the package/bottle). Yeast does expire at some point and it loses it’s rising ability as it ages. Secondly, humidity, altitude, and temperature do factor in. If it’s an extremely humid day, your dough may not rise as well, or if your water is too hot it can hinder or kill the yeast. Your water should be at the same temperature as a baby’s bottle. Also, yeast feeds on sugar so I always add about 1 teaspoon of sugar to the warm water (right after I add the yeast) and that makes the yeast rise and bubble more. (As I add the sugar, I gently stir it into the warm yeast/water mixture. You don’t want to bother the yeast as it rises so stir the sugar in right away.) I always cover my dough with a thin cotton dish towel and place it in a nice warm place (e.g.; in a sunny window). This helps the dough rise faster and higher. Yes, it is possible that you rolled the dough out a little too thin. As far as being too dense, I wonder if you used a tad bit too much flour to dust the surface when you rolled out the dough? That would explain why the doughnuts turned out a little too dense and it may be part of the yeast rising issue. Next time, try using a very light sprinkle of flour to dust your rolling surface and don’t over-work the dough. I hope this helps and please let me know if you have any other questions. Enjoy! Linda
Margaret says
Thank you for your tips! I will definitely try it again and keep all of that in mind!!!
Nurul says
Hi…. Your doughnut looks yummy….i will try them today…..can i use high protein flour instead all purpose flour?
Blessed Beyond Crazy says
Hi Nurul,
Honestly, I don’t know. You can certainly try it and see how they turn out. Good luck! Linda
duha says
i love this recipe!! i wanted to ask if it can be doubled? and if we can freeze the dough and fry donuts later?
Blessed Beyond Crazy says
Hi Duha,
Yay! We are so glad you like this recipe!!! You certainly can try doubling the recipe, however, the rising process will probably take longer if you place the entire batch in one bowl. I would suggest dividing the dough into two separate bowls and go from there. I just asked my mom if she ever tried freezing the dough and frying the doughnuts later and she said that she has never done that. However, she and I both think it should work. It’s definitely worth trying. Of course, you’ll have to let the doughnuts thaw and rise before frying them. Thanks for stopping by and for trying this recipe. Please let us know how things turn out. Take care! Linda
duha says
so i’ve just doubled the recipe and waiting to see how it turns out ???? i used salted butter though, and in doubling i didn’t double the amount of salt. is that okay?
Angie says
I have been searching for the perfect doughnut recipe and then I found your grandma’s. Your recipe makes a doughnut that is soft, fluffy and delicious. I have made them twice in two days. They are so easy and come together quickly. I used your glaze recipe for half and then added cocoa powder to the glaze that was left for the remaining doughnuts. Thank you and I am looking forward to trying some of your other recipes.
Blessed Beyond Crazy says
Hi Angie,
We are so happy that you are enjoying this doughnut recipe! That makes us very happy! 🙂 We love your idea of adding cocoa powder to glaze some of the doughnuts. That sounds amazing! Thanks so much for stopping by and leaving us such a nice message and we hope you enjoy our other recipes too. Linda & Anna
Kerani Kent says
Hi I’m trying to make your recipe. However it calls for 1/4 cup 4 tbsp of butter. But then says 1/2 a stick..which is 8 tbsp..which is it?
Blessed Beyond Crazy says
Hi Kerani,
Hey, thanks so much for stopping by!!! The recipe is correct because half of a stick of butter equals 4 tablespoons, not 8 tablespoons. 1/4 cup equals 4 tablespoons. Here’s an easy conversion calculator that you can use if you’d like > https://www.calculateme.com/butter/sticks-of-butter/to-tablespoons/
Please let me know if you have any other questions and I hope that you enjoy this recipe. 🙂
Linda
Time says
How long does the dough need to be kneaded until it resembles a soft baby’s bottom? Also approximately how long does the dough take to double in size, and the donuts as well once they are cut out?
Blessed Beyond Crazy says
Hello,
The kneading time usually takes me somewhere around 5 minutes. Depending on the environmental surroundings (such as temperature, humidity, etc…) the dough usually takes around 1 hour to rise. This applies to all rising times, including after the doughnuts are cut out. Enjoy! Linda
Christen Murphy says
This did not work for me at all. I am guessing my yeast did not activate. 🙁
Blessed Beyond Crazy says
Hi Christen,
Oh gosh, I’m so sorry to hear that. It is possible for yeast to grow old in the package/bottle and not activate correctly. I’ve had that happen to me before. I’ve also gotten my water too hot and it killed/hindered the yeast. Humidity can also affect how yeast rises. I hope you try the recipe again sometime though. Take care and stay safe! Linda 🙂
Asil Ahmed says
I was fearing that the recipe might turn out to be bad or incorrect but after making the donuts I’m speechless. Totally amazing ????
Blessed Beyond Crazy says
Hi Asil,
Thank you for trying Grandma’s Light-as-a-Feather Doughnut Recipe! We are so happy that you enjoyed them! Thanks for stopping by and leaving us a nice message. Have a wonderful day! Linda
Sabrina says
Do you use active dry yeast or instant yeast?
I was using instant and donuts came out great but switched to active and now donuts are still light and tender but flat on one side and not as fluffy???
Blessed Beyond Crazy says
Hi Sabrina,
You should be able to use active dry, instant, or even rapid rise yeast. Each reacts a little differently time-wise so you’ll need to watch your dough as it rises to make sure it doesn’t overprocess. I usually use instant when I make these doughnuts. I hope that helps. Thanks for stopping by! Linda
Blessed Beyond Crazy says
Hi Tadej,
That would be wonderful! I think your mother in law will enjoy this recipe and thank you for sharing it with her!
Enjoy!
Linda
Blessed Beyond Crazy says
Hi Lori,
Yep, this recipe really is a keeper!
Thanks for stopping by!
Linda
Lovefoodies says
These look fabulous and I know I could eat at least 10 in one go!
Blessed Beyond Crazy says
Us too! We love this recipe! 🙂
Thanks for stopping by!
Linda
debi at Life Currents says
Like Krispy Kreme donuts without having to go out! These look amazing! My family will love them! Thanks for sharing the recipe.
Blessed Beyond Crazy says
Hi Debi,
Thanks for stopping by and I do believe that your family will love these yummy homemade doughnuts.
Enjoy!
Linda
Jessica says
I can’t wait to try these. They look so light, fluffy and tasty!
Blessed Beyond Crazy says
Hi Jessica,
Yes, these doughnuts really are light, fluffy and delicious.
Thanks for stopping by!
Enjoy!
Linda