
A Kitchen Remodel is a huge project that can transform your whole home!
When we bought our house last year we did a complete renovation, including a kitchen remodel. Please enjoy the pictures and our kitchen transformation.
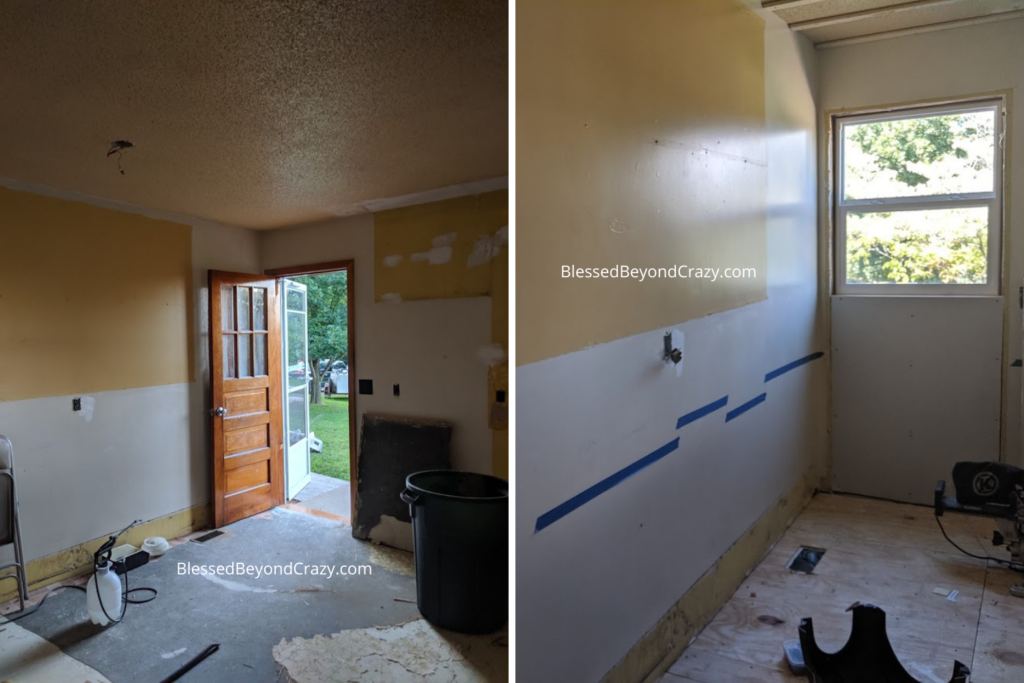
Before the Kitchen Remodel
To help support our blogging activities, our site contains affiliate links. If you make a purchase from a link on our site, we may receive a small percentage of that sale, at no extra cost to you. Blessed Beyond Crazy is a participant in the Amazon Services LLC Associates Program, an affiliate advertising program designed to provide a means for sites to earn advertising fees by advertising and linking to amazon.com. As an Amazon Associate, I earn from qualifying purchases.

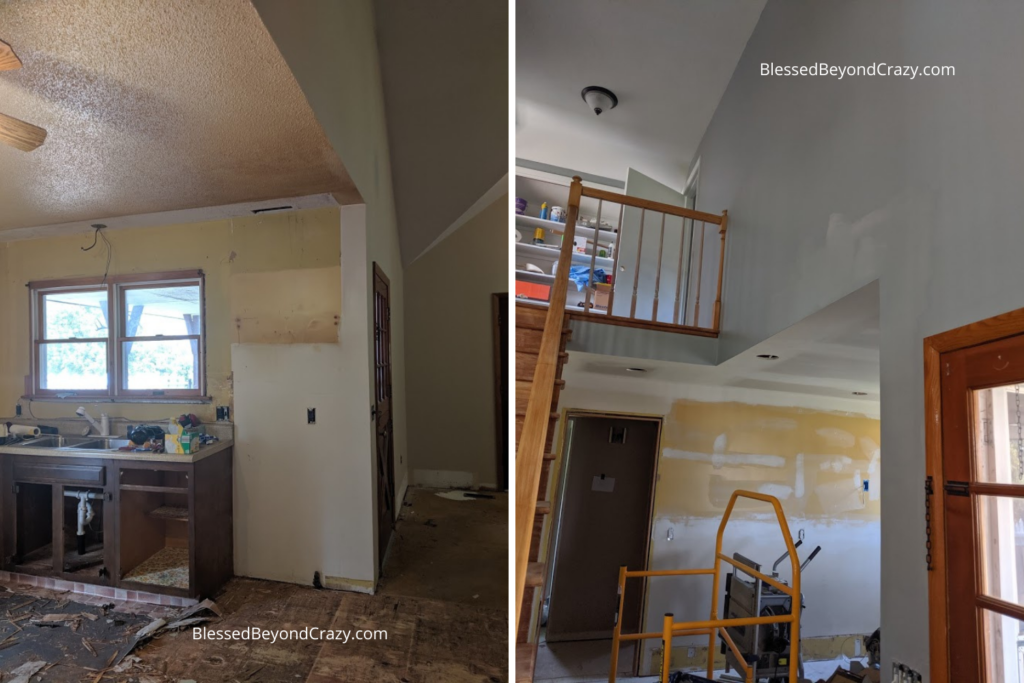
We completely rearranged the layout of the kitchen. For reference, when comparing before and after pictures look at the sink. The placement of the sink and the double windows are the only things that stayed in the same location.
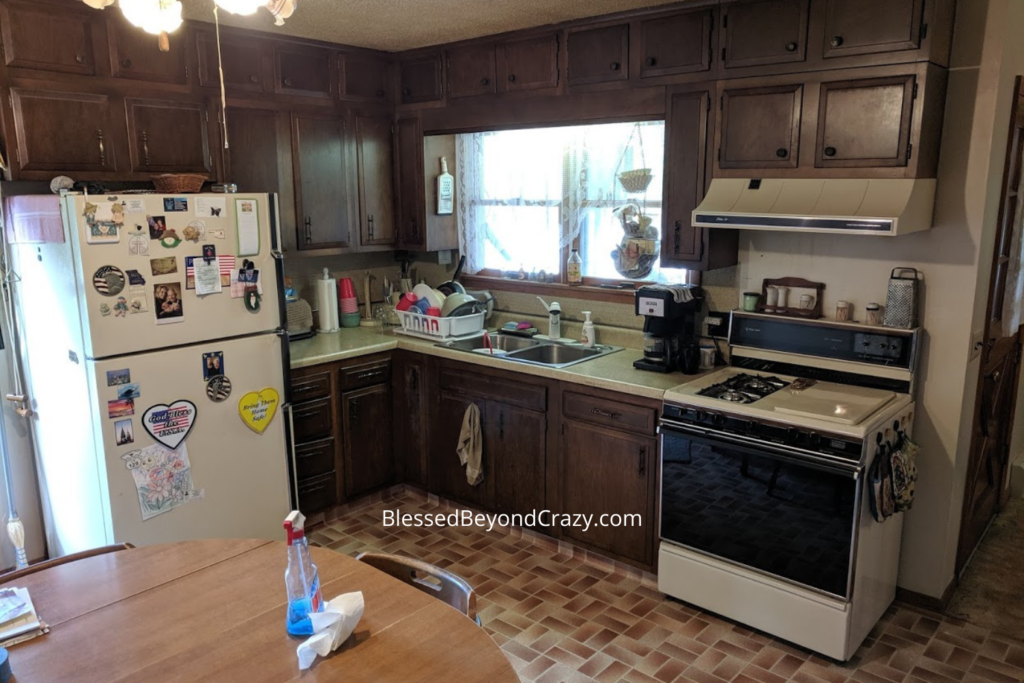
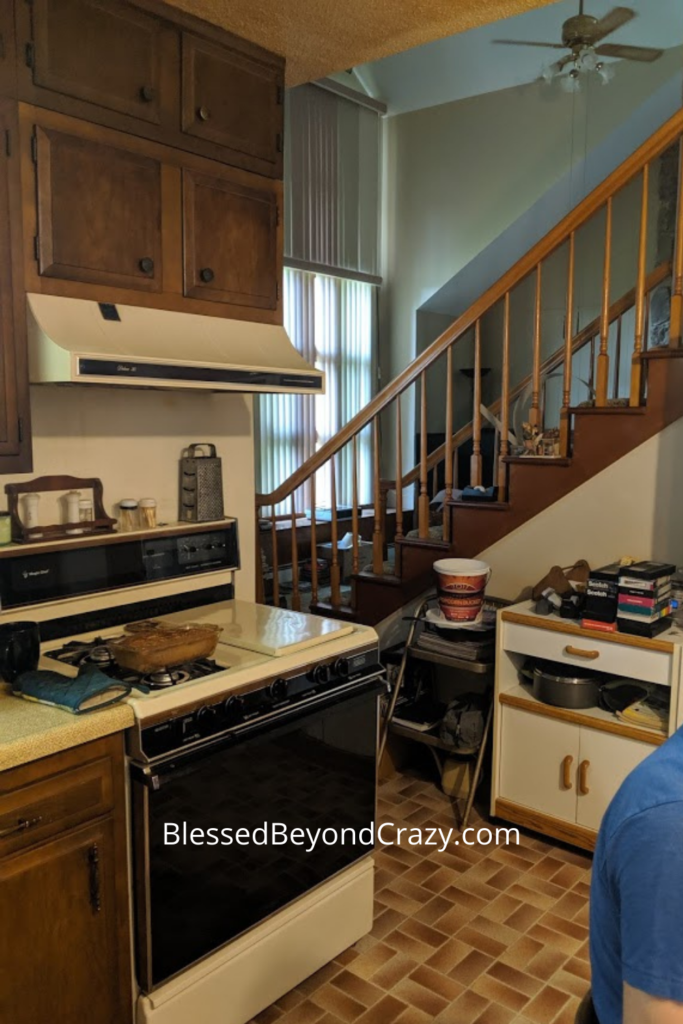
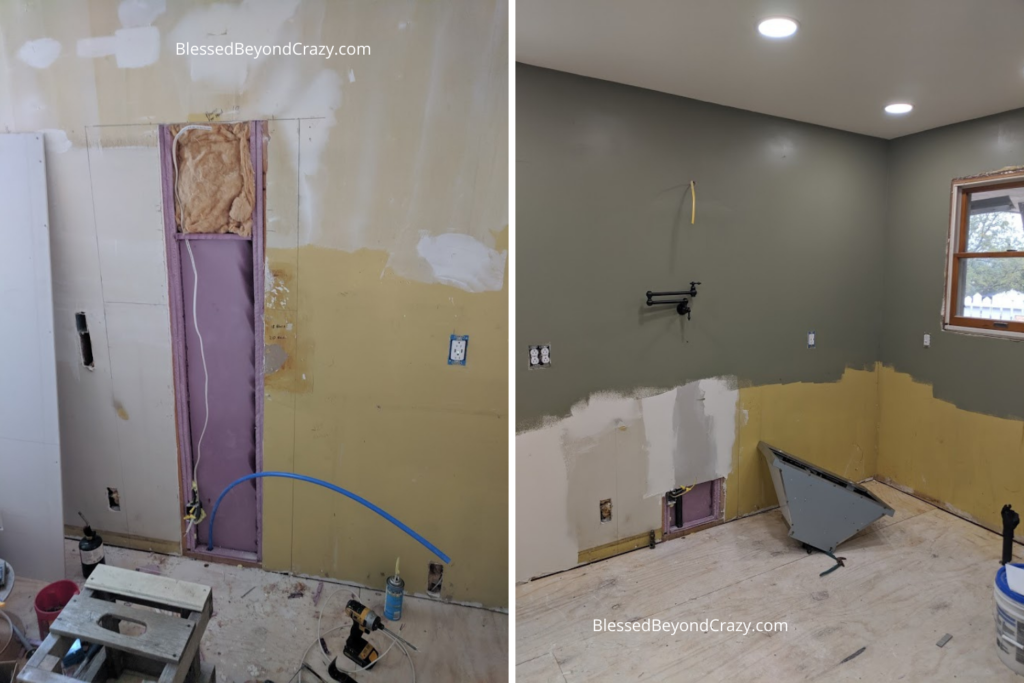
During the Kitchen Remodel
We ran into a few issues, as is common during a remodel.
The first issue was the sub-flooring. It was not the same thickness as the sub-flooring throughout the rest of the house. Since we wanted to replace all the carpet and linoleum with a continuing run of laminate wood flooring we needed the sub-flooring to be level everywhere. That meant we had to replace the sub-flooring in the kitchen, which was not planned.
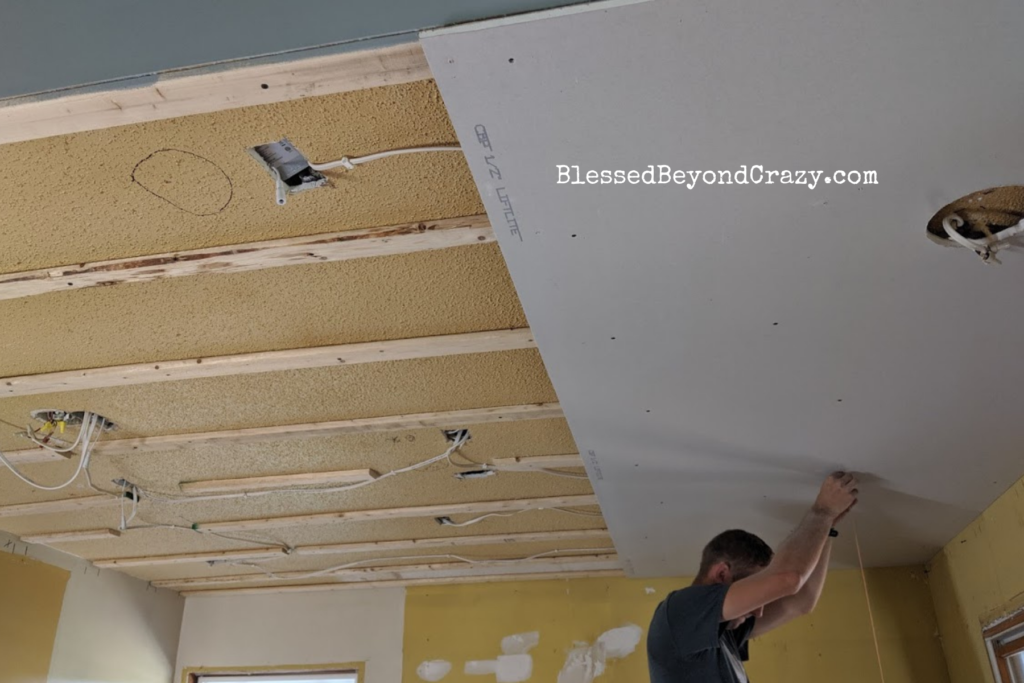
The second issue was the ceiling. There was a popcorn ceiling in the kitchen, and it had been painted yellow. We had successfully scraped the popcorn ceilings everywhere else in the house. Since the kitchen ceiling had been painted yellow, we couldn’t just scrape it off as we did in the other rooms. Ultimately, we ended up putting new drywall over the existing ceiling. This also helped us with the wiring for the new can lights. We put these 6-Inch Slim LED Recessed Lights everywhere: the kitchen, bathroom, living room, garage, porch. We absolutely love them!
Not a concern, but we decided to give ourselves extra cabinets and countertop room by removing the exterior door (originally next to the fridge in the before pictures) and replacing it with a window. This one change alone almost doubled the usable kitchen space!
Another problem was adding a pot filler. I always wanted a pot filler, and we found an inexpensive one on Amazon, so we went for it! Since the stove was going to be on an exterior wall, we were concerned about pipes freezing. We added this purple installation board and left a chunk of drywall missing behind the stove, so the pipe would stay warm. The stove is covering this, so it remains hidden. We have gone through two winters without any issues of pipes freezing.
Kitchen Remodel After Pictures
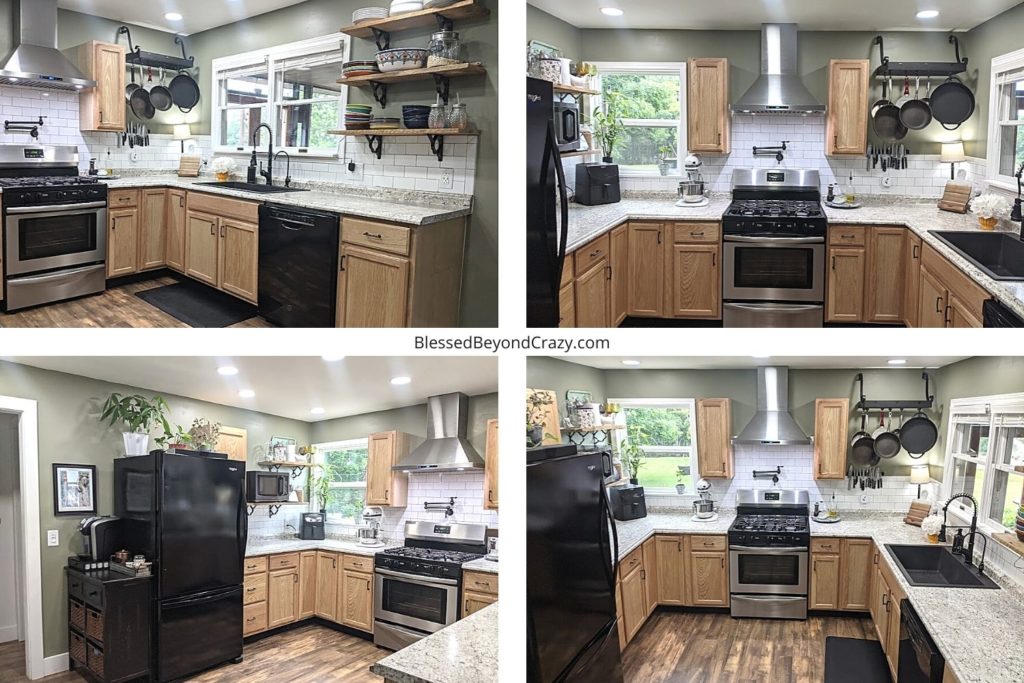
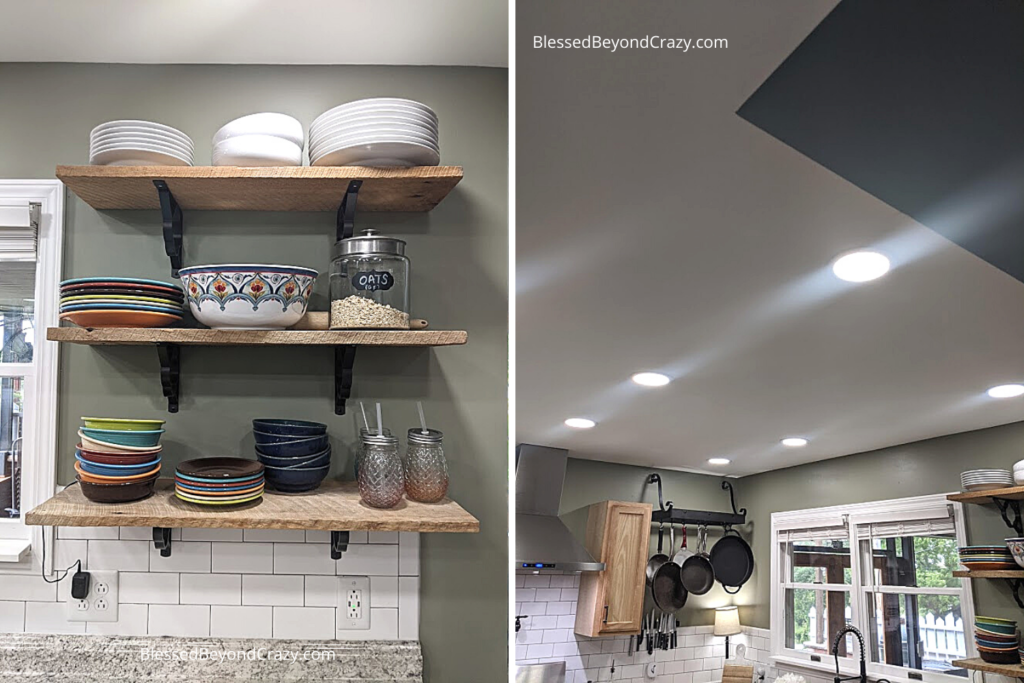
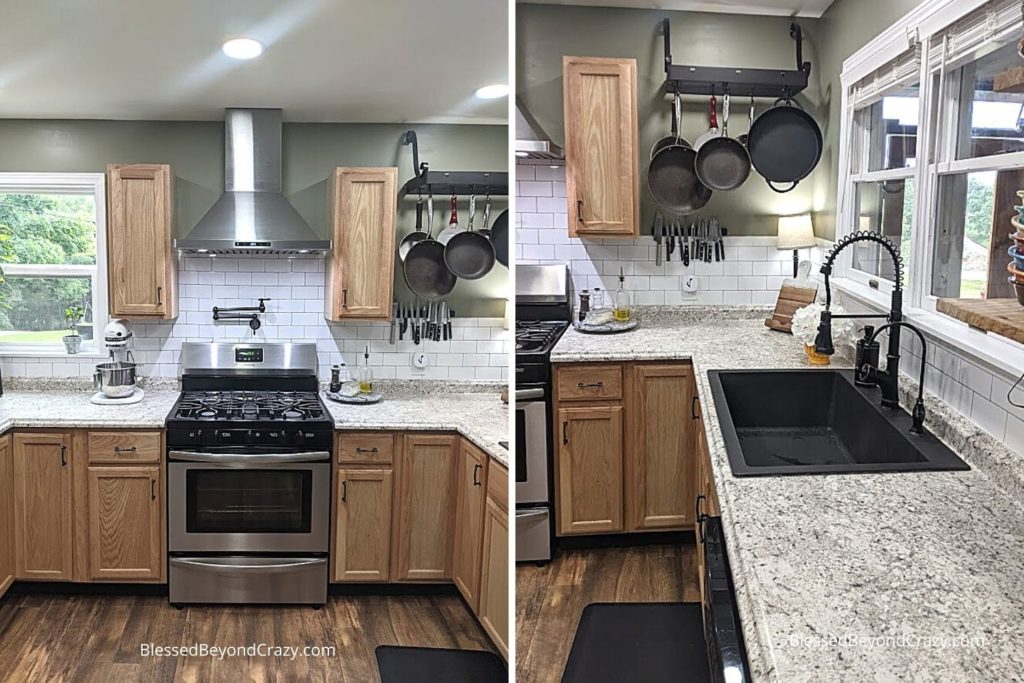
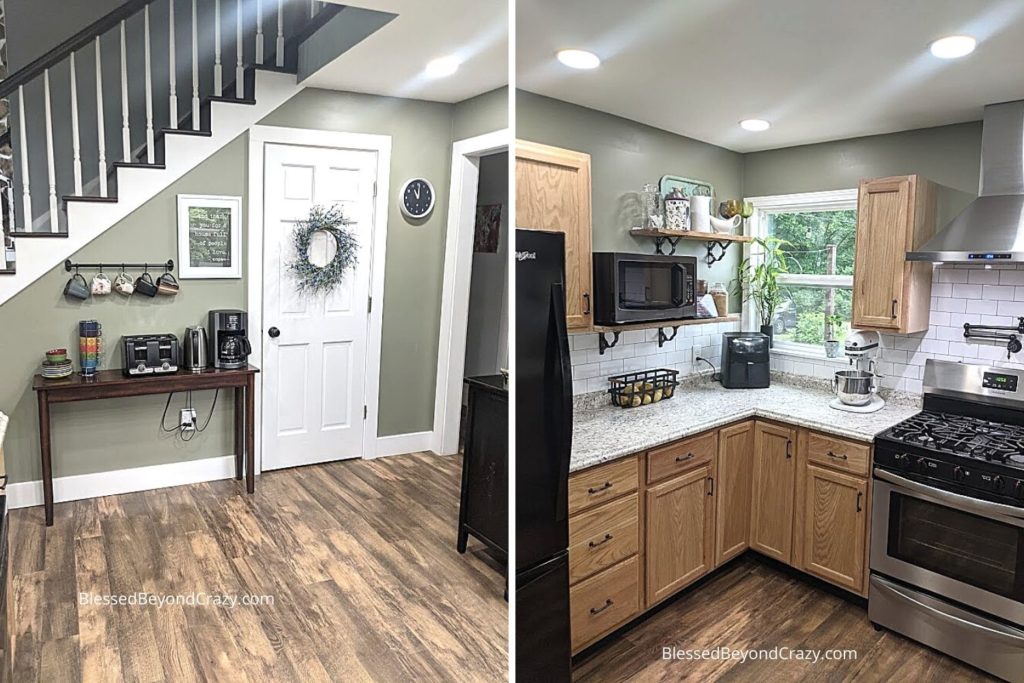
I am very happy and pleased with how our kitchen remodel turned out!
- The paint color is Earth Green by Sherwin Williams.
- Cabinets, fridge, stove, dishwasher, sink, hardware, flooring, backsplash tile, and countertops were all purchased from Lowe’s.
- Our cabinets were inexpensive, so to upgrade them we added soft close hinges.
- The pot and pan hanger was made by my dad (it’s amazing, right!).
- The open shelves are oak boards from an old barn.
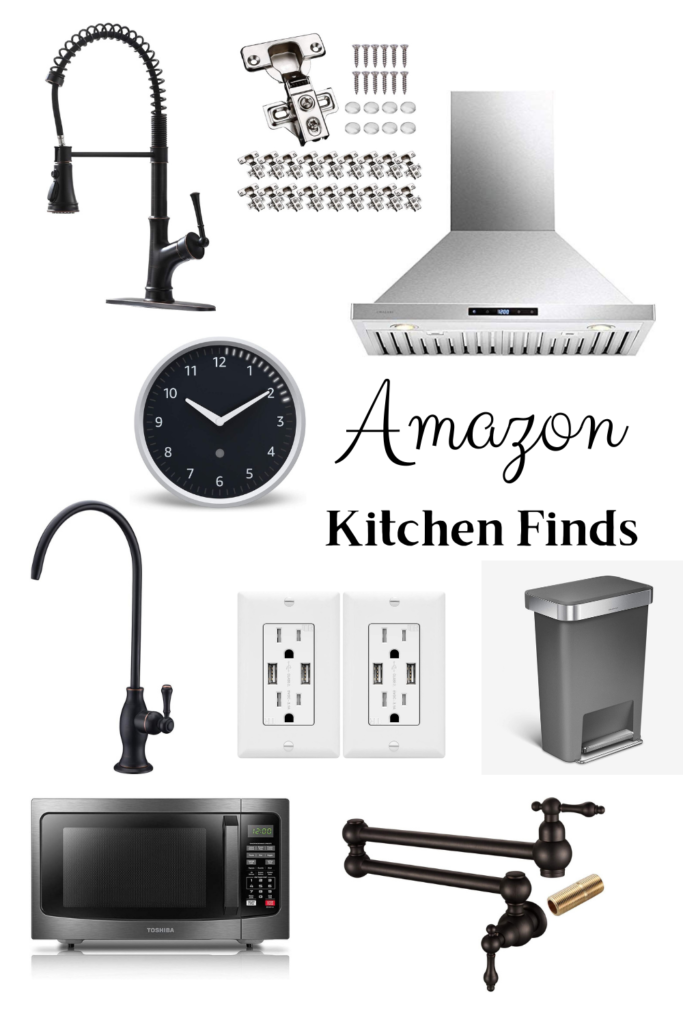
High Arc Kitchen Sink Faucet | Soft Close Cabinet Door Hinges| Range Hood | Echo Wall Clock | Drinking Water Purifier Faucet | USB Wall Outlet | 45 Liter Kitchen Trash Can | Microwave Oven with Smart Sensor |Pot Filler Faucet Wall Mount

Air Fryer Max | KitchenAid Professional Series | Mr. Coffee 12 Cup Programmable Coffee Maker | Magnetic Knife Bar | Coffee Mug Rack | Recipe Stand | White Marble Lazy Susan | 4-Slice Compact Toaster | Electric Water Kettle | Keurig Coffee Maker




Leave a Reply